
Instructions: How to Build an AR-15 Upper Assembly
Posted by Gun Builders Depot on Apr 6th 2020
This guide illustrates the tools required, torque specs, and the steps involved for properly installing your AR-15's new barrel. We're using a traditional 0.750" low-profile gas block for this install, though the install steps are generally the same if you're using an A2-style FSB. You'll need about 30 minutes to one hour to get this job done with certain required tools. Let's take a look at the tools first.
AR-15 Barrel Install
Tools Required
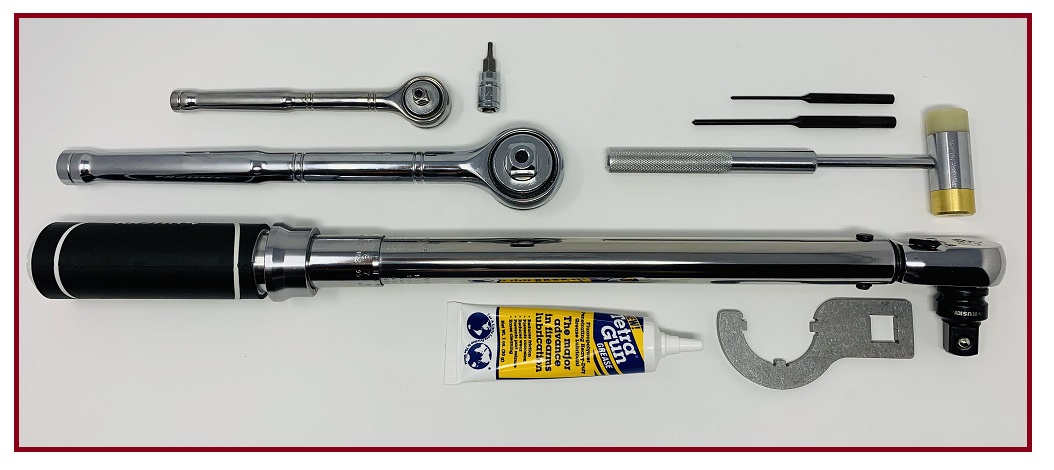
Torque Wrench & Barrel Nut Wrench. The barrel nut wrench is specially designed to clamp down onto the grooves in your barrel nut. A square cut-out is provided for attaching it to a torque wrench. You'll need both to properly tighten the barrel nut to torque. The military's "official" torque specs for the barrel are 30 to 80 ft-lbs. Your barrel will likely provide torque specs. If not, stick to 40 to 50 ft-lbs. This is recommended by most manufacturers.
Grease. Grease is required for properly torquing the barrel nut. You'll be loosening and re-tightening the barrel nut three times to achieve a proper install. Grease is required to prevent the threads on the nut and receiver from stripping or galling. Use a nonmetallic grease for this, like Tetra Gun Grease.
Ratchet or Breaker Bar. You should never loosen a torqued nut with a torque wrench, as this can throw off the wrench's calibration. Grab a ratchet wrench or breaker bar to loosen the barrel nut.
Roll Pin Punches. You'll need a 3/32" punch for the roll that secures the gas tube to the gas block. You'll also need a larger 5/32" punch for the roll pin that secures the gas block to the barrel.
Gunsmith Hammer. Highly recommended for the roll pin punches.
Allen Keys. Most gas blocks come with Allen-head bolts that help keep the block in place while you install the roll pins. You'll need a set of Allen keys to remove and tighten these bolts during the install.
Vise. Required to securing your upper receiver while you torque the barrel nut.
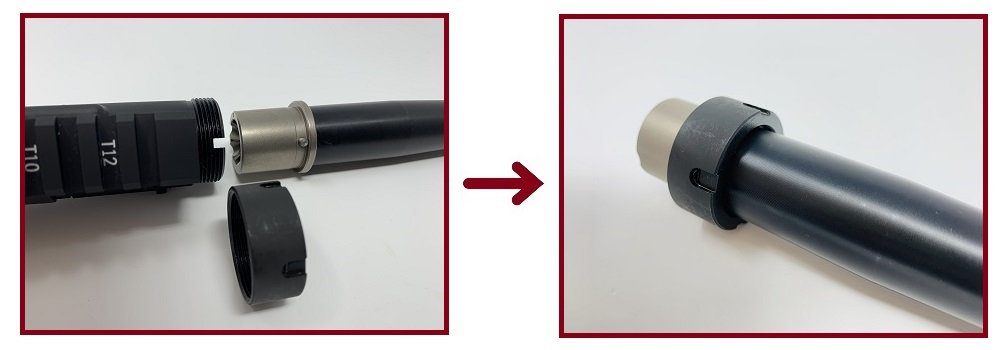
Receiver Vice Block Clamp (or Reaction Rod). A vice block clamp secures around the upper receiver, allowing you to safely clamp it into your vise without damaging the receiver itself. Alternatively, a reaction rod slides inside the receiver and secures to the star chamber in the barrel extension. The other end of the rod is flat, allowing you to clamp it to your vise. Either solution works. We don't recommend clamping your receiver directly inside the vise, as this can scratch and deform the aluminum.
Step 1: Orient & Place Barrel Nut on Barrel
Orient the barrel nut so the grooved side is facing the muzzle, and slide it onto the barrel. If your gas block came bolted to the barrel, you will need to remove it with an Allen key before sliding the nut onto the barrel.
IMPORTANT: Your handguard may require you to insert a bolt plate or other hardware in between the barrel nut and receiver. Check the instructions for your handguard to verify whether this is necessary. In the following steps you'll notice our six-bolt attachment plate is installed between our nut and receiver for our handguard.
Step 2: Lubricate & Test-Fit Barrel Extension
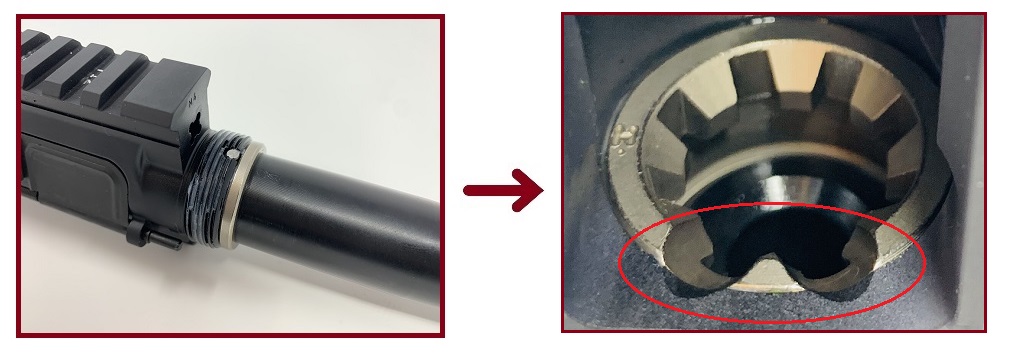
Lubricate the inside of the receiver and the exterior of the barrel extension. Slide the barrel extension into the receiver and ensure it's fully seated. Verify the alignment pin on the extension properly lines up with the cut-out on the receiver's threads. Look inside the receiver and verify the feed ramps on the extension align with the ramps on the receiver itself.
Step 3: Tighten and Torque Barrel Nut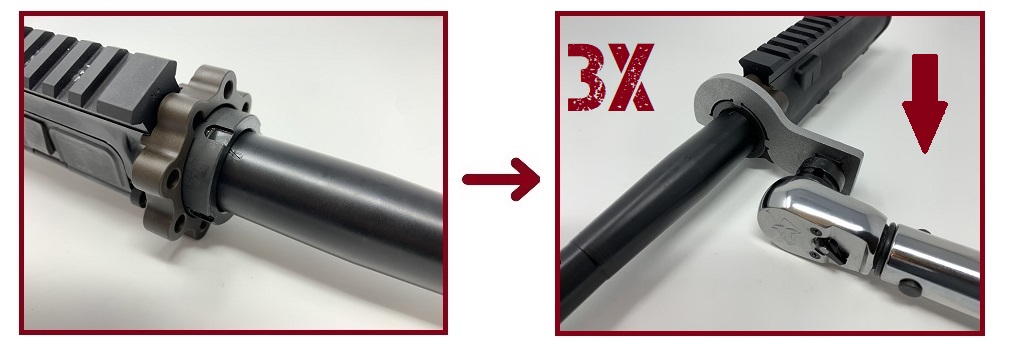
If required, first ensure your handguard's installation plate or hardware is properly aligned so the gas tube can fit into the upper receiver later. Ensure plenty of grease is applied to the threads before tightening. When tightening the nut, pull the barrel nut wrench down from the left side of the receiver. This pulls the teeth on the wrench into the grooves on the nut. Tightening from the right side of the receiver can bend the nut wrench outward, ruining it.
Torque to 40 to 50 ft-lbs. unless otherwise specified by your barrel's manufacturer. Then loosen the nut with your breaker bar or ratchet wrench. Loosen by flipping the barrel nut wrench upside down and pulling up from the left side of the receiver. This again pulls the teeth on the wrench into the nut's grooves, preventing the wrench from bending outward.
Repeat this process until you've tightened and torqued the barrel nut a third and final time.
Step 4: Insert Gas Tube & Gas Block Onto Barrel
Insert the end of the gas tube with the roll pin hole into the top of the gas block. Then slide the gas tube and gas block onto the barrel. The tube should fit through the hole on your handguard's mounting hardware (if applicable) and into the upper receiver.
Step 5: Align Gas Block Roll Pin Hole, Bolt Block to Barrel
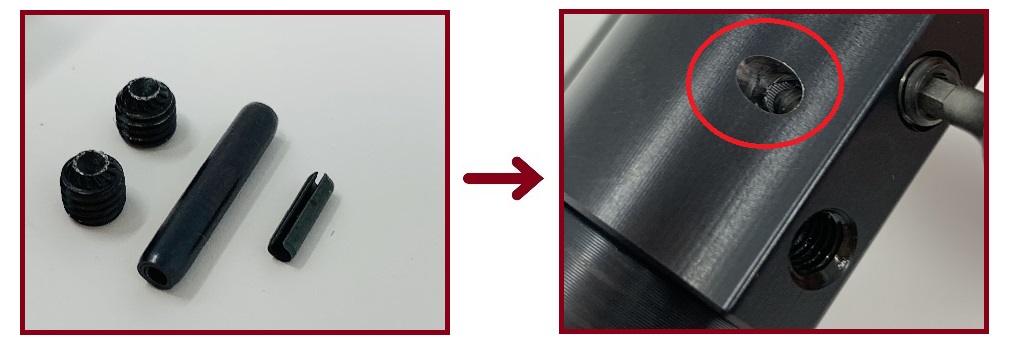
The gas block roll pin hole should align with the notch at the bottom of the barrel. Verify the notch and hole are aligned, and bolt the gas block to the barrel using the provided set screws and Allen key.
Step 6: Install Gas Block Roll Pin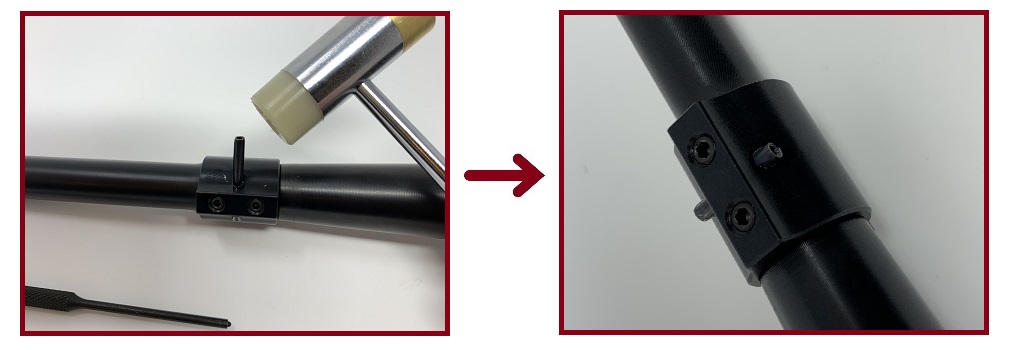
The gas block roll pin can now be installed. Use the 5/32" punch and gunsmith hammer to assist you. If possible, rotate the receiver assembly 90 degrees in your vise so the pin hole is facing up. The pin is a very tight fit, so it helps to get the pin partially seated by tapping directly atop it with the polymer/rubber side of your hammer. It can then be seated fully with the punch. Most roll pins are longer than the pin hole, so the pin should protrude from each side of the gas block equally.
Step 7: Align Gas Tube and Install Gas Tube Roll Pin
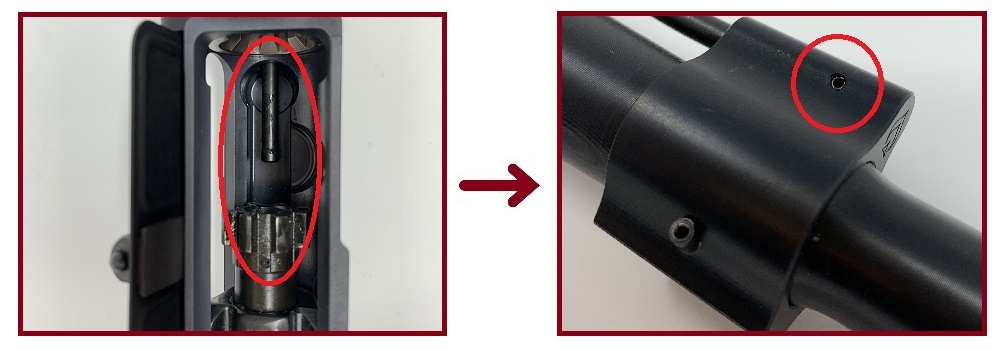
The gas tube's alignment can be verified by simply installing your bolt carrier group and charging handle into the upper receiver. Verify the gas key aligns and fully seats to the gas tube by placing the bolt into battery. Then install the gas tube roll pin using the 3/32" punch and gunsmith hammer. Again, it helps to rotate the assembly so the hole is facing upward and it may be easier to get the pin started by tapping on it with the hammer. The pin should be flushed on both sides of the gas block once fully seated.
Your Install is Complete
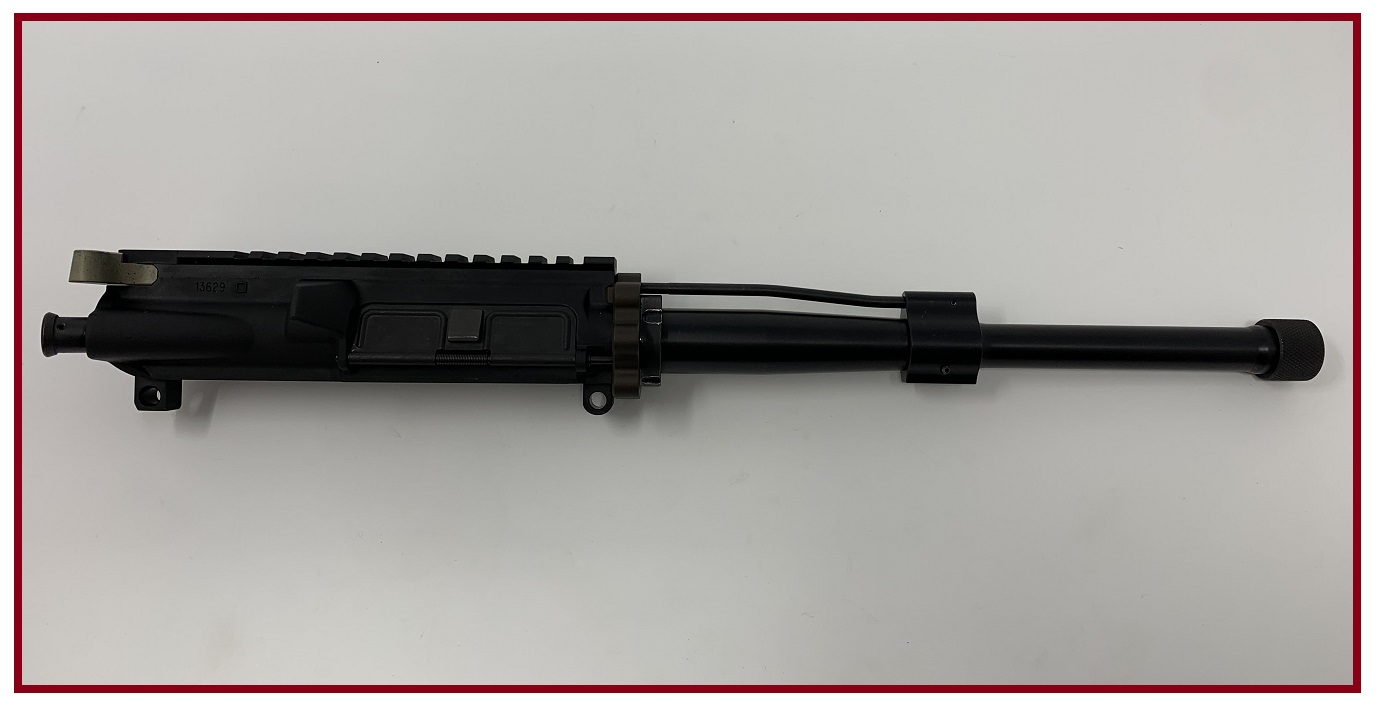
With your gas system aligned and pinned, your AR-15 barrel install is complete! You can now install your handguard and then slap that upper onto your finished 80% lower or retail receiver assembly. Be sure to follow the instructions for torquing your handguard's fasteners and hardware, to ensure you do not damage the barrel nut or upper receiver.
DISCLAIMER: If you are new to the world of DIY gun building, you likely have a lot of questions and rightfully so. It’s an area that has a lot of questions that, without the correct answers, could have some serious implications. At GunBuilders.com, we are by no means providing this content on our website to serve as legal advice or legal counsel. We encourage each and every builder to perform their own research around their respective State laws as well as educating themselves on the Federal laws. When performing your own research, please be sure that you are getting your information from a reliable source.