")
How to Build an AR-15 Upper (The Original Picture Guide)
Posted by GunBuilders.com on Oct 29th 2024
If you've found this guide, you already know what you need -- and we've got you covered: Follow these detailed instructions to put together your AR-15 upper receiver assembly from scratch!
These instructions are for all AR-type uppers.
You can follow these instructions to build a standard AR-15 upper chambered in any caliber. These instructions are also applicable for AR-10 and AR9 uppers. If you're assembling an AR9 (9mm) upper, ignore the steps for installing the gas system -- you won't have one! Torque specifications are the same for AR-15, AR-10, and AR9 barrel nuts.
Parts Required
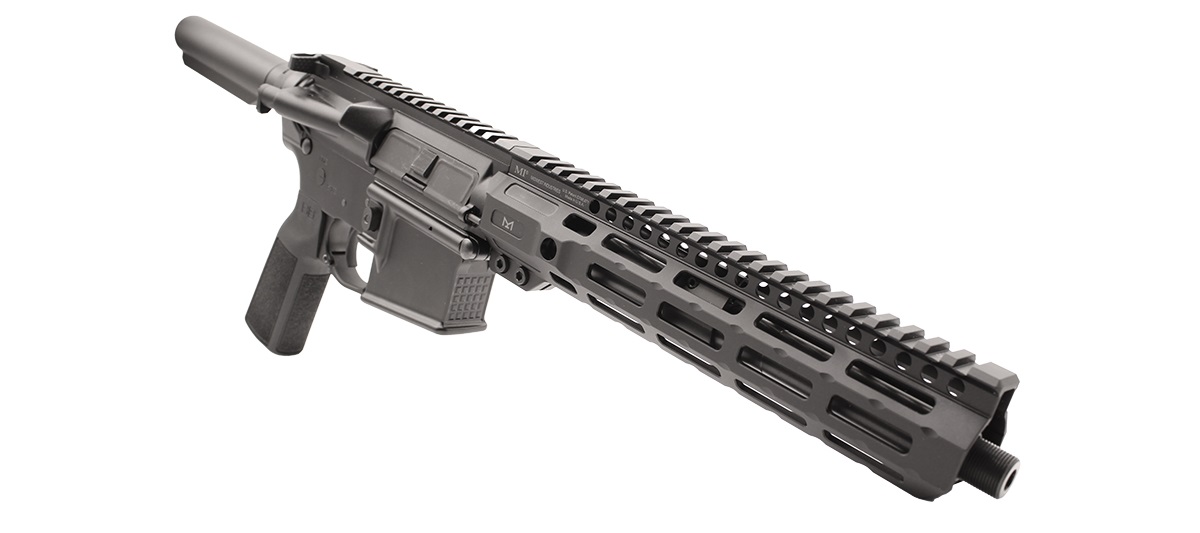
Below are the parts you'll need to build a complete, functional AR-15 upper that's ready to install on a lower assembly (to build your lower assembly, follow these instructions).
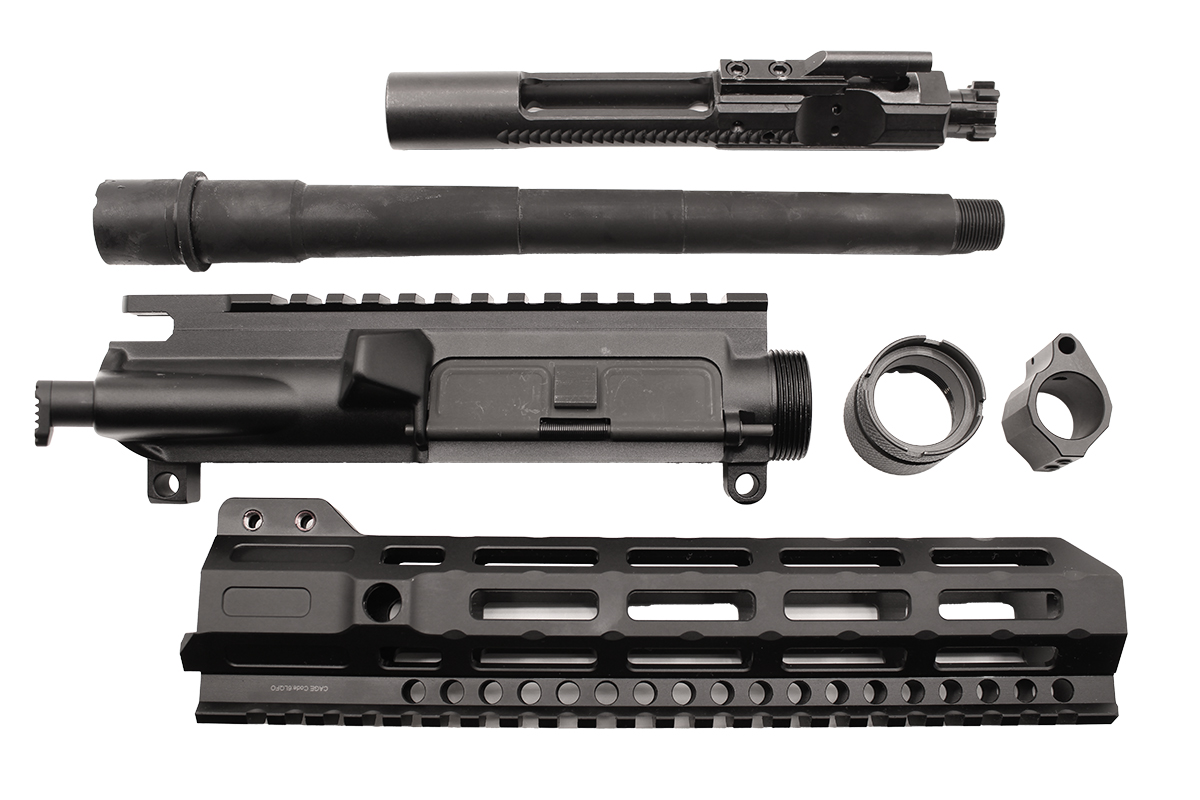
- Stripped Upper: We're using a standard, M4-type stripped upper receiver (available here).
- Handguard: Most handguards are free-float and feature M-LOK attachment slots, like ours above.
- Barrel Nut: Your handguard will provide the barrel nut; most barrels don't come with one.
- Gas Block: We're using a low-profile gas block, so it tucks neatly inside our handguard.
- Gas Tube: Not pictured; use the right tube length for your barrel's gas system! Ours is pistol-length.
- Barrel: We're installing a 300 Blackout barrel in this guide; the steps are the same for all barrels!
- Bolt Carrier Group: BCGs come pre-assembled; you just need to install it at the end.
- Charging Handle: Not pictured; all charging handles function the same way.
- Forward Assist: Some stripped uppers' forward assists may or may not come preinstalled.
- Dust Cover: This may or may not also come preinstalled. Some uppers don't have one!
Tools Required
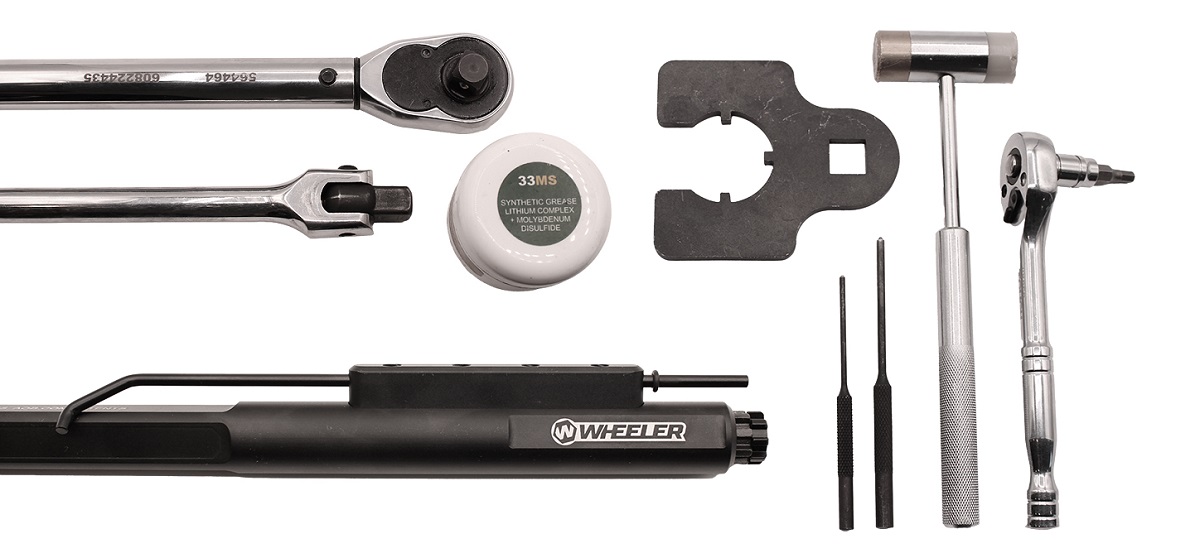
Before starting, grab the tools below. Most are required! Some are recommended to make the job easier.
Required Tools
- Allen Key(s): Required for securing most handguards' bolts.
- Torque Wrench: Required for properly tightening the barrel nut.
- Breaker bar: For temporarily breaking the barrel nut loose before re-tightening.
- Vise Block: Required for securing the stripped upper receiver in your vise.
- Barrel Nut Adapter: Required for gripping the barrel nut with your torque wrench.
- Roll pin punches: Required for installing the forward assist. Available here!
- Roll pin hammer: For tapping punches to secure the forward assist roll pin. Available here!
- Tabletop Vise: For securing your vise block (or reaction rod) and receiver. Available here!
The Wheeler AR Armorers' Essentials Kit includes a torque wrench, upper receiver vise block, and various Allen-head sockets for securing your handguard.
Recommended Tools
- Grease: Recommended for the barrel nut threads, to make any future removal easier.
- Ratchet Wrench: Recommended for installing the handguard's bolts with greater ease.
- Allen-Head Socket: Appropriately sized for use with ratchet wrench to install handguard bolts.
- Reaction Rod: We're using one instead of a vise block. This tool doubles as a gas tube alignment tool.
- Pliers: Useful for holding roll pins and securing the dust cover's "C" clip onto its rod.
How to Assemble The AR-15 Upper
Skip the first step if your assist and dust cover are already installed, or if your receiver doesn't have these parts.
#1: Install Forward Assist & Dust Cover
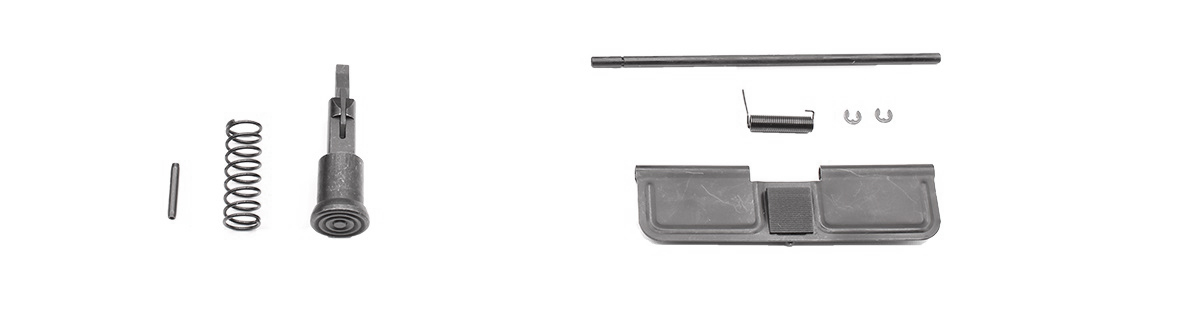
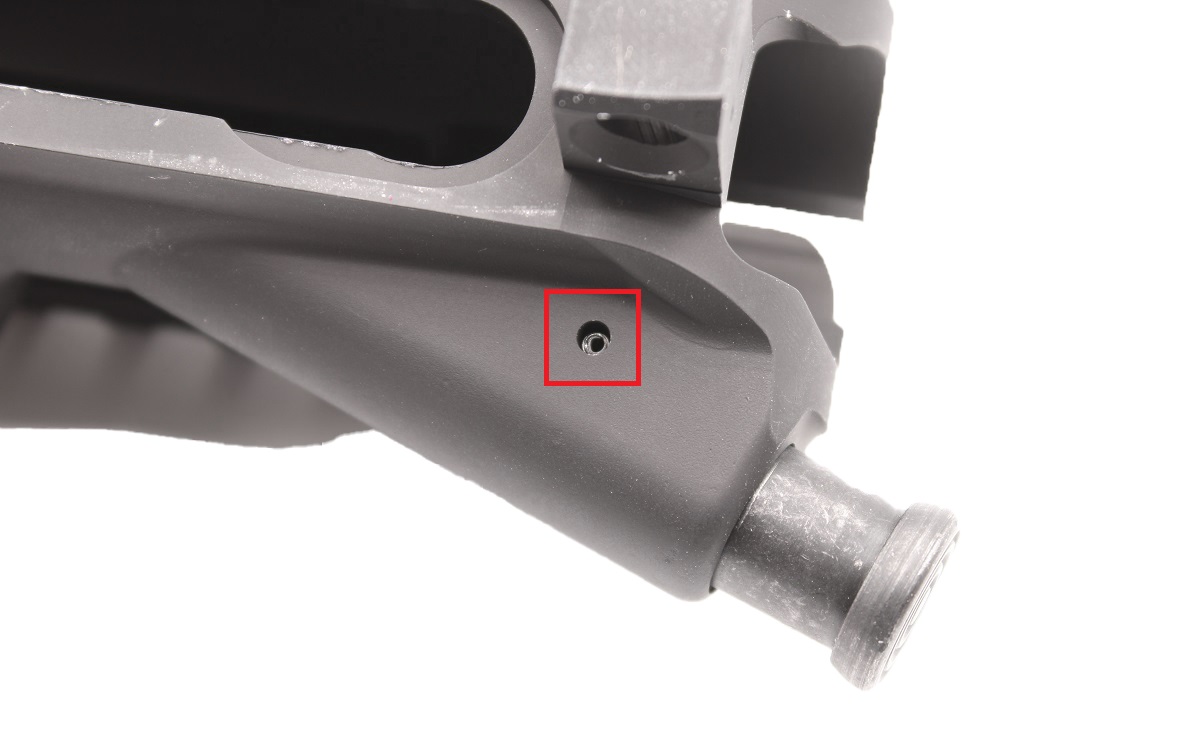
Place the spring over the forward assist, then push the assist into its hole on the right side of the receiver.
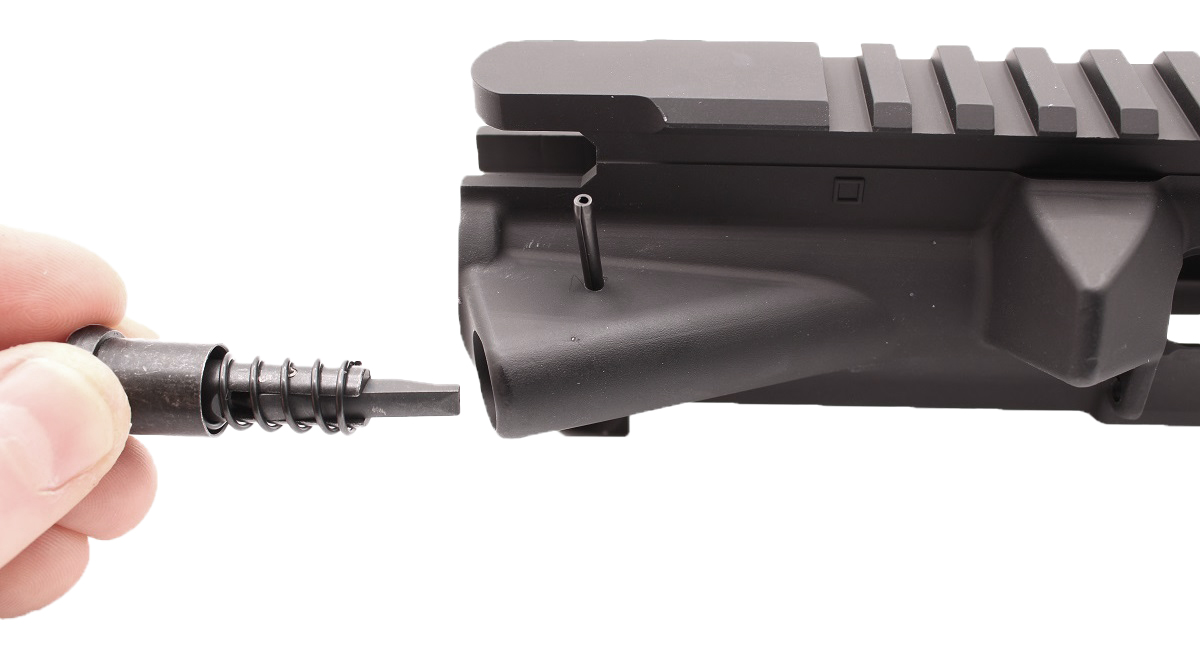
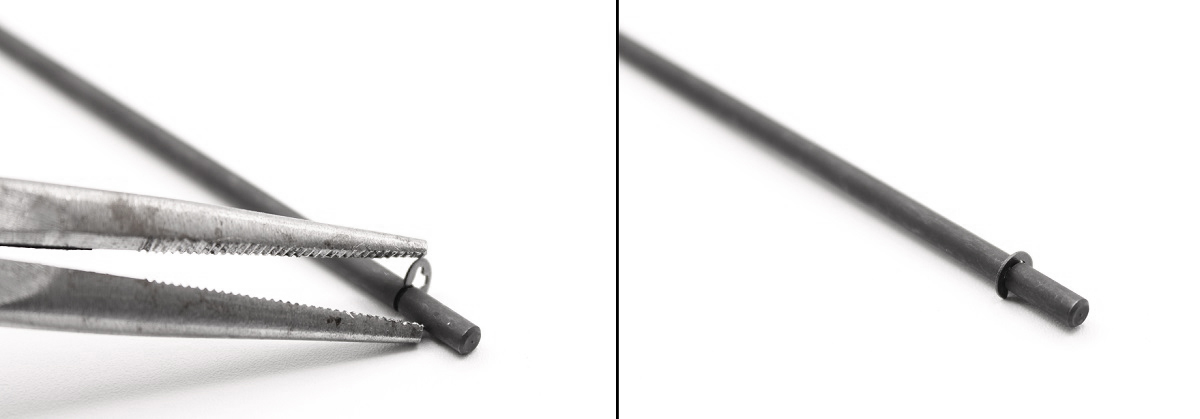
The forward assist is held in place by a roll pin. It helps to partially tap the pin into the receiver before inserting the forward assist.
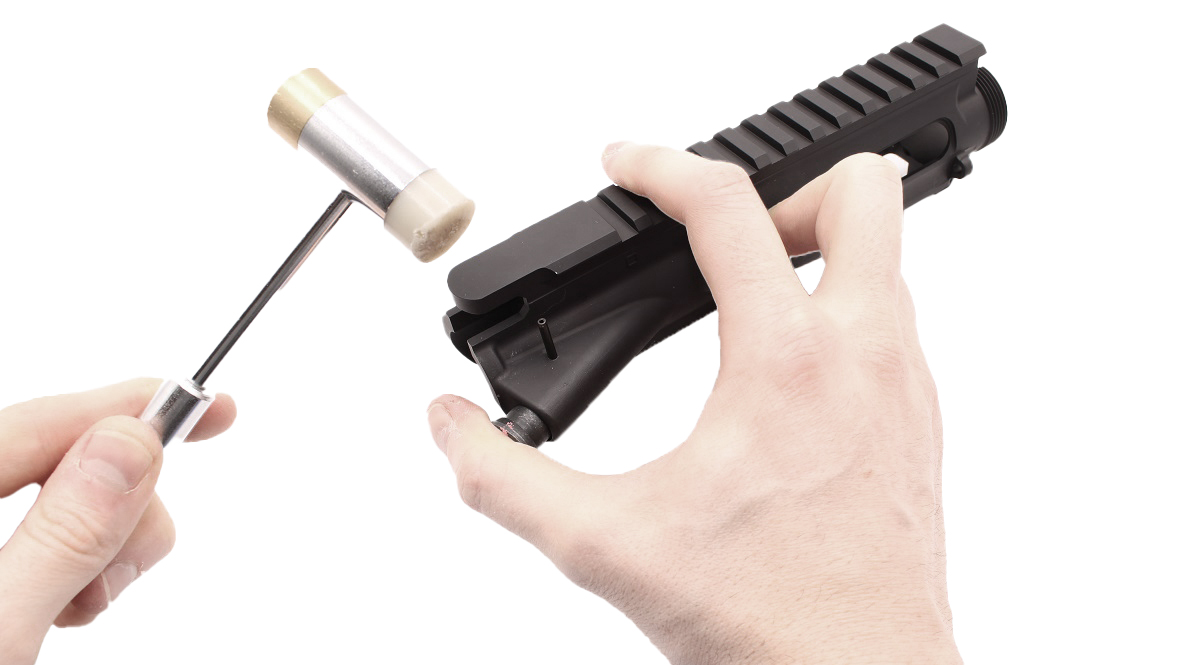
Press on the forward assist's button to align it with the roll pin. Then tap on the pin to seat it fully.
Now grab the dust cover and its components, including its rod, "C" clip, and spring. First, install the clip onto the cut-out near the end of the rod. It helps to use needle-nose pliers to press the clip onto the rod.
Next, line up the dust cover with its mount on the receiver, and insert the dust cover rod half way.

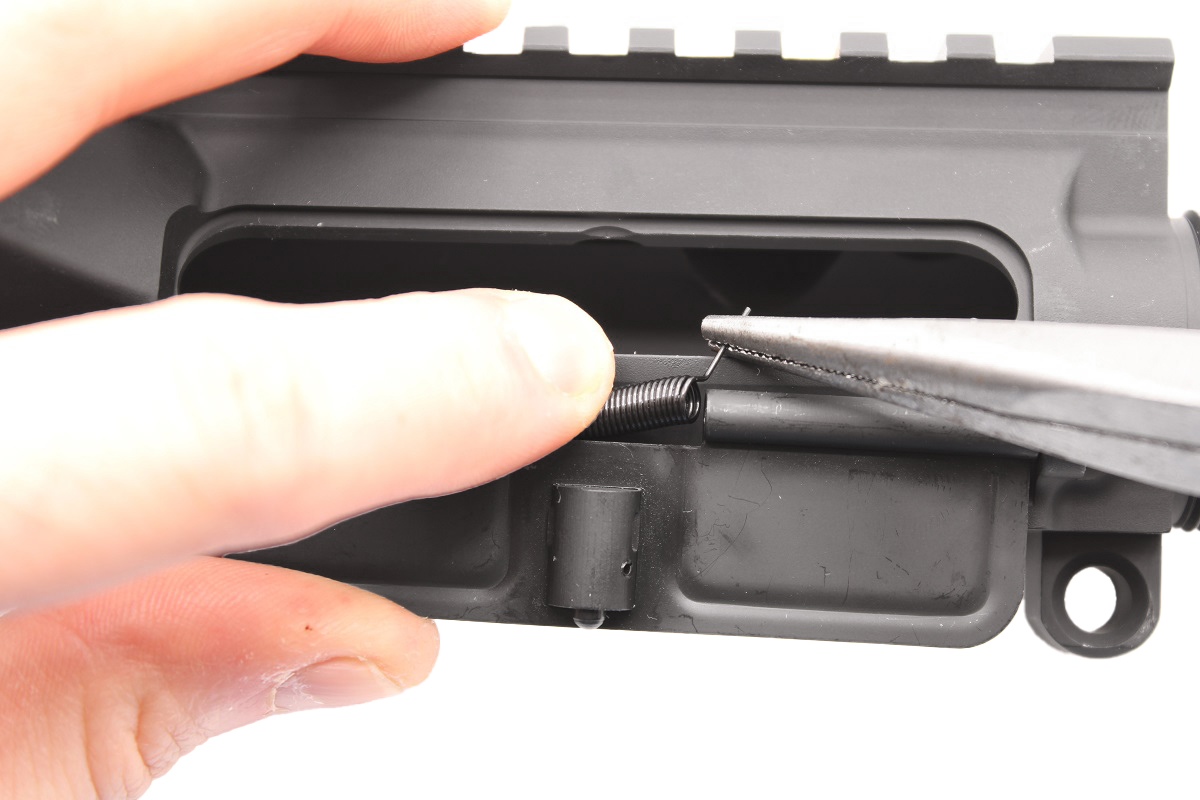
Now comes the tricky part: You need to install the dust cover's spring. You'll need to align the spring with the cover's rod holes:
Now press and hold the left side of the spring with your index finger, and rotate the right side of the spring one full rotation, clockwise. Pliers are very helpful, here.
Once you've rotated the spring end, it should rest flat against the inside of the cover. Keep holding the spring in place, and insert the rod all the way.
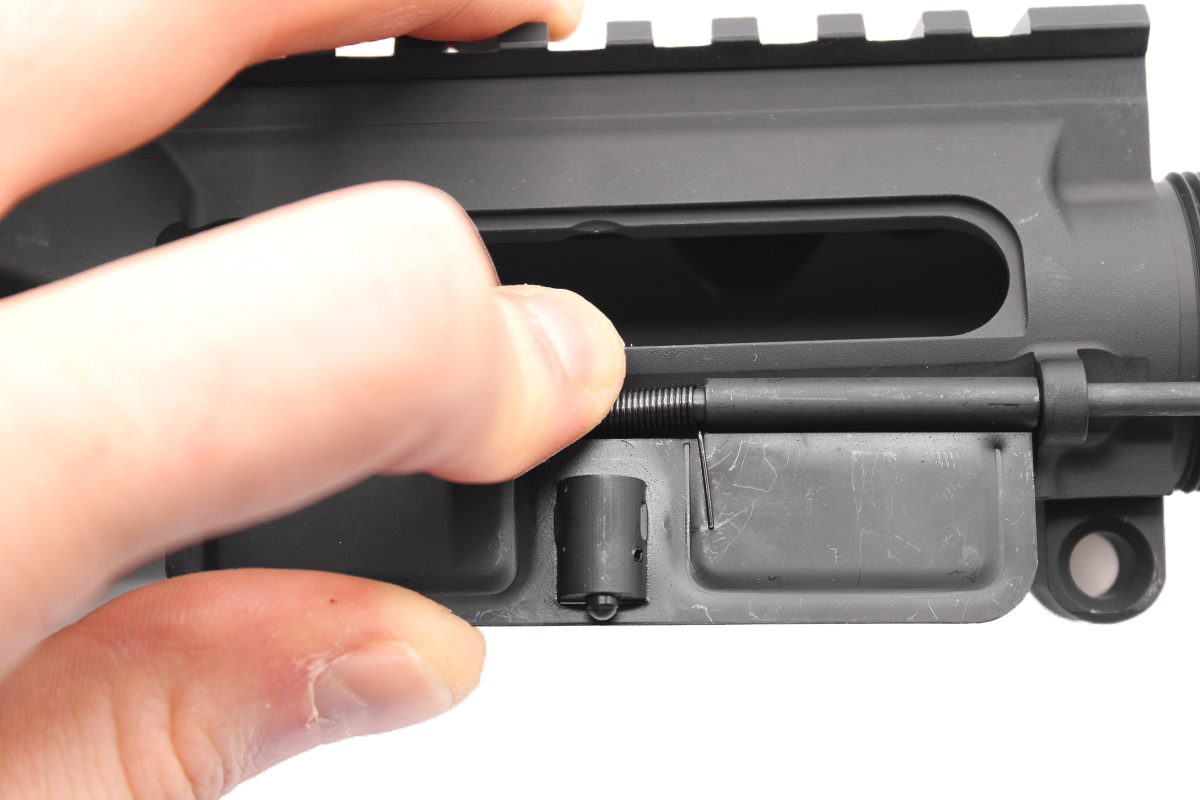
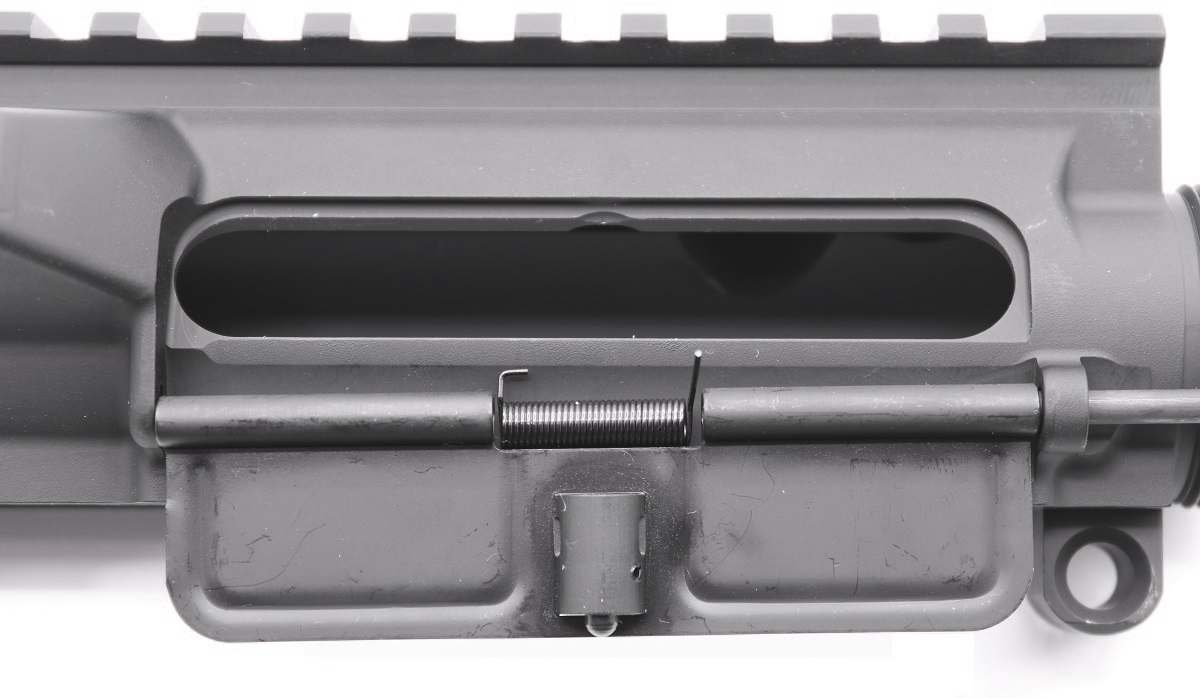
Once the rod is fully seated, the spring should be captured.
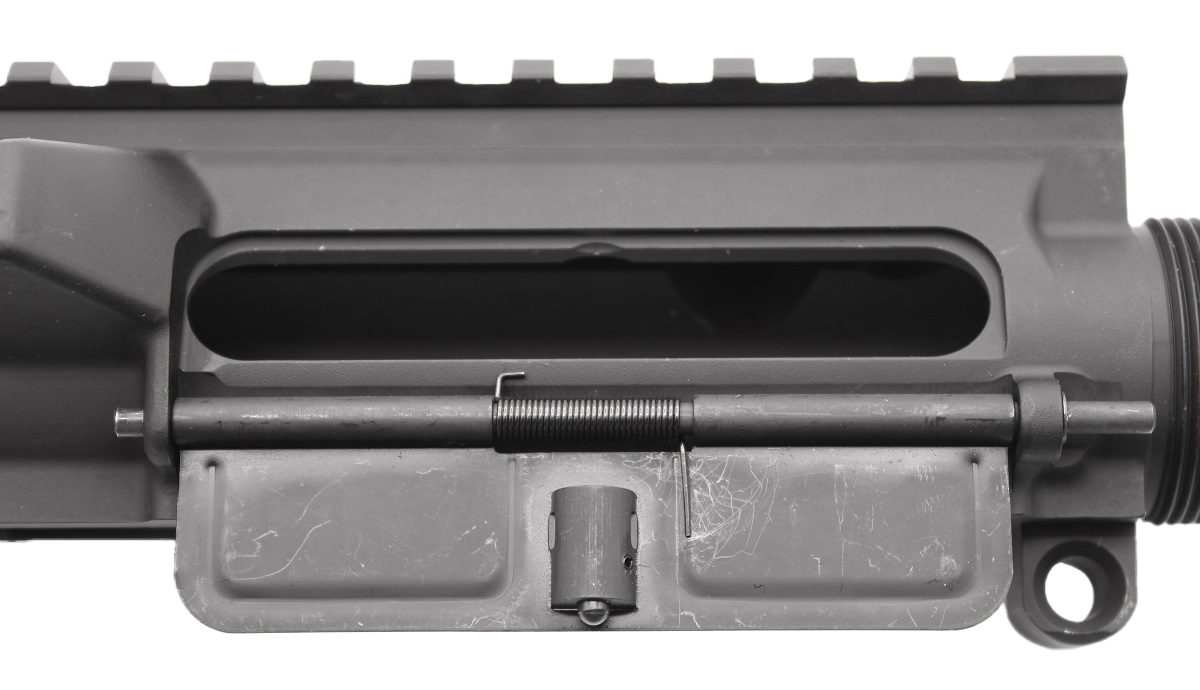
Test that the dust cover functions by closing it and pressing it back open from inside the receiver. The spring should flip the cover down with a pop.
#2: Install Barrel

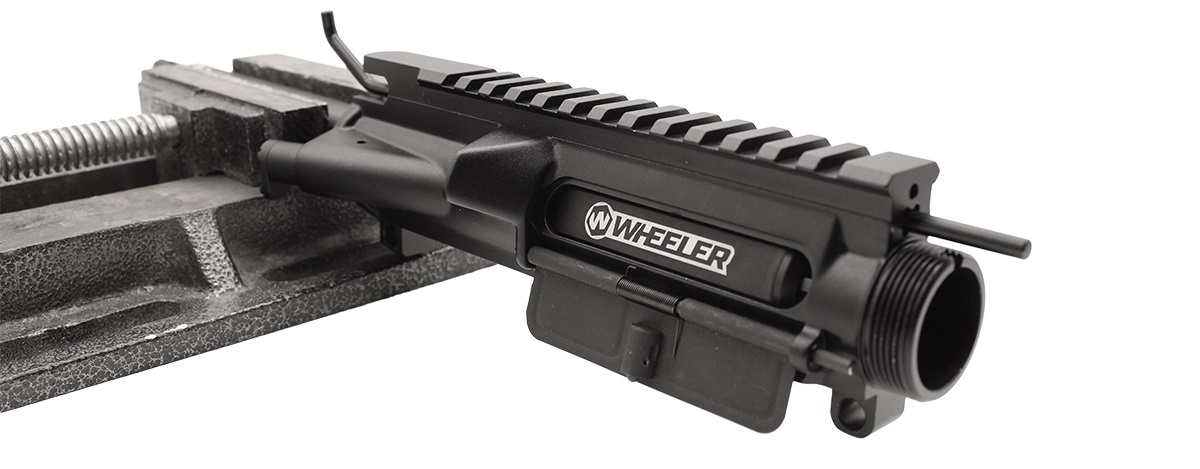
Before proceeding, ensure your upper receiver is secure using your vise and vise block, or reaction rod. If using a vise block, secure the block around the receiver. Then tighten the block inside your vise.
If using a reaction rod, secure the flats of the rod in your vise first.
Then slide the receiver onto the rod. If your rod had a gas tube alignment tool, you can remove it for now -- we won't use it until later.
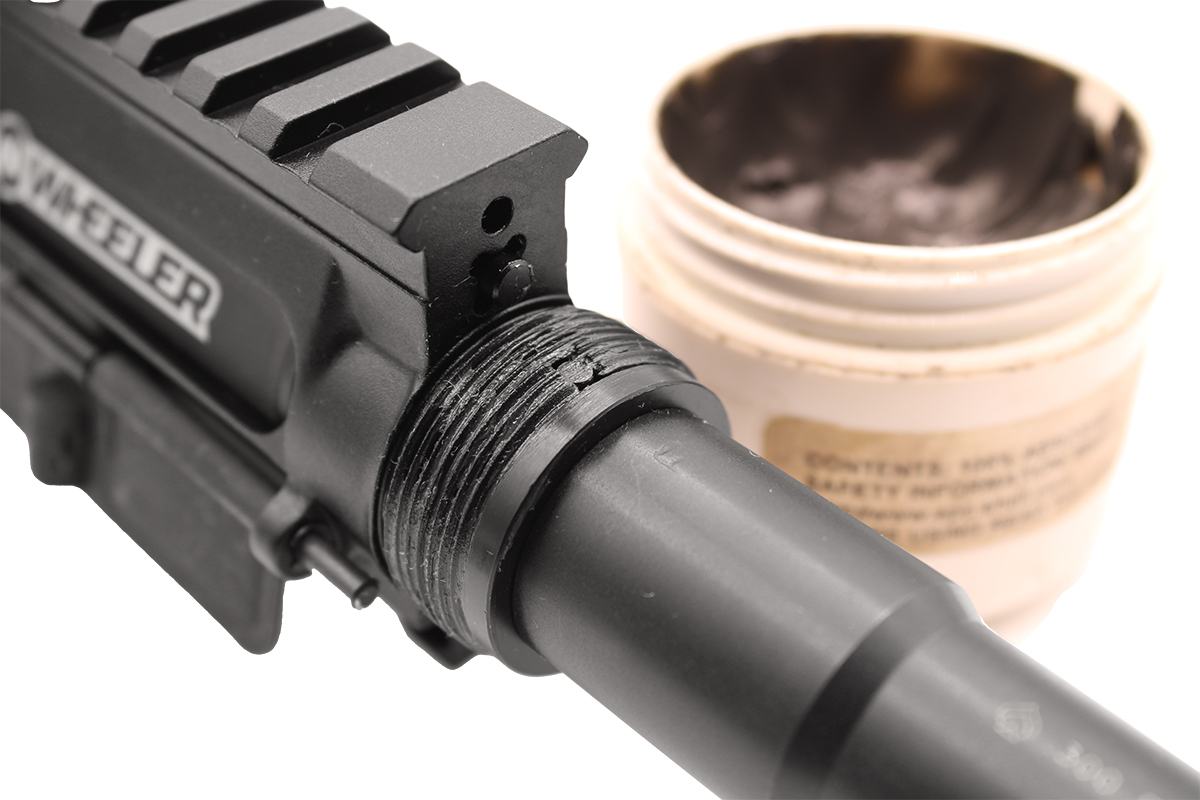
First, slide your barrel extension into the front of the receiver. Ensure the alignment pin atop the extension seats inside the cut-out inside the barrel nut threads. Apply grease to the threads.
IMPORTANT: Do not apply grease between the barrel extension and the inside of the receiver.

Next, hand-tighten the barrel nut onto the receiver's threads. Make sure the cut-outs on the nut are facing the muzzle.
Before tightening the nut with your torque wrench, check your handguard's instructions to see if a torque value is provided by the manufactured.
NOTE: If your handguard provides no torque value for your barrel nut, use 40 lb.-ft. of torque.
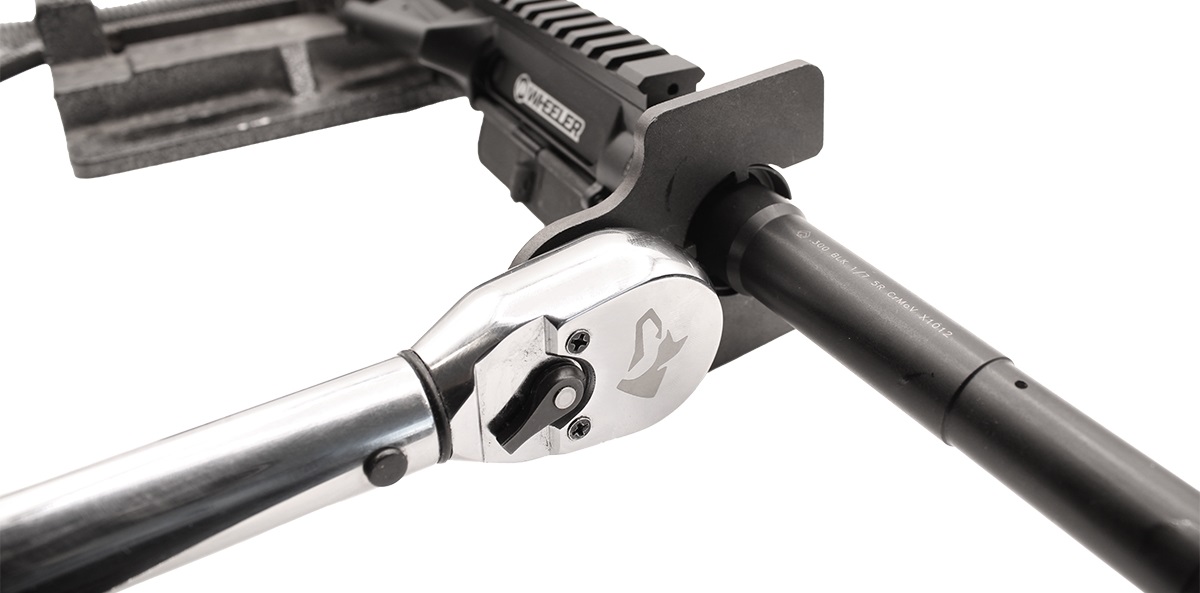
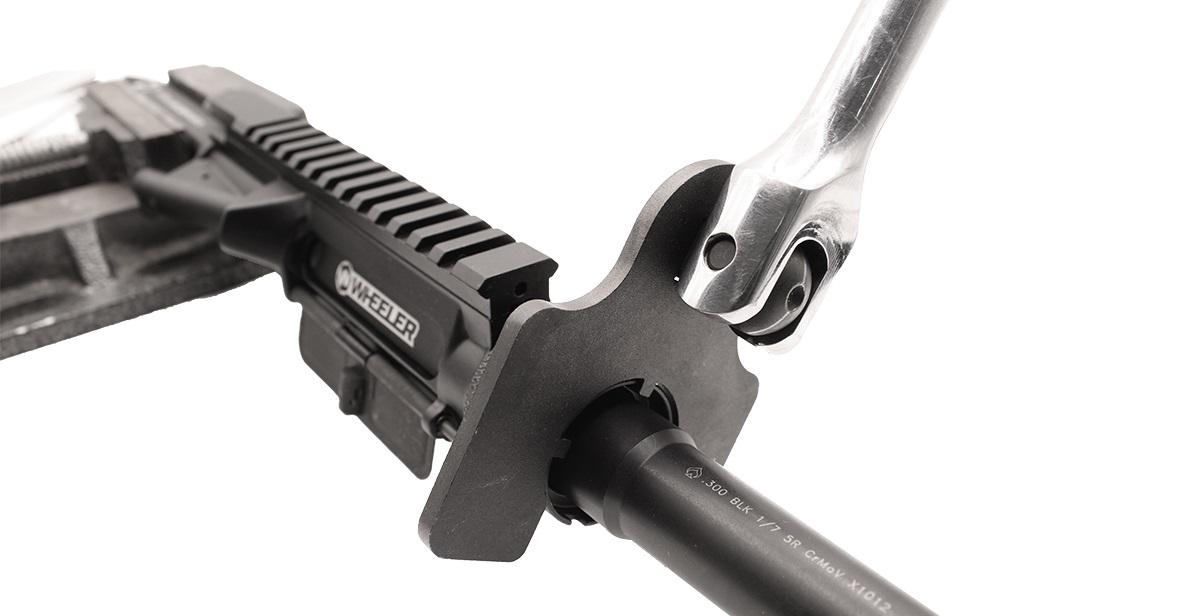
Tighten the barrel nut to the specified torque. Ensure your torque wrench and barrel nut adapter are parallel with one another. This ensures proper torque is applied.
IMPORTANT: You must loosen the barrel nut after torquing it to the specified lb.-ft. After loosening it with a breaker bare, re-torque it a second time. Loosen the nut a second time, then torque the nut a third and final time before proceeding to the next step. This ensures the steel nut doesn't loosen from the softer aluminum threads in the future.
#3: Install Gas Block & Tube
Before proceeding, consider dimpling your barrel to provide a more secure fit between the gas block, its set screws, and the barrel. This is not required. It is only recommended.
Guide: How to Dimple Your AR-15 Barrel.
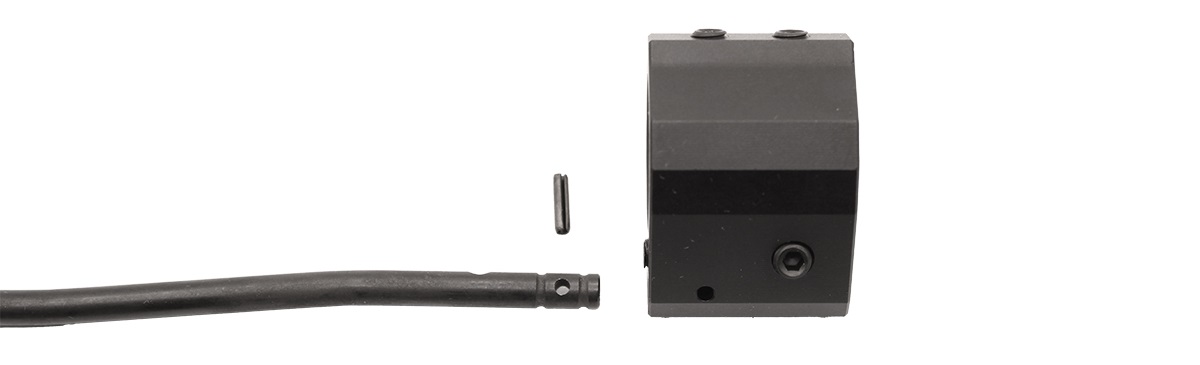
The gas tube is secured to the gas block via a roll pin. It's best to install the gas tube into the block before attempting to install the block on the barrel. Attempting to tap the gas tube roll pin into the block after installing the block on the barrel may result in the block rotating, and the set screws damaging the barrel.

Secure the gas block in your tabletop vise. Use a soft cloth or rubber vise jaws to prevent marring the block. Insert the gas tube into the block, aligning the roll pin holes in the tube and block. Then tap the roll pin into the block, securing the tube, using an appropriately sized roll pin.
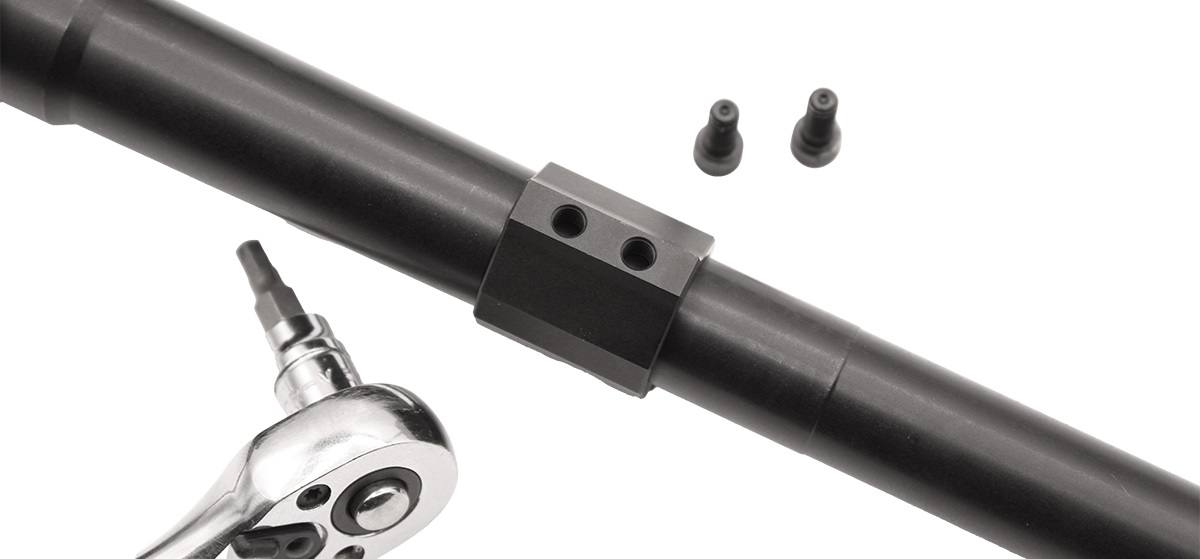
Seat the gas block and tube on the barrel. Do not install the set screws yet.
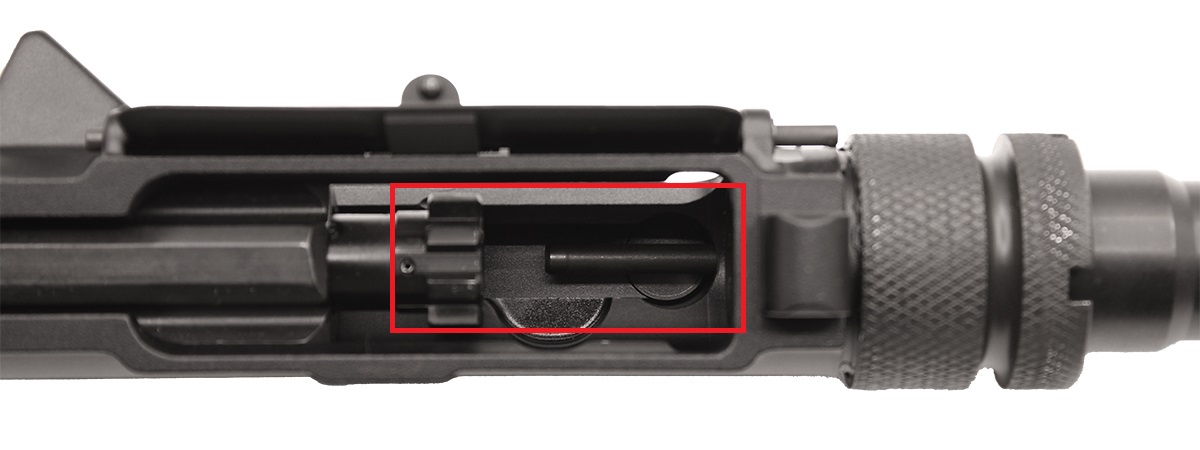
Ensure the gas tube is aligned inside the upper receiver. You may use your reaction rod, if it comes with an alignment tool. Otherwise, slide your bolt carrier group into the receiver, pressing it into the barrel extension to fully seat it.
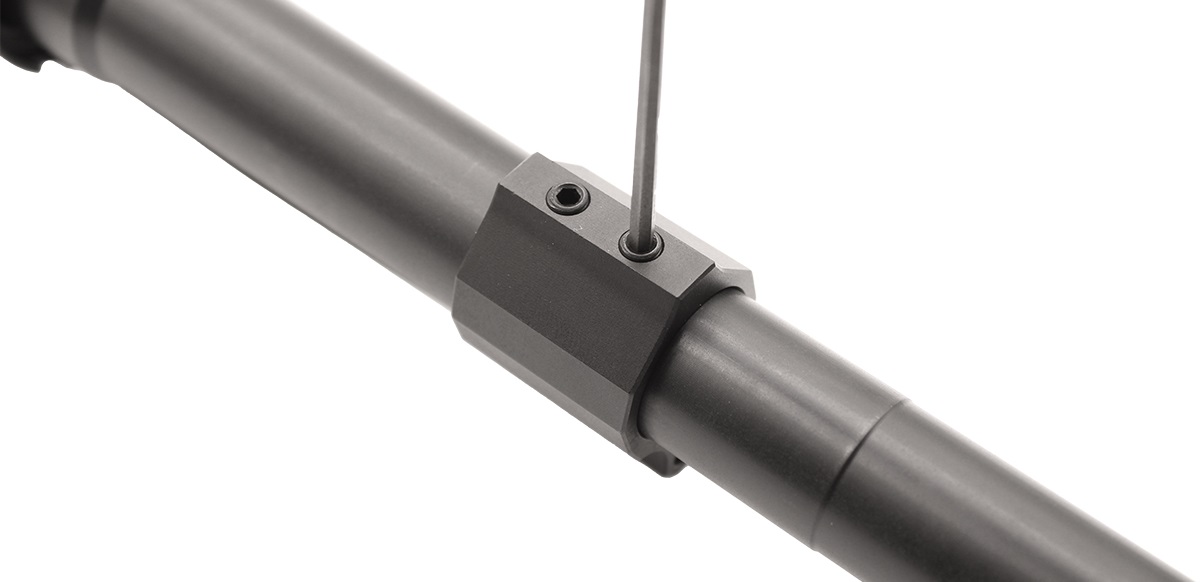
With the gas tube aligned inside the upper receiver, install and tighten the gas block's set screws using an appropriately sized Allen socket or Allen key. If using a thread locking compound, ensure it is high-temperature; the gas block gets quite hot during live fire. Reference your gas block's install instructions to determine if specific torque specifications are required for the set screws.

If your gas block is adjustable, ensure the adjustment screw is in the open position, and tighten the adjuster's set screw if applicable.
#4: Install Handguard
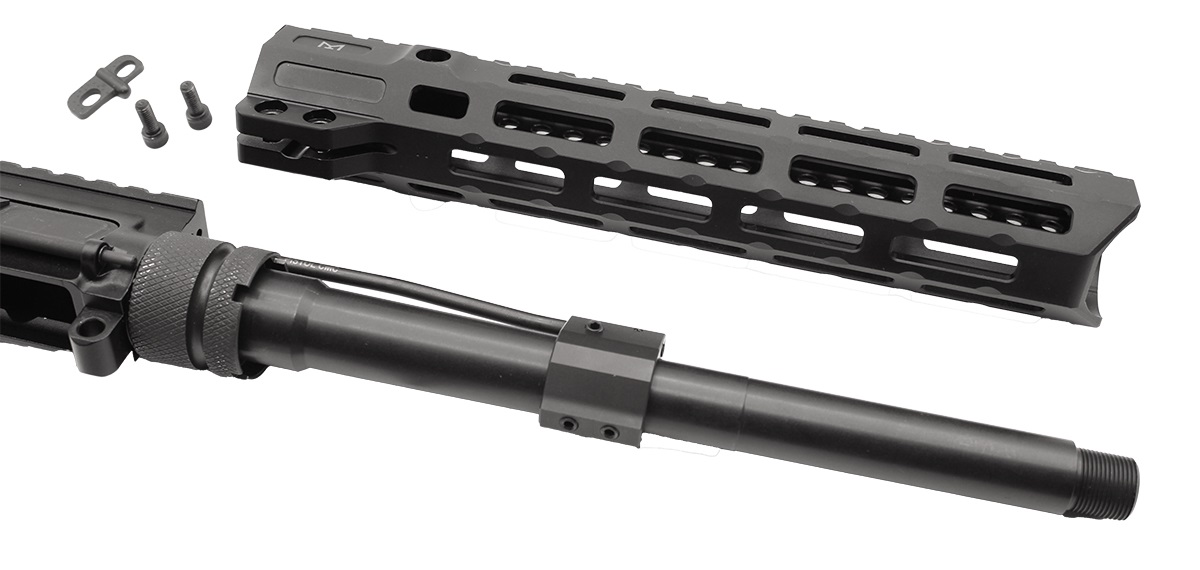
Note that installation steps for various handguards differ slightly. We're using a relatively universal and common handguard configuration. This handguard is free-float, and uses an anti-rotation lug with two set screws to align and tighten the handguard.
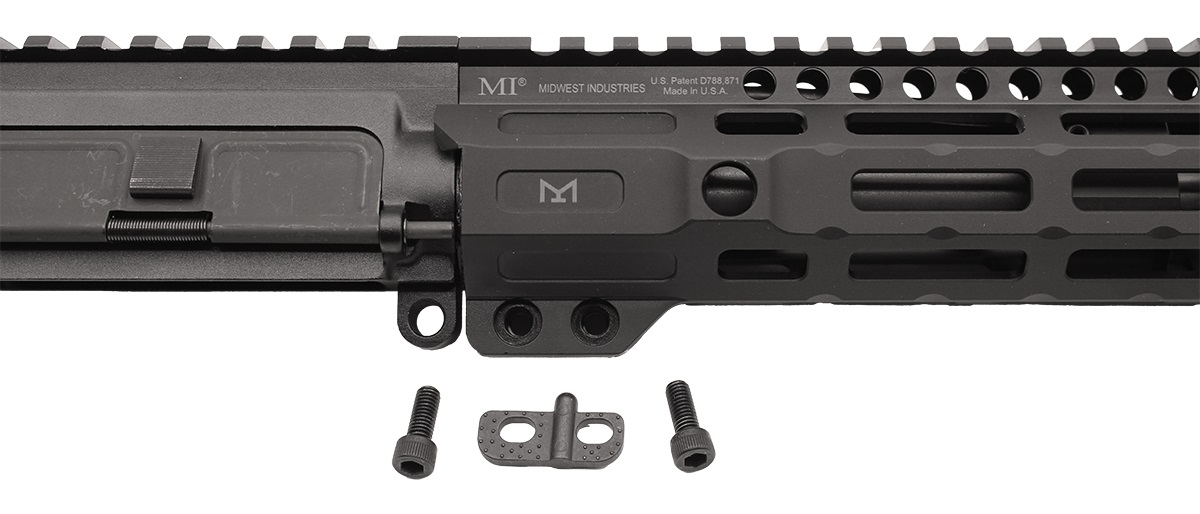
Slide the handguard over the barrel nut, and press it against the receiver. This handguard has alignment tabs on either side of the receiver; if yours does not, ensure the handguard's top rail aligns with the upper receiver rail.
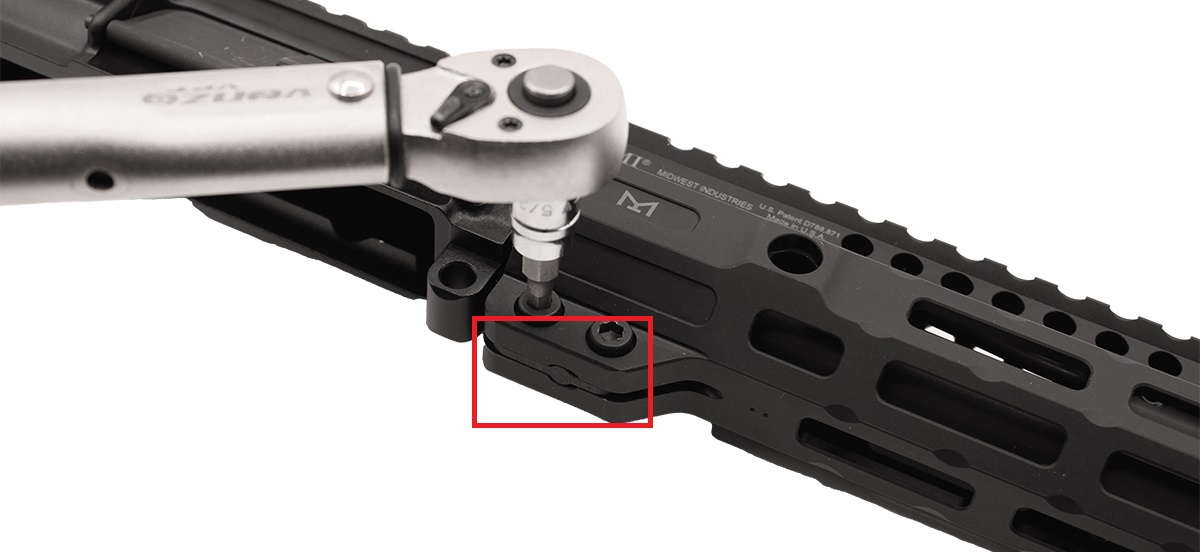
With the handguard positioned and aligned, insert the alignment pin (if applicable). Tighten the handguard's bolts using an appropriately sized Allen key, or Allen socket and wrench. Reference your handguard's installation instructions to determine if a specific torque specification is required for the bolts.
NOTE: Most AR-15 handguards are made from aluminum, which can warp or crack if the bolts are over-torqued. If your handguard's bolts have no torque specification, take care not to over-tighten them! Forty (40) in.-lbs. of torque is a safe default value to use. Otherwise, hand-tighten the bolts, then perform an extra half turn with an Allen key or wrench.
#5: Install Charging Handle and BCG
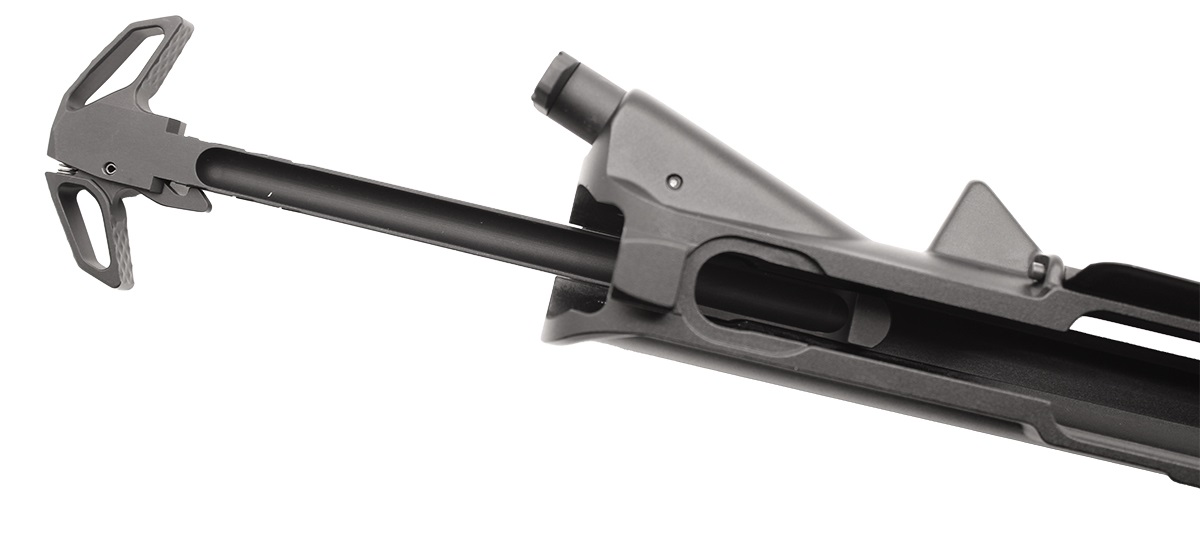
The charging handle must be partially inserted into the upper receiver before installing the bolt carrier group. Flip the upper receiver and charging handle upside down. Insert the tip of the charging handle into the receiver, aligning the shoulders on either side of the charging handle's rod with the cut-outs in the channel near the rear of the receiver.
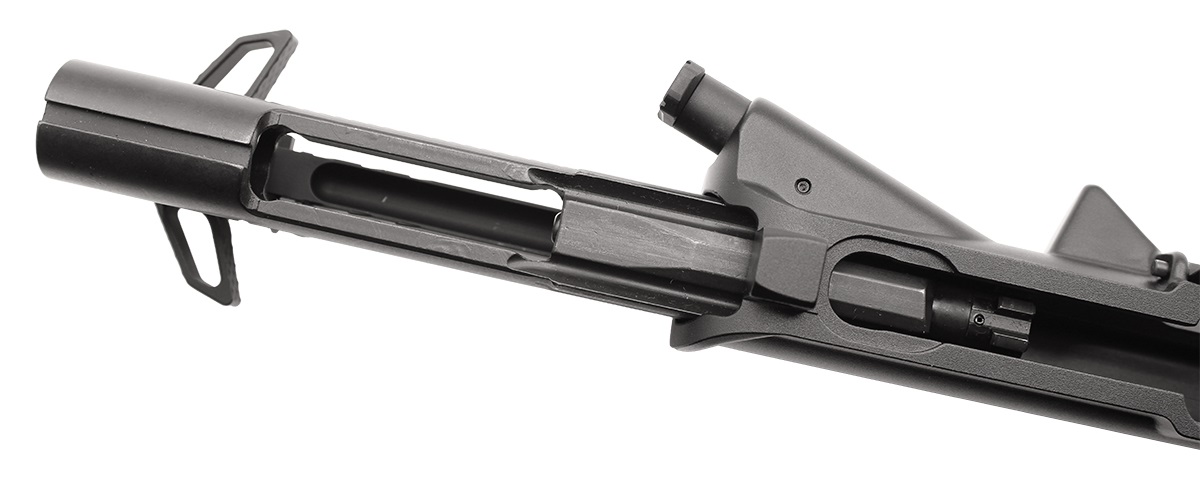
Next, orient the bolt carrier group upside down. Gently pull on the bolt to ensure it is fully extended. Then rest the gas key inside the channel cut into the underside of the charging handle.
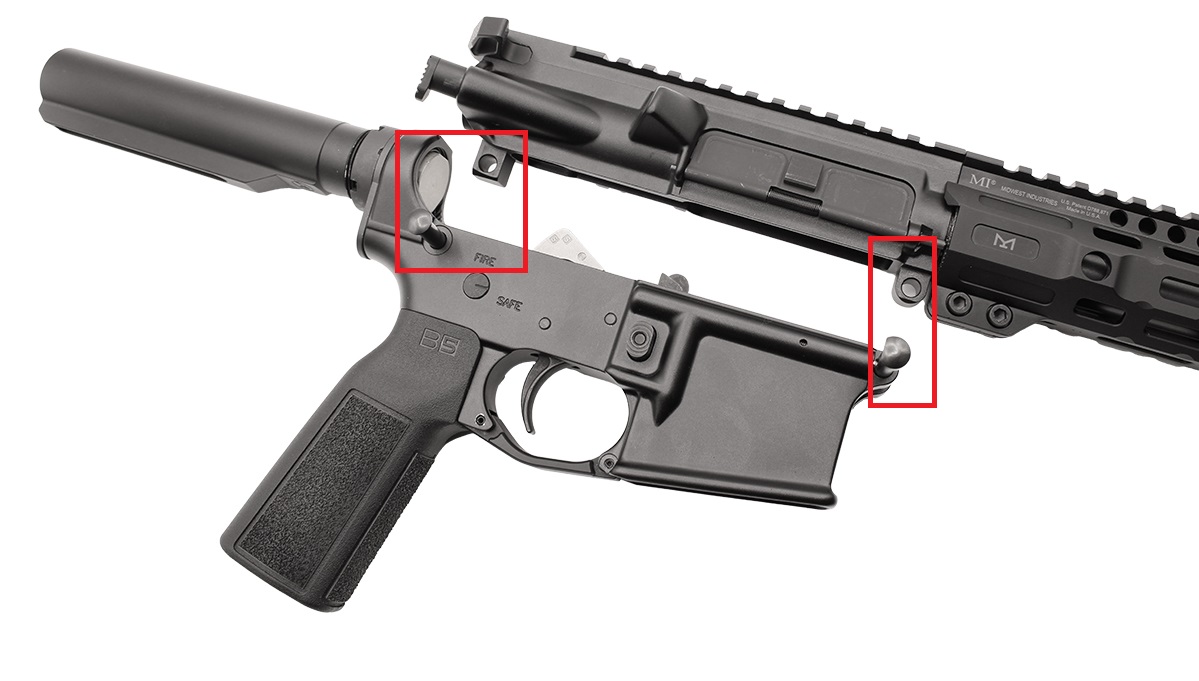
Press the charging handle and bolt carrier group into the upper receiver. The charging handle should click, locking itself and the bolt to the upper. Lastly, pull the front pivot and rear takedown pins out of your lower receiver to install the upper onto the lower.
Your AR-15 Upper is Complete
Your AR-15 upper assembly is now complete! If your lower isn't assembled yet, follow our guide on how to build your AR-15 lower receiver.
DISCLAIMER: If you are new to the world of DIY gun building, you likely have a lot of questions and rightfully so. It’s an area that has a lot of questions that, without the correct answers, could have some serious implications. At GunBuilders.com, we are by no means providing this content on our website to serve as legal advice or legal counsel. We encourage each and every builder to perform their own research around their respective State laws as well as educating themselves on the Federal laws. When performing your own research, please be sure that you are getting your information from a reliable source.