
How to Build a G17/19 GLOCK Slide
Posted by Gunbuilders.com on Jan 25th 2024
Finish cutting, drilling, and assembling your P80 frame? Now it's time to complete the other half: The slide assembly. With an assembled slide, you'll be ready to put your P80 build together and finally hit the range. In this guide, we're going over how to assemble your slide using one of our P80-compatible slide kits.
NOTE: No matter what Polymer80 build you're completing, all slides use the same components, and all assembly steps below are applicable.
Slide Assembly: Tools Required
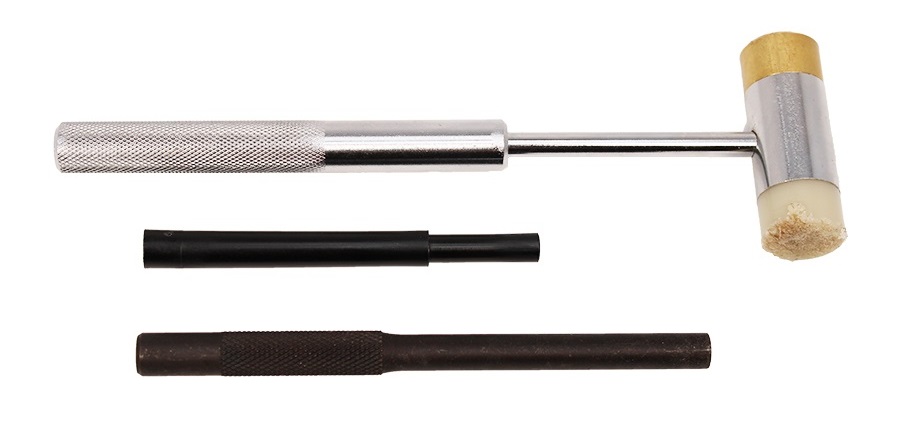
One component of the GLOCK® slide assembly requires a special tool: The firing pin's channel liner sleeve. This sleeve needs to be press-fit into the slide using a channel liner install tool (pictured center).
You can also use a hollow punch to tap the channel liner into the slide.
At minimum, we recommend purchasing a punch set with a gunsmithing hammer. This kit is also required for assembling any P80 frame or AR-type lower receiver.
How to Assemble The GLOCK® Slide
First, make sure you have all the required components in the diagram below.
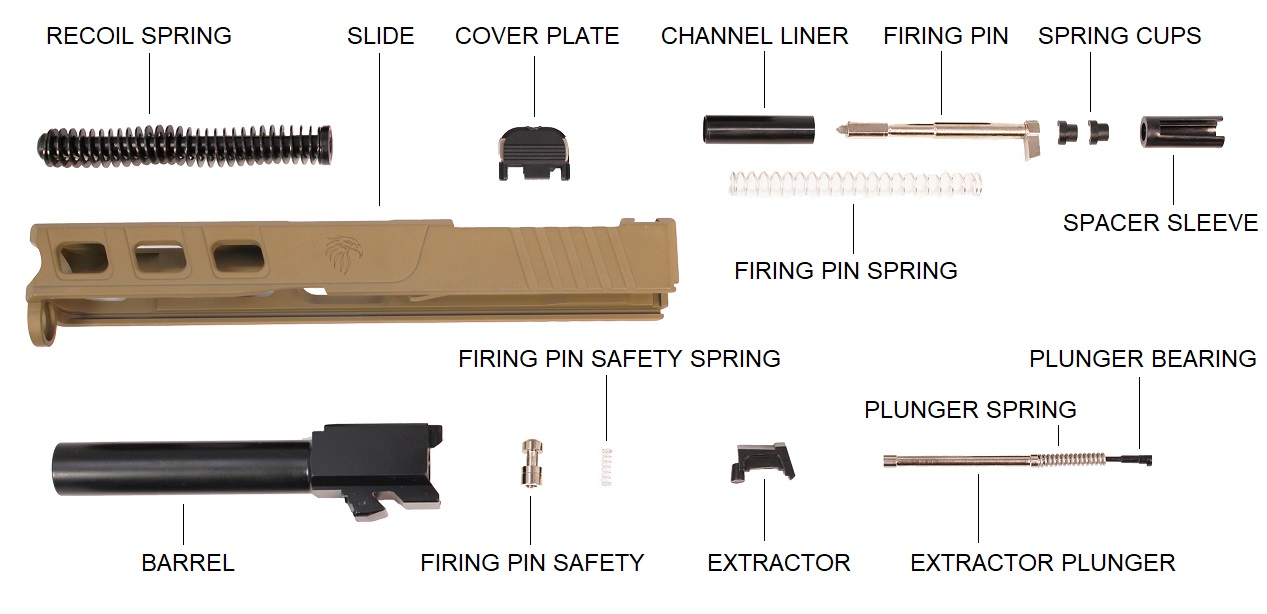
To make things easier, we've created P80-compatible slide kits that include all the required parts. You can shop for various slide kits here. Options include optic-cut and powdercoated slides for each Polymer80 frame.
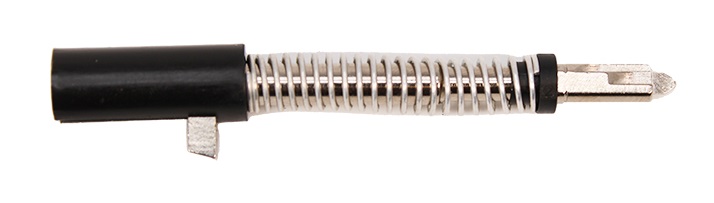
1. Install Firing Pin, Spring, and Retainer
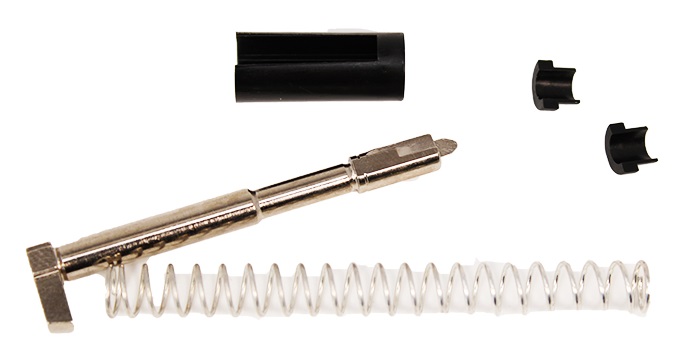
The firing pin components include the spring, pin, spring cups, and spacer sleeve. First, place the spacer sleeve over the firing pin. The cut-out in the sleeve should slip over the foot of the pin.
Next, slide the spring onto the pin and compress it. While compressing the spring, slip both spring cups atop the spring. The cups will capture the spring underneath the head of the pin.
See the finished assembly for reference:
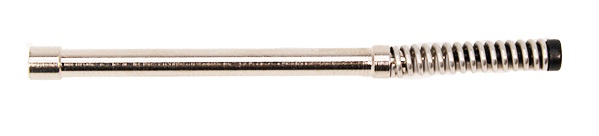
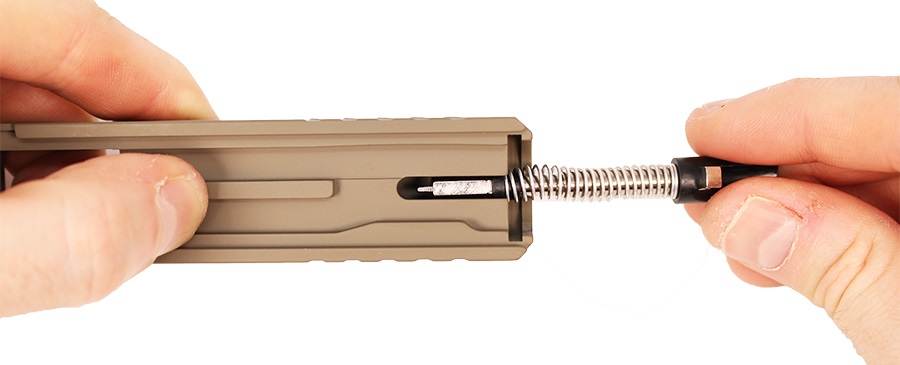
2. Install Extractor Spring, Plunger

The extractor assembly includes the extractor rod, spring, and plunger bearing.First, press the plunger bearing into the spring. It can fit in either end.
Next, press the opposite end of the spring atop the extractor rod. It should snap onto the head of the rod.
See the finished assembly:
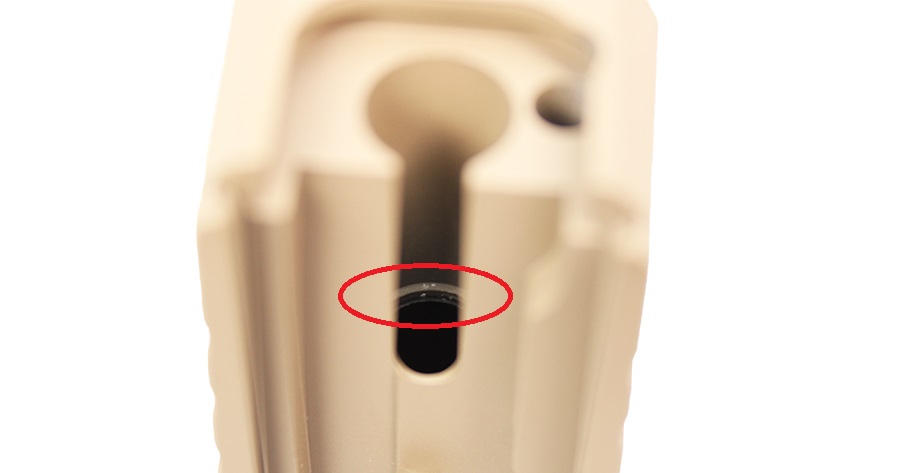
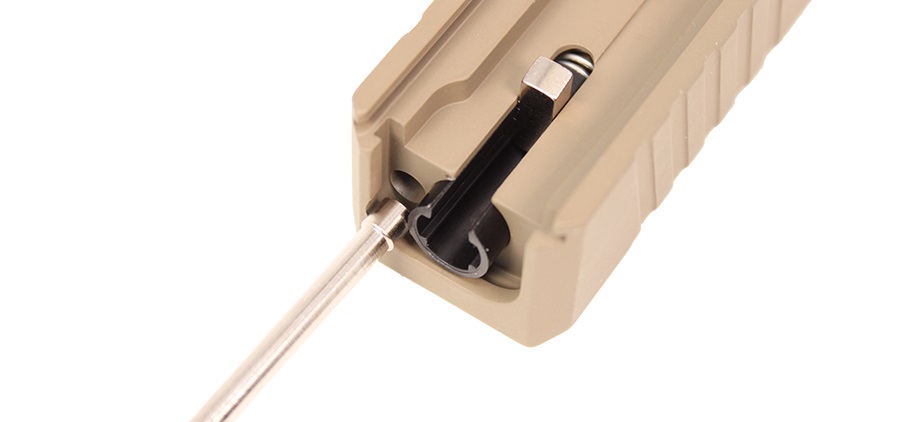
3. Tap Channel Liner Into Slide
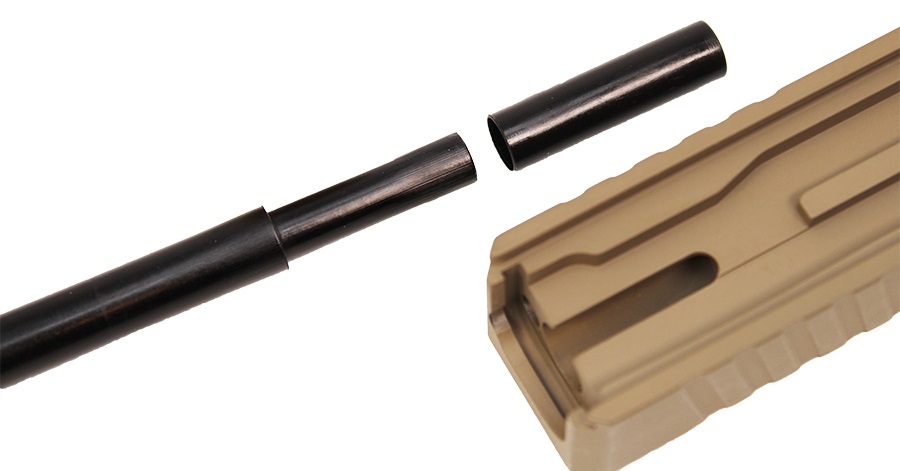
You'll need a channel liner install tool or hollow punch, and a gunsmithing hammer, to complete this step. Carefully inspect the channel liner: One end is cut flat. The other end has a small chamfer. The chamfered edge should be inserted into the slide.
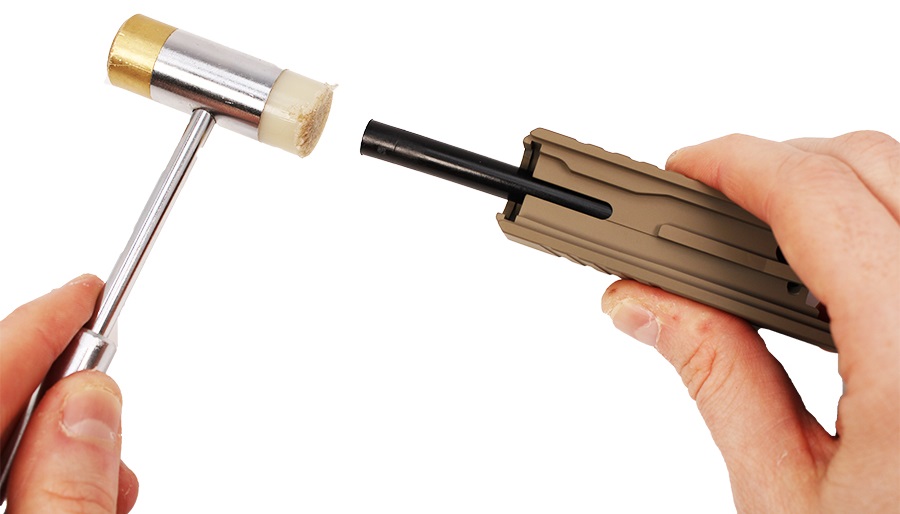
Tap the channel liner into the slide using your tool or punch and hammer. Continue tapping until the liner rests just below the lip inside the slide.
See below for reference:
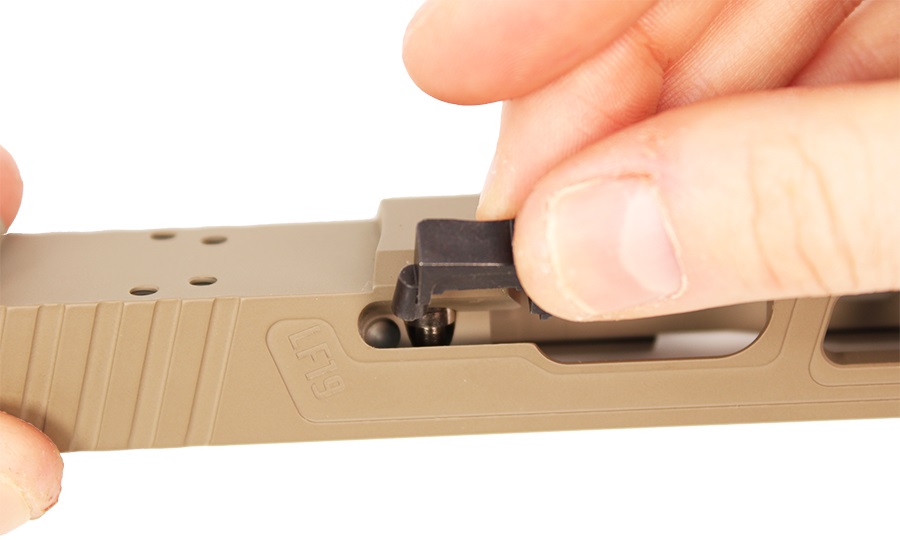
4. Install Firing Pin Safety
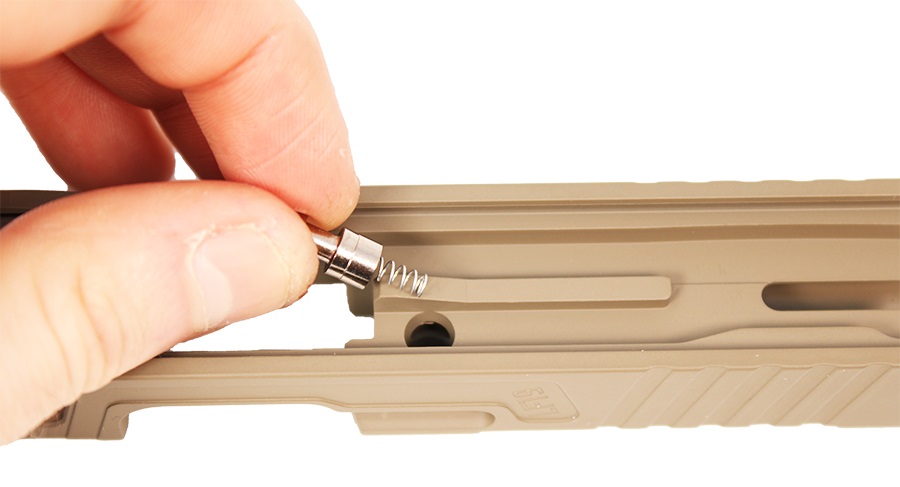
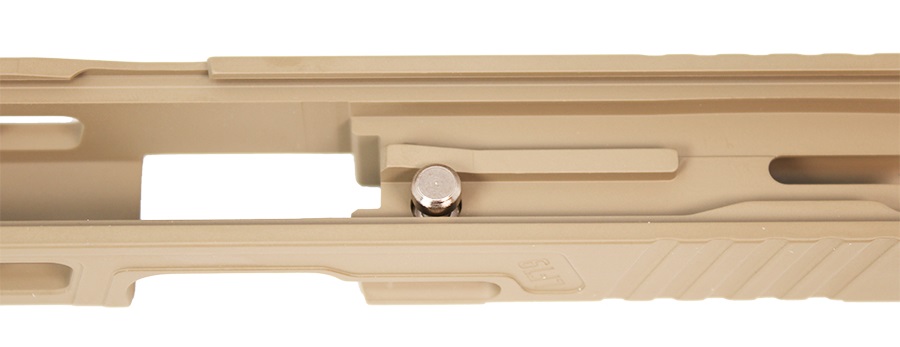
Insert the firing pin safety spring into the bottom of the pin safety. Then insert the pin's spring into the hole next to the firing pin channel. The head of the pin safety should protrude from the slide like so:
Next, gently depress the pin safety while inserting the firing pin assembly into the channel liner.
The firing pin assembly's spacer sleeve should protrude from the rear of the slide once inserted. The pin will hold the pin safety in place, too.
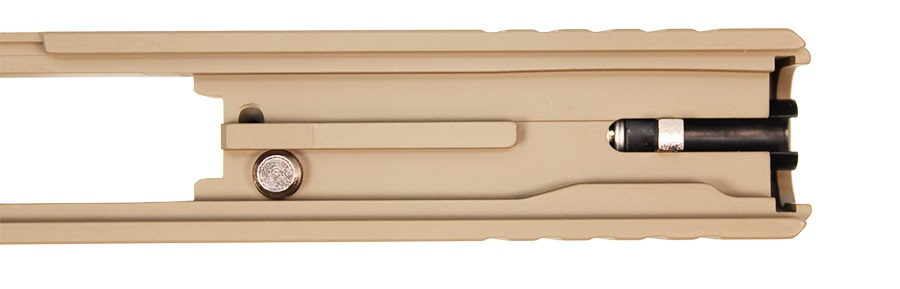
5. Install Extractor Depressor Plunger
First, install the extractor. Drop it into the slide as pictured above. While holding the extractor in place, insert the extractor depressor plunger that you assembled in step two.
The metal end of the plunger should go in first. The hole for the plunger is located next to the firing pin channel at the rear of the slide.
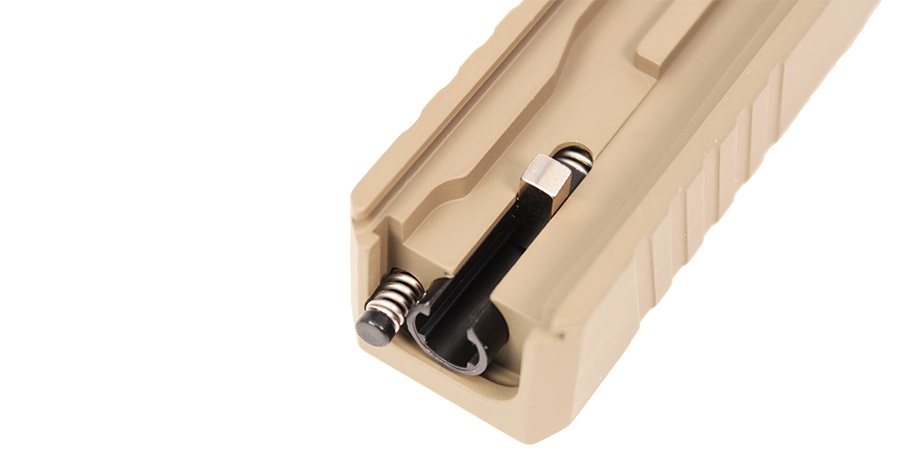
The plunger will protrude slightly from the slide when inserted.
Step 6: Install Cover Plate
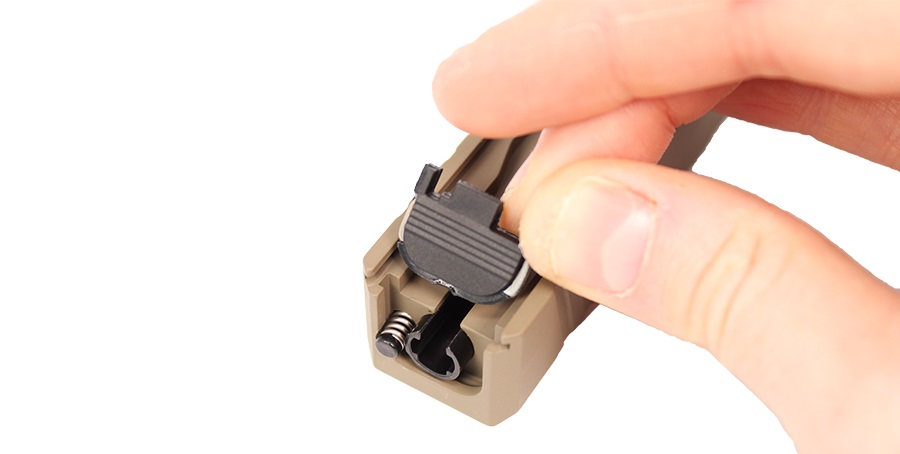
The cover plate will capture and hold the firing pin and extractor depressor plunger inside the slide. To install the cover plate, you'll need to temporarily compress both units' springs.
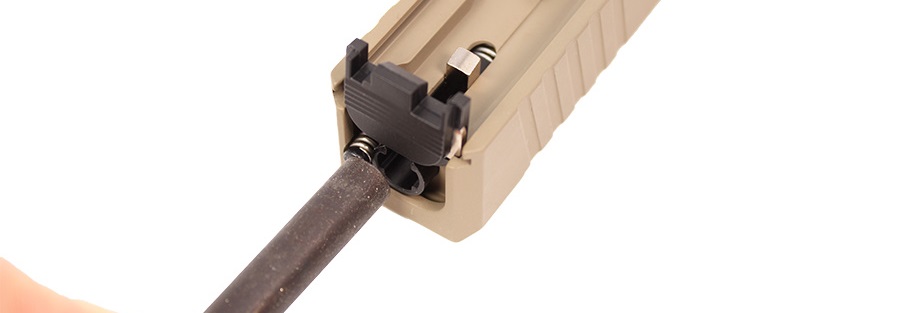
Use a punch, wood dowel, or other flat faced tool to press on both the firing pin and plunger. While pressing on both units to compress them inside the slide, push down on the cover plate to seat it.
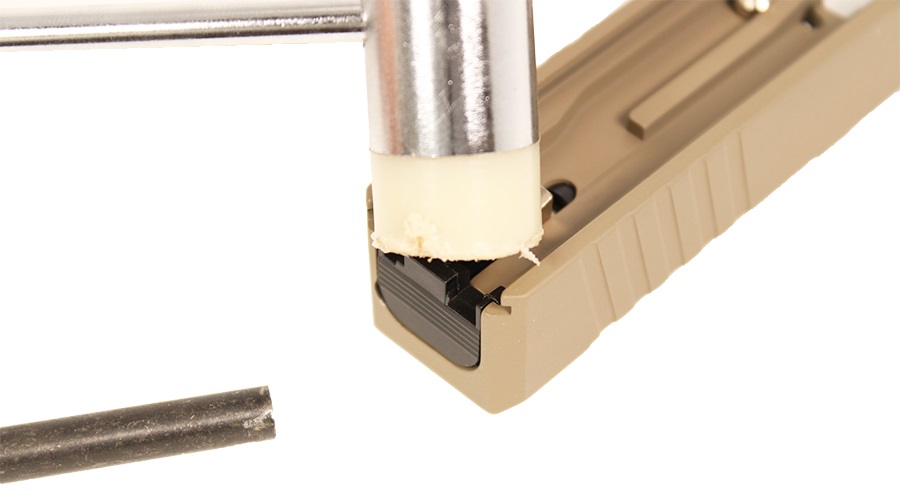
A new slide and cover plate may make for a tight fit. You may need to gently tap on the cover plate to ensure it is fully seated.
Step 7: Install Barrel and Spring
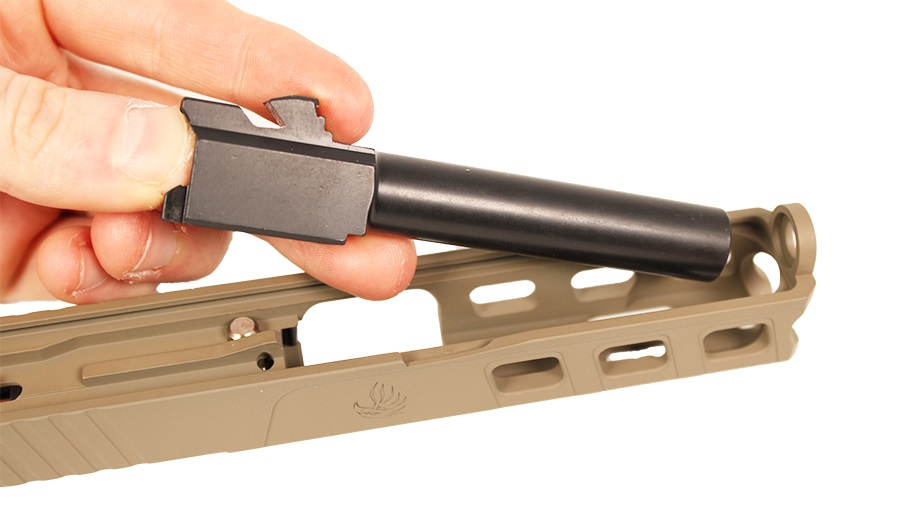
To seat the barrel in the slide, place the muzzle through the front of the slide. The lugs on the barrel should face away from the slide.
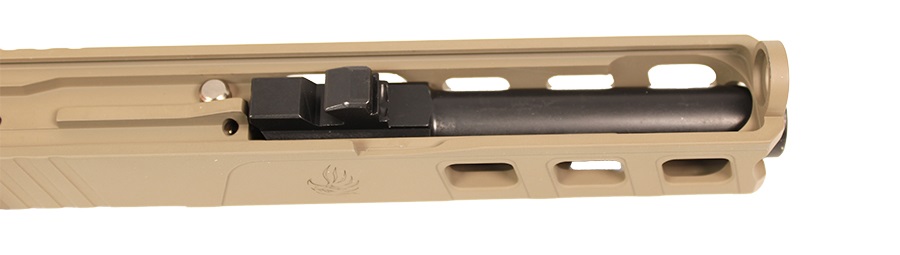
With the barrel resting in the slide, insert the guide rod. The round head of the rod will seat in the ring underneath the barrel.
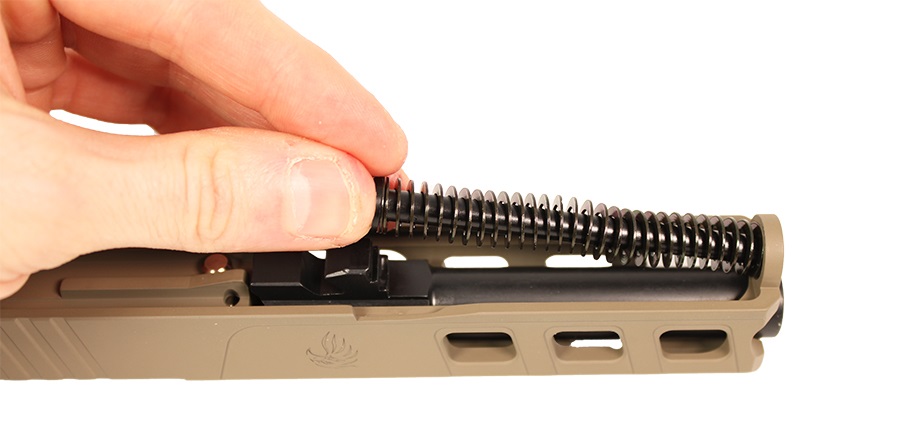
Apply pressure to the rod to push it forward slightly, then angle the rear of the rod downward.
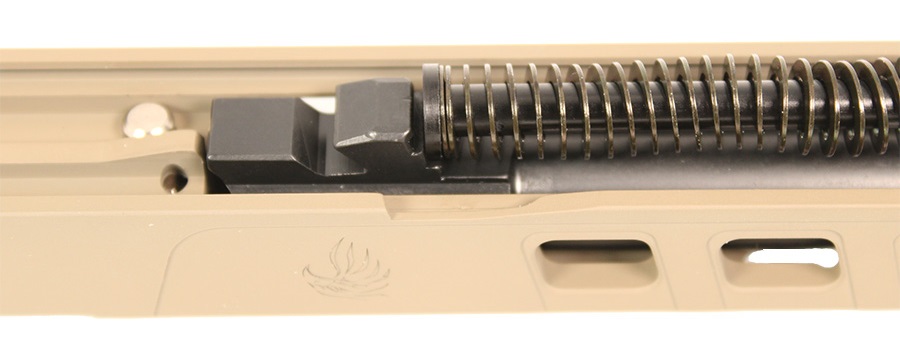
The end of the guide rod should rest at the base of the barrel lug.
Your GLOCK Slide Install is complete
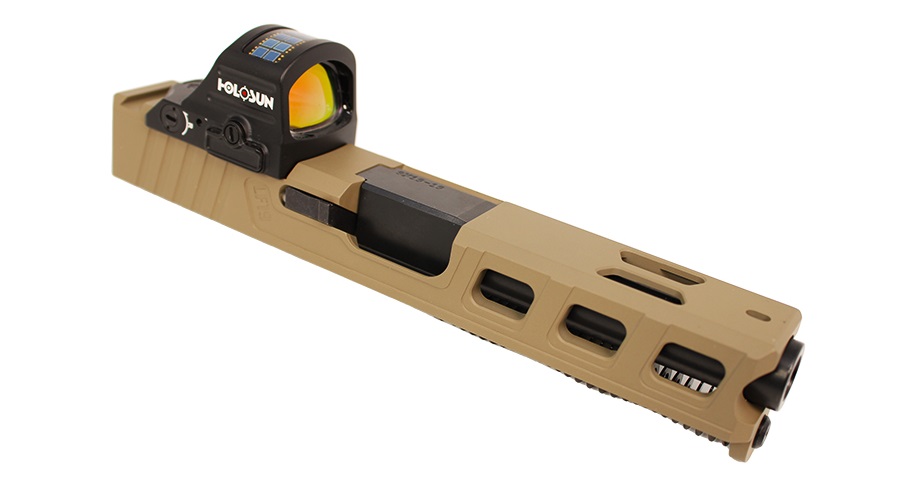
Your slide can now be installed on your GLOCK or Polymer80 frame. If installing a pistol red dot, ensure the bolts securing the optic to the slide are not too long -- otherwise, they may interfere with the firing pin or extractor depressor plunger's movement.
DISCLAIMER: If you are new to the world of DIY gun building, you likely have a lot of questions and rightfully so. It’s an area that has a lot of questions that, without the correct answers, could have some serious implications. At GunBuilders.com, we are by no means providing this content on our website to serve as legal advice or legal counsel. We encourage each and every builder to perform their own research around their respective State laws as well as educating themselves on the Federal laws. When performing your own research, please be sure that you are getting your information from a reliable source.