")
How to Lap Your AR-15 Upper (Instructions & Photos)
Posted by Gunbuilders.com on Mar 16th 2025
Bought a match-grade barrel? Assembling a long-range .308 setup with a stainless target plinker? The build quality of your barrel comes first, but the quality of the upper receiver you install it in can be just as important -- especially if you want proper optic and iron sight alignment with as few adjustments as possible when zeroing or using holdovers.
What is Hand Lapping?
Hand lapping is a process that squares the face of the upper receiver's barrel extension housing -- that's the threaded front end of the receiver that secures the barrel. The front of this housing may have an uneven surface perpendicular to the direction of the barrel.
This unevenness can force the barrel to become canted up or down, or worse, left or right, after it's installed and secred by the barrel nut.
With the barrel canted, the barrel extension may not align properly with the bolt's lugs. This can cause unecessary stress on the bolt carrier group and, as the barrel and receiver heat up, this can cause issues with extractiong spent brass from the chamber.
At a minimum, having a receiver extension housing that's not square with the barrel extension can cause the barrel to become misaligned with your glass optics or iron sights. You'll have to compensate for this lack of alignment with extra windage and elevation adjustments.
Benefits of Lapping The Receiver
Hand lapping the upper receiver ensures none of the above issues become apparent in your freshly built AR. By squaring the face of the receiver, you'll ensure the barrel's properly aligned with the receiver itself.
This guarantees the receiver's top rail, and the handguard itself, are both aligned with the bore, which helps ensure your irons and optics will align easily. This also ensures the bolt carrier group and the bolt's lugs align properly with the barrel extension.
This ensures reliable, smooth extraction of spent casings, and it ensures the bolt's lugs can evenly distribute applied forces to reduce stress and wear and tear.
(You Need a Quality Lapping Tool)
Trying to lap the upper receiver with a cheap lapping tool is a pointless endeavor. You may even do more harm than good. A quality lapping tool must be used (covered below), as it's the tools precise tolerances and carefully crafted alignment that ensure the receiver itself is squared properly when you're performing the work.
So, how does this work? See our step-by-step instructions and photos below to hand lap and accurize your AR-15's stripped upper receiver.
How to Lap The AR-15 Upper
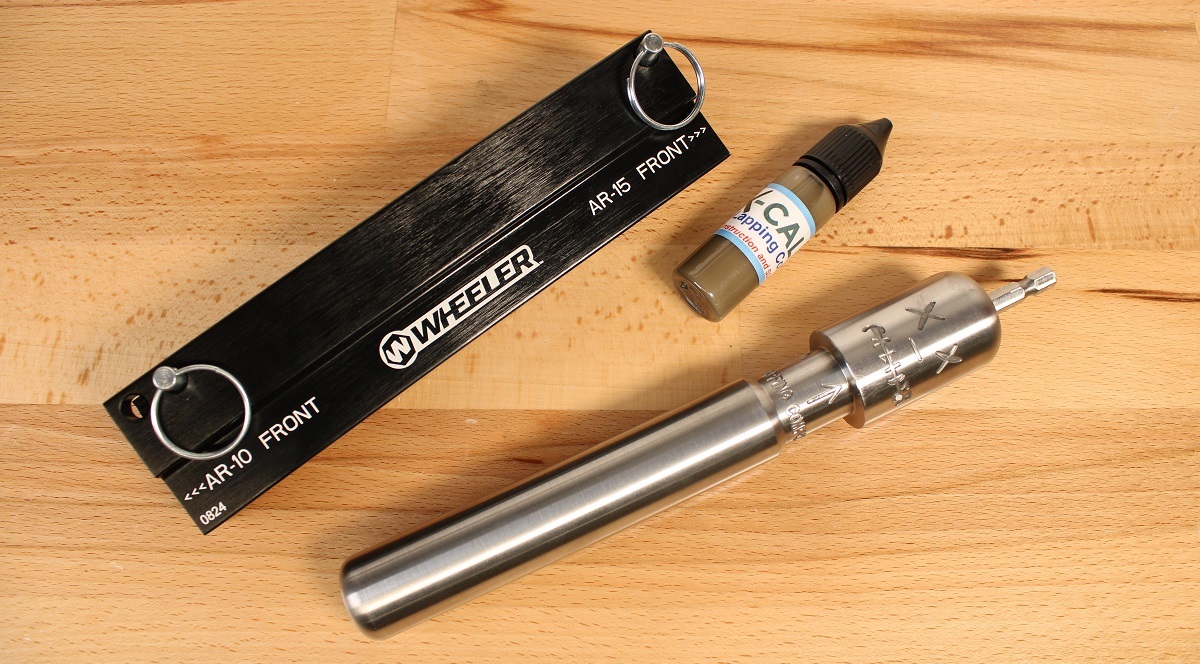
Like we mentioned above, you need a quality lapping tool. We strongly recommend the B.A.R.T 1.0 Tool from X-Caliber Barrel, pictured above. This lapping tool is precision-machined and made in the U.S., and it comes with the appropriate liquid lapping compound needed to square the face of the receiver.
You'll also need an AR-15 upper receiver vise block (available here) and a basic tabletop vise (like this one). The vise block and vise are required to hold the stripped upper in place while you work the receiver with the lapping tool. A reaction rod won't work for this, since the lapping tool must be seated inside the upper to align itself with the barrel extension housing while lapping.
Although the lapping tool can be worked by hand, we recommend getting an electric drill. Using a drill to spin the tool will greatly speed up the process. This will also help ensure even pressure is applied to properly square the receiver.
Lastly, you'll need some firearm lubricant. Stripped upper receivers can vary in their tolerances, and you may find it's a tight fit when inserting the lapping tool. Coating the lapping tool will aid with insertion. This will also help prevent the tool from marring or scratching the inside of the receiver.
1. Secure Receiver in Block & Vise
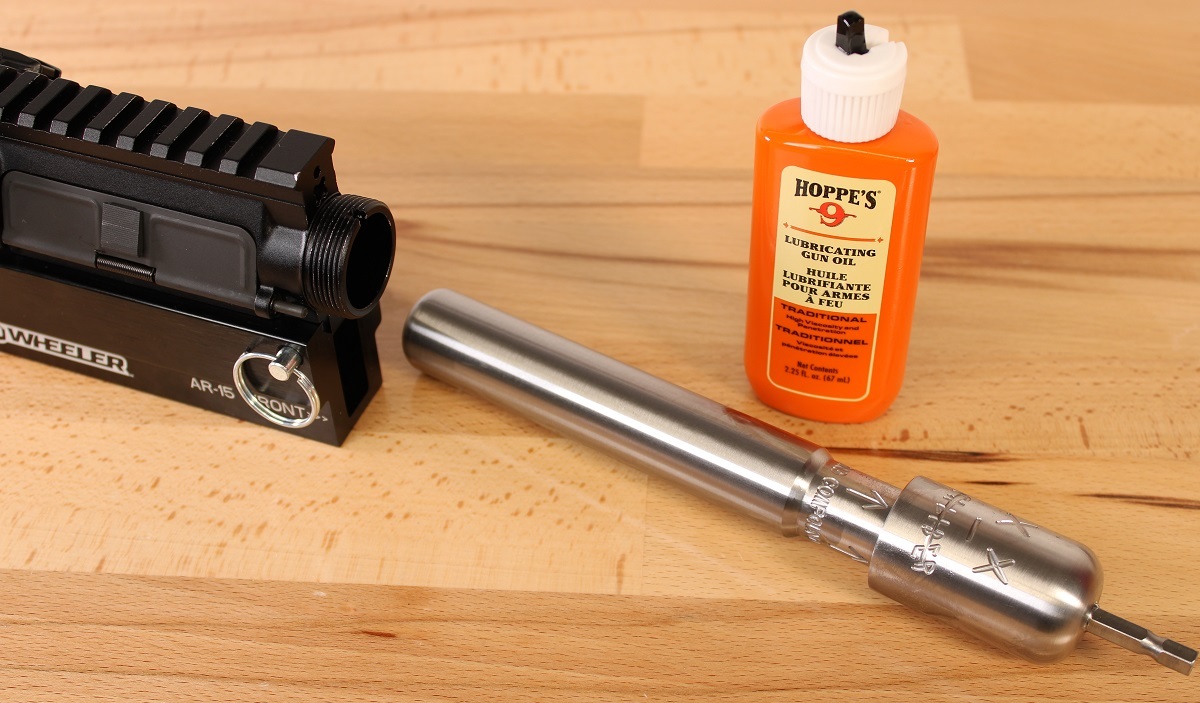
Secure your stripped upper in the receiver vise block so the barrel extension housing is facing outward. Then secure the block inside your vise.
2. Lube & Insert Lapping Tool, Apply Compound
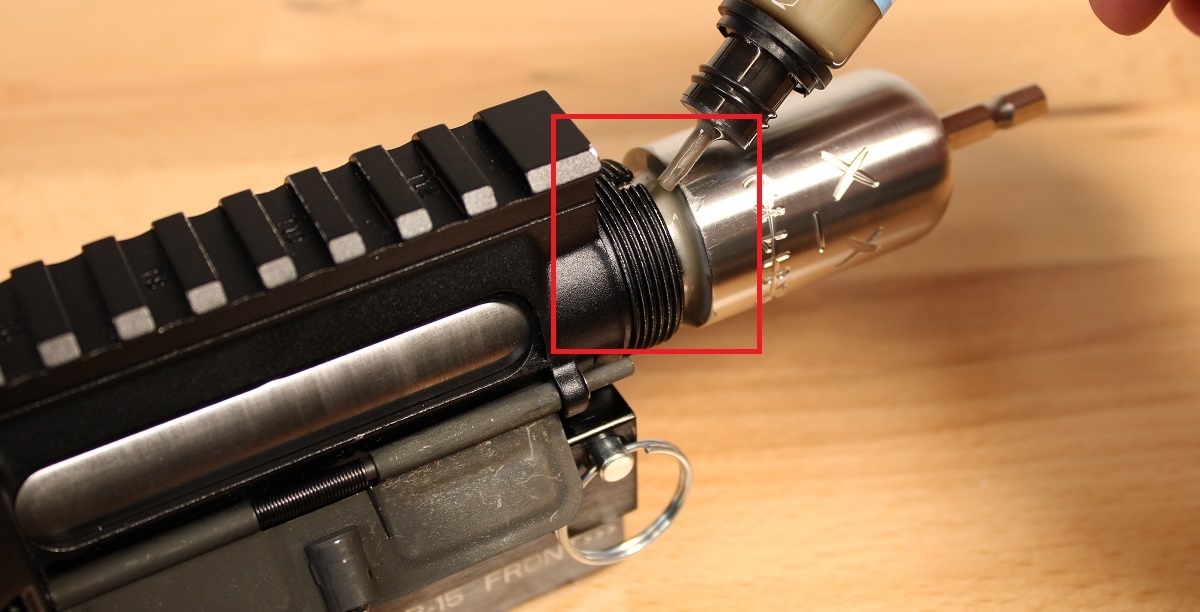
With the receiver secured, lightly coat the lapping tool's bar with lubricant, then insert the tool into the upper receiver. Slide the tool into the receiver until the rear of the head of the tool is nearly touching the face of the barrel extension housing.
Next, liberally apply lapping compound around the entire base of the tool's head.
3. Rotate Lapping Tool to Square Receiver Face
With lapping compound applied, secure your electric drill to the bit attachment on the head of the tool. Applying moderate pressur, push the tool up against the face of the receiver. Trigger the drill and rotate the lapping tool around the receiver's face.
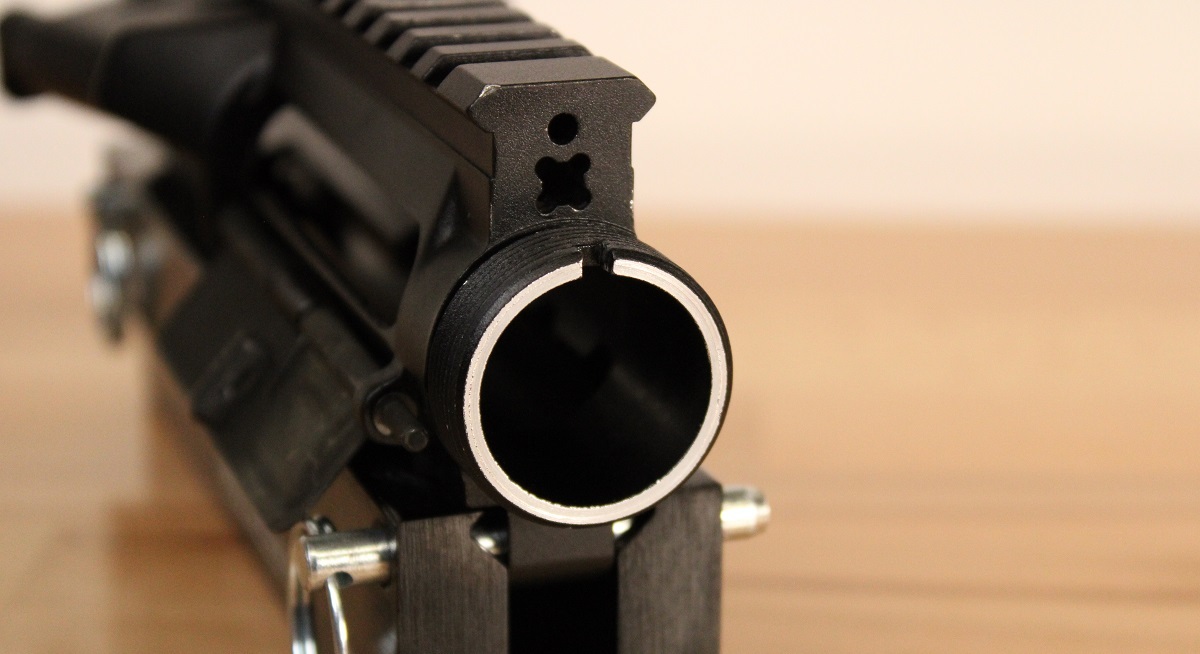
Allow the tool to work the face of the receiver for 8 to 10 seconds. Then back off the tool, wipe away the lapping compound, and inspect the face of the receiver. You should begin to notice bare aluminum showing through the anodized finish.
Reinsert the tool, apply more lapping compound, and continue working the receiver another 8 to 10 seconds. Repeat this process until a solid, uniform ring of bare aluminum is showing around the face of the barrel extension housing (pictured above).
4. Clean Off Lapping Compound, Install The Barrel
Once the face of the receiver is squared, be sure to thoroughly remove all lapping compound. Leaving any compound behind can damage the receiver when installing the barrel and handguard.
Need help installing your barrel? Follow this instructional guide next!
DISCLAIMER: If you are new to the world of DIY gun building, you likely have a lot of questions and rightfully so. It’s an area that has a lot of questions that, without the correct answers, could have some serious implications. At GunBuilders.com, we are by no means providing this content on our website to serve as legal advice or legal counsel. We encourage each and every builder to perform their own research around their respective State laws as well as educating themselves on the Federal laws. When performing your own research, please be sure that you are getting your information from a reliable source.