How to Zero a Red Dot Sight
A red dot sight
is the most popular type of optic for firearm owners, as it is easy to
use and provides a clear sight picture. They provide a clear,
wide-sighted picture, and they don’t suffer from parallax error (that
means your head and eye placement in relation to the binoculars doesn’t
affect what you see). But to squeeze that accuracy out of your new red
dot sight, you need to zero it so your point of aim matches your point
of impact.
How Red Dot Reticles Adjust
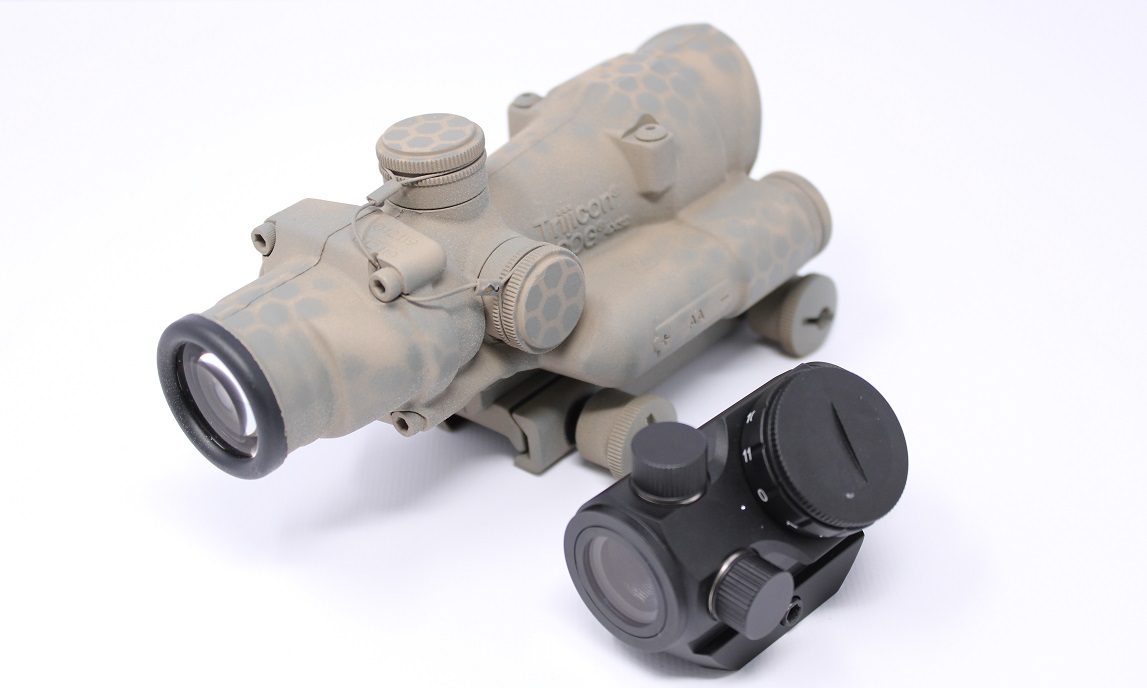
Is it advisable to only ever use iron sights and conventional rifle
scopes? Red dot sights are adjusted in the same way as any other sight.
This is done by making adjustments to the reticle placement, based on a
known distance to the target, using windage and elevation turrets or
buttons built into the red dot scope itself. For example, the Bushnell
TRS-25 (shown above) has adjustment turrets like the Trijicon ACOG rifle
scope next to it.
Whether you’re using a reflex, prism, or holographic red dot, their
differences don’t matter when you zero your red dot. Without getting too
technical, all red dot sights adjust so that the aim (where you’re
looking) matches impact (where the bullet hits), typically with quarter,
half, or 1-MOA clicks, like most other optics.
Understanding MOA
Why do you need to know this? Because your red dot sight instructions
probably indicate your reticle adjusts using MOA. If you’re trying to
make your firearm more accurate if you zero a red dot sight, you need to
convert the difference between point of aim and point of impact from
inches to MOA.
If you’re not sure what MOA is, we’re going to keep it simple: 1 MOA
measures 1 inch at 100 yards. That means 0.5 MOA is 0.5″ at 100 yards,
and a 0.25 MOA is 0.25″ at 100 yards. As distance decreases, so too does
the conversion from MOA to inches. At 25 yards, 1 MOA is 0.25″, 0.5 MOA
is 0.25″, and 0.25 MOA is 0.0625″. Want To Fully Understand MOA? Read The Full Guide Here.
How to Zero Your Red Dot
When it comes to MOA, you don’t need to understand all the
technicalities. All you need to know is how to convert inches to MOA, so
you can accurately zero your red dot, and make the necessary
adjustments downrange at different wind speeds and distances.
1. Convert inches to MOA
For example, if you’re zeroing a handgun with a new Sig Romeo 1 Red Dot,
and you’re firing at a target 25 yards away, aiming for the bulls-eye,
and your round lands 5 inches below the center, you can use this formula
to turn 5 inches into MOA so you can adjust your optic:
[Distance between aim and impact in inches] divided by [distance to yard / 100] = MOA.
Let’s plug in 5″ as our difference between aim and impact, and use 25 yards as our distance:
5 / [25/100] = ?
5 / 0.25 = 20 MOA low.
Let’s say you’re zeroing with a rifle at 100 yards and your round lands 5″ low once again:
5 / [100/100] = ?
5 / 1 = 5 MOA low.
Using this formula, you’re converting the inches you need to correct
your aim into MOA, so you can adjust. But how do you make those
adjustments?
2. Adjust your red dot’s reticle
The amount of MOA (minute of angle) that your red dot’s reticle moves
per adjustment click, in addition to the total number of MOA you need to
adjust, determines how many clicks you need to make to adjust your
point of impact. For example, if your red dot sight has a 1 MOA reticle
and you need to adjust your point of impact by 10 MOA, you would need to
click the adjustment knob 10 times.
By using the first example, we were able to deduce that we would need
to adjust the reticle on our handgun red dot by 20 MOA upwards. For a
red dot sight with 1-MOA turrets or buttons, you would simply need to
adjust it 20 clicks or button presses upwards. However, if each click or
turn only corrects by 0.5 MOA then it would be double that amount, or
40 clicks. And if it’s 1/4-MOA (which is common), it would quadruple the
amount, or 80 clicks.
If we use example #2 as a guide, we would make 5 clicks upward with
1-MOA adjustments, 10 clicks upward with 0.5-MOA adjustments, and 20
clicks upward with 1/4-MOA adjustments.
Turret Adjustment
To ensure you are adjusting your red dot scope in the correct
direction, always click the reticle’s adjustment turrets or buttons in
the direction you want to shift your point of impact. So for example, if
you’re aiming low, you should move the up/down (elevation) adjustment
up. If your rounds are landing left of the target, you would then move
your left/right (windage) adjustment to the right.
Save Ammo When You Zero a Red Dot
Now you know how to convert inches to MOA, and you know how to input
your adjustments into your reticle to zero it. But how do you make
zeroing easy? You might install your red dot sight and find that even at
25 yards, your un-zeroed reticle is so far off that you miss
completely. This is a more common problem than you think. And you need a
way to easily measure the difference, in inches, between your aim and
impact on the target itself.
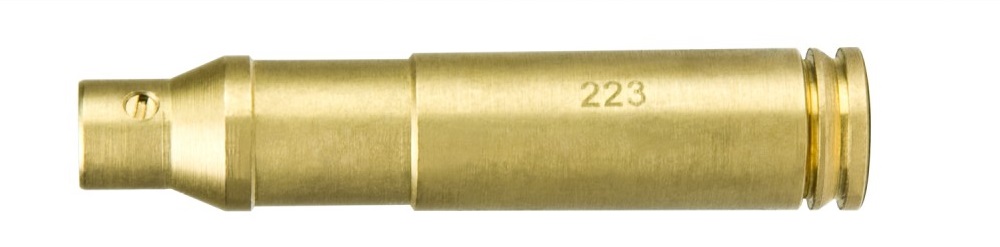
Get a laser boresight
This writer spent eight years in the military, sending thousands of
rounds to targets at the qualification and zero ranges. I am here to
tell you, having ran ranges and having helped hundreds of soldiers zero
their red dots, that you absolutely need a laser bore sight. Missing the
target and trying to guess how far you’re off range—and then making
big, blind adjustments to try and get on paper—will waste time, targets,
and money.
So why is laser bore sight so important? A decent laser bore sight
costs about as much as a couple rounds of loose ammo, and it’ll save you
boxes of ammo. Using the bore sight, you’ll get an easy-to-read
estimation of where a live round will land on your target relative to
your point of aim. You can then easily adjust your reticle and
familiarize yourself with your adjustment knobs or buttons, without ever
having to pull the trigger. A bore sight can get you to an
almost-perfect zero within 50 yards, requiring only minor adjustments,
and you can zero your red dot fully at a 25-yard range.
Use a zeroing / sighting target
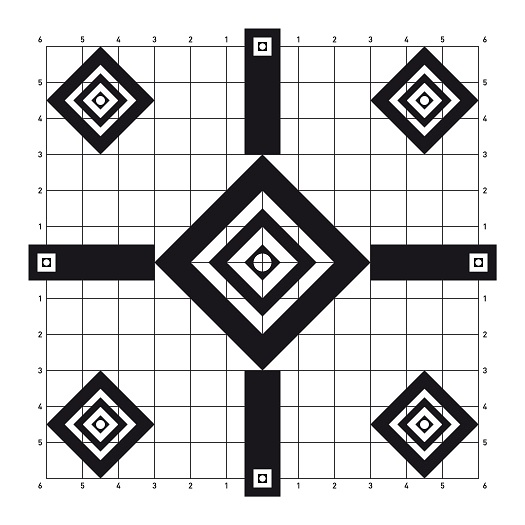
Even if your bore sight gets you your aim close to impact, you should
always confirm your zero at a known distance. And chances are, you’ll
want to send rounds on target to confirm your accuracy either way. To
make zeroing at the range with live ammo easy, you should grab some
Sighting Targets. These targets come printed with perfect 1″ squares,
making MOA adjustments at known distances—like 25, 50, or 100
yards—super easy. You don’t even need a spotter scope or a laser
pointer. Just count the blocks between your point of impact and the
center of the target to measure your difference in inches.
FAQ
Q: Can I zero other optics with these instructions?
A: Yes. Red dot scopes, iron sights, and variable or fixed-power rifle
scopes, all adjust using the same basic principle: Adjustment point of
aim in order to shift point of impact, using windage and elevation
adjustments. Variable-power scopes require a bit more consideration when
zeroing.
Q: How can I calculate the number of clicks I need to adjust my reticle?
A: Multiply the observed difference between your points of aim and
impact in MOA. Multiply that number by the MOA per click listed on your
buttons or turrets. If it’s not listed, check the manual for your optic.
Example: If you observe a 20 MOA adjustment is required and your
turrets say “half an MOA” or “0.5 MOA” per click, multiply 20 by 0.5.
This would be 40 clicks.
Q: What if my red dot sight uses MILs instead of MOA?
A: MILs are the equivalent of MOA in the metric system. One MIL equals 1
centimeter at 100 meters, whereas one MOA equals 1 inch at 100 yards.
If your red dot rifle uses MILs, then simply measure your difference
between aim and impact in centimeters instead of inches. To make
adjustments, you should set the zero at a known distance of meters,
rather than yards. You will then be able to determine how many mils per
click your reticle needs.