
The Best AR-15 Coatings Compared
Posted by Gun Builders Depot on Apr 27th 2021
Black rifles deserve the name: They're almost all, well, black. Other parts (like our raw 80% lowers) come unfinished so you can add your own coating. Even though they all look alike, there are loads of finishes available for your AR-15 and other guns. Which ones can you apply at home, and how do they compare? Learn how each coating is applied and its qualities and performance, right here.
WARNING: The process of applying certain AR-15 coatings or finishes may be dangerous. Some should only be applied by professionals. Personal protective equipment (PPE) is required when painting, anodizing, or coating any firearm parts.
Hardcoat Anodizing
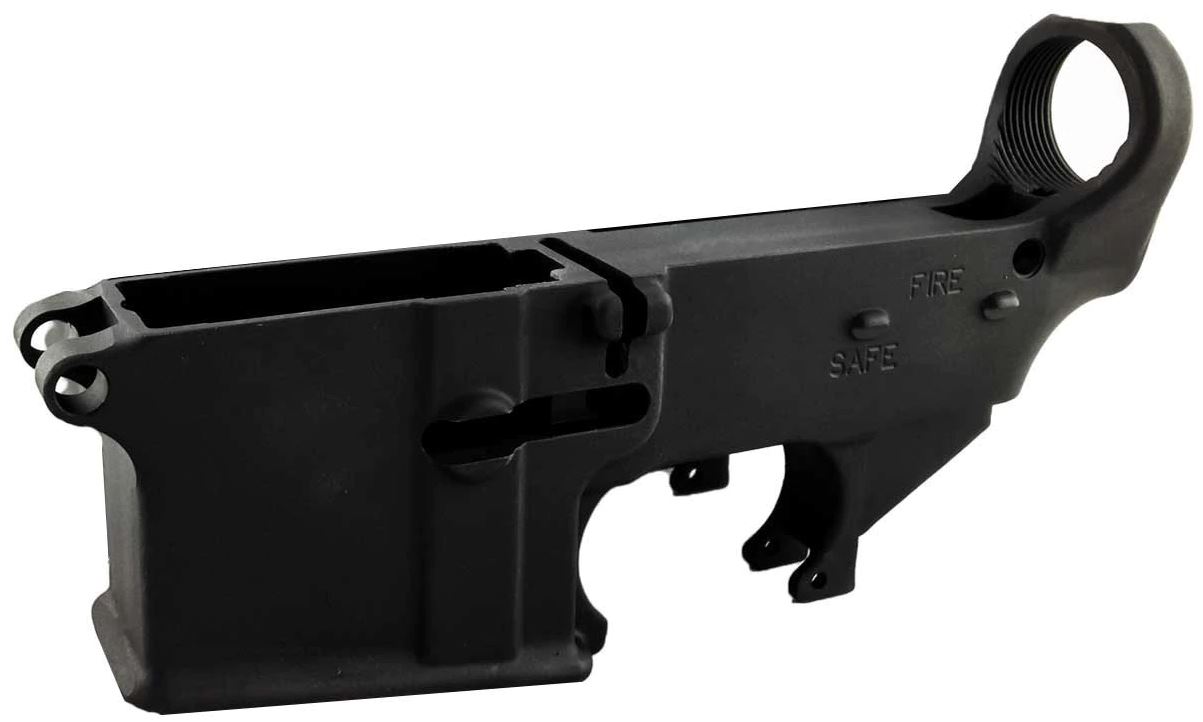
Hardcoat anodizing is used on virtually all AR-15s, in some way.
If you own an AR already, or if you're shopping around for accessories like an aluminum handguard, then you've already seen the ubiquitous hardcoat anodized finish. Often advertised as "Type III" or "mil-spec anodizing", this matte black coating is found on just about every AR-15 in circulation, one way or another. It's aesthetic, incredibly durable, and easy to apply with a uniform color. That means when you're shopping around for AR parts from different makers, they'll all match together quite nicely. After all, you don't want a rifle or pistol with an upper, lower, handguard, and buffer tube that all look different.
Finish Specs/Features
- Applied with electro-chemicals, creating strong bond with the metal.
- Surface is harder than tool steel, allowing for great wear performance.
- Application creates a relatively universal matte black, "tactical" finish.
- Retains oil and grease, providing further protection against wear over time.
- Extremely high temperature resistance, ideal for uppers and handguards.
Anodizing Color Options
Hardcoat anodizing is just the most common finish you'll find on an AR. But it's not the only anodizing option available. Anodizing can produce myriad colors and finishes, from matte to high gloss. You'll often find (pricier) custom AR-15 receivers and handguards available in greens, blues, reds, or a combination of colors.
Differences between types I, II, and III
Type I anodizing is the least robust, used on small components. This can be applied at home with "DIY" kits. It is rarely found on major-wear parts like receivers. It produces a finish approximately 0.0001" thick and uses chromic acid instead of sulfuric acid. Type II anodizing uses sulfuric acid to create the coating, which is still achievable at home with extreme safety precautions. Type II coatings typically measure 0.0002" to 0.0006" thick. Type III is the most robust finish. Sulfuric acid is used with cooling, greater electrical current, more exacting measurements, de-oxidizing agents, and other additives. Type III, or "Hardcoat" finishes are about 0.0005" to 0.003" thick.
Duracoat
Duracoat is a DIY or professionally applied painted coating for polymer or metal.
Duracoat was developed by Lauer Custom Weaponry in Wisconsin for application on tactical rifles like the AR-15. If you want to add a custom patterned or multi-color finish to your rifle, this is probably the firearm coating you'll want to go with. It's the easiest-to-apply coating compared to the others we describe in this guide. Duracoat requires two chemicals - a hardener/reducer, and the color agent - to be mixed to produce a liquid paint that can then be sprayed onto the firearm to coat it.
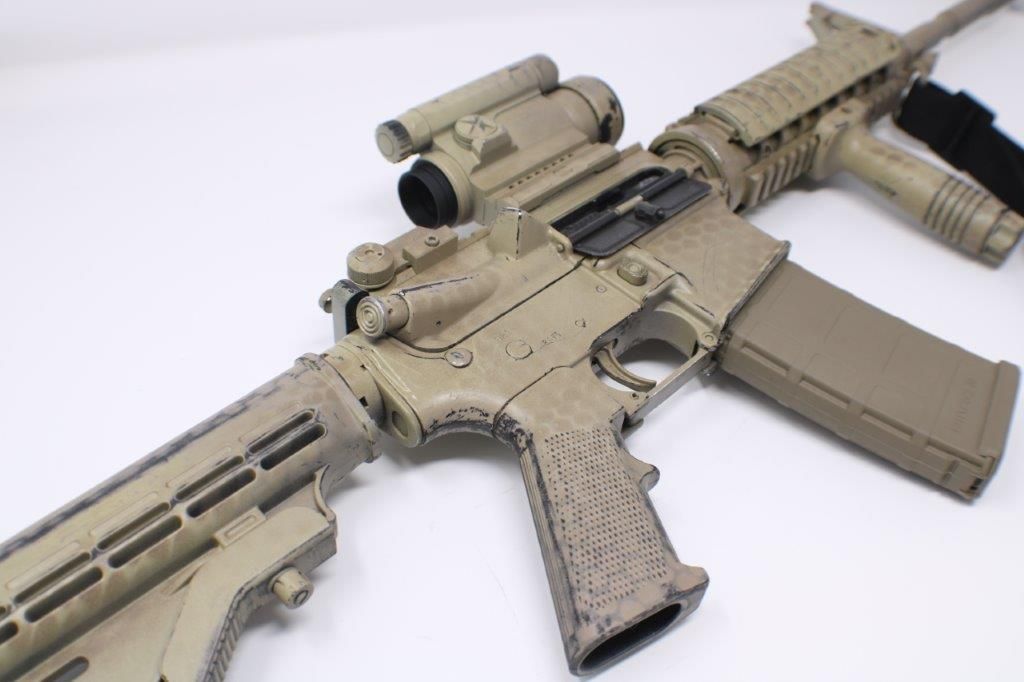
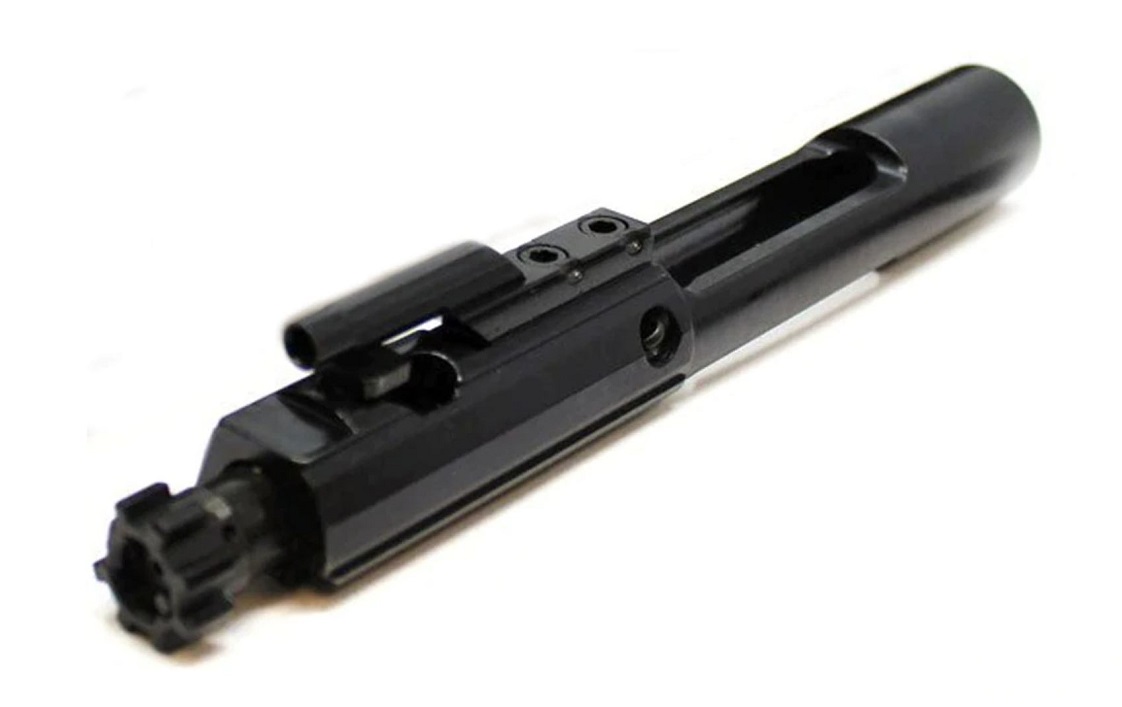
Example of multi-color / pattern application
The rifle we've illustrated above is an employee's AR-15 that was coated with a mixture of Duracoat tan colors before being "battle-worn". Look closely and you'll find a mesh pattern applied over the base layer of lighter tan, followed by a darker tone. Duracoat is easy to apply at home and requires no experience. Only good prep work and patience are required.
Finish Specs/Features
- Produces a relatively matte finish
- Doesn't require a top coat or clear coat
- Easy to apply at home as "DIY" finish
- Produces a thin, not "goopy", but tough coating
- No specialty equipment required for application
- Very high temperature and abrasion resistance
- Full cure/harden time is approximately 4 to 5 weeks
- Similar performance and protection as hardcoat anodizing
Application
Duracoat can be applied in a shop setting by manually mixing the agents required to produce liquid paint. This involves mixing Duracoat hardener/reducer with your chosen paint color, then applying it via an air brush or high-pressure, low-volume (HPLV) spray gun, just like how you would spray automotive paint.
We strongly recommend (based on personal experience) simplifying the process greatly: Duracoat sells "DIY" spray aerosol cans that come with the paint color and hardener/reducer together in the can, along with a small container of cleaning solvent/degreaser to prep the firearm being painted. The spray can is activated by depressing a red button underneath the aerosol can, which releases the hardener/reducer, allowing the paint to be mixed and sprayed. Once a can has been activated, the paint within is useable for up to 4 weeks.
Spraying is simple: Apply 2 to 3 coats approximately 30 minutes apart. We strongly recommend using a heat gun between coats to help off-gas each paint layer. This helps to produce a uniform, thin-but-strong coating/ Allow the firearm to dry for at least 24 hours before handling. Duracoat can be handled after one full day, but true hardening and a full cure requires at least 4 to 5 weeks. A hot, dry climate will accelerate this cure time.
Prep
Like all paint projects, prep constitutes 90% of the results. You must fully degrease your firearm before applying Duracoat. Heat flashing isn't required, but once you've degreased, you shouldn't handle the firearm with bare hands. Any oil from your fingers will ruin the finish being applied. Disassembly isn't required before painting, as Duracoat cures to a fine finish and isn't "gluey" or sticky while curing. You can tape up optics, fasteners, and the action, trigger, and muzzle before painting. That's how we applied a uniform coating to the AR-15 shown above.
Cerakote
Cerakote is like a more "high-performance" version of Duracoat. It is more difficult to apply.
Cerakote applies almost like Duracoat: It's a painted finish that is applied with a spray gun, utilizing hardener and reducing agents that must be mixed and activated with liquid pigment. Unfortunately for the "DIY"-er, that's where similarities end. Cerakote uses ceramic, not just paint, in its chemical composition. That means applying Cerakote requires professional equipment, like an HPLV gun with an air compressor (no aerosols are available), a sandblaster for surface prep, and a curing oven for proper application.
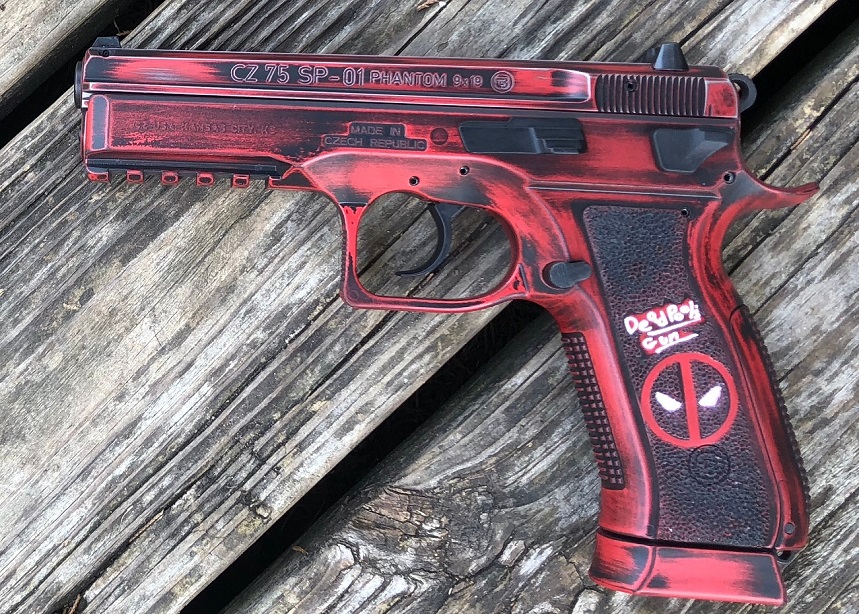
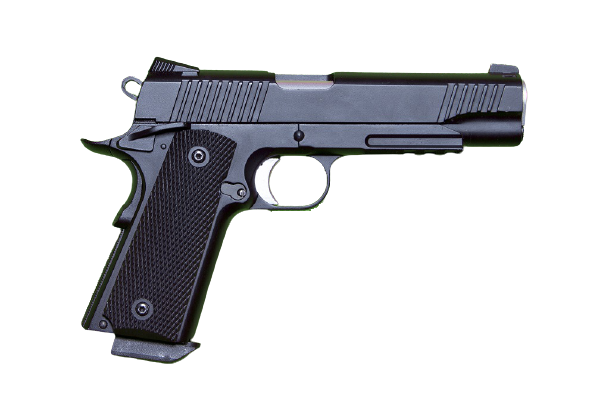
Like Duracoat, Cerakote produces a fine, thin finish that's about as strong as a hardcoat anodized treatment. It requires no top protective coat or clear coat, and, like the rather creatively painted handgun shown above, it can be "battle-worn", layered with different colors, and patterned to produce custom designs and themes.
Finish Specs/Features
- Applied as a liquid paint
- Uses ceramic for hardness
- High-performance wear resistance
- High-performance heat resistance
- Requires professional equipment
- Cures in as little as five days
Application
These steps should not be used to apply Cerakote. They're informational only, designed to give you an idea of how Cerakote is applied - and perhaps, to illustrate why it's best left to professionals, not to be applied as a "DIY" project unless you own the equipment and have experience with commercial prep and paint.
Blasting/Prep
Parts to be Cerakoted must first be sandblasted. Cerakote recommends aluminum oxide or garnet. Metal parts (steel, aluminum, upper/lower receivers and the like) should be blasted at 80 to 100 PSI. Polymer parts (pistol grips, rail attachments, polymer receivers) should be blasted at 30 to 40 PSI. After blasting, all parts should be de-greased and off-gassed in an oven at 200 degrees for 30 minutes.
Mixing and Spraying
Cerakote can be mixed at 24:1 paint-to-hardener for a flat finish, 18:1 for a matte finish, and 12:1 for semi-gloss. It should be sprayed at about 13 PSI from your HPLV gun with a 0.8mm tip.
Baking and Curing
Cerakote provides different types of paint that have specific cure temperatures and times. Generally, all Cerakote requires curing between 150 and 250 degrees for approximately 2 hours. True cure requires 5 days of settling, but after oven-curing, firearms can be handled and shot without risking damage to the Cerakote.
Water Transfer or "Hydro-Dip"
A unique painted finish that can apply complex designs and graphics.
Hydro-dipping has been in use for years, and recently it's gained favor in the firearm community for its ability to apply complete graphics and pre-painted designs with extreme precision. Hydro-dipping is not exclusively a firearm coating, and it isn't as tough or resistant to heat as anodizing, Duracoat, or Cerakote. It'll typically require a high-temperature clear coat to function as a proper firearm finish.
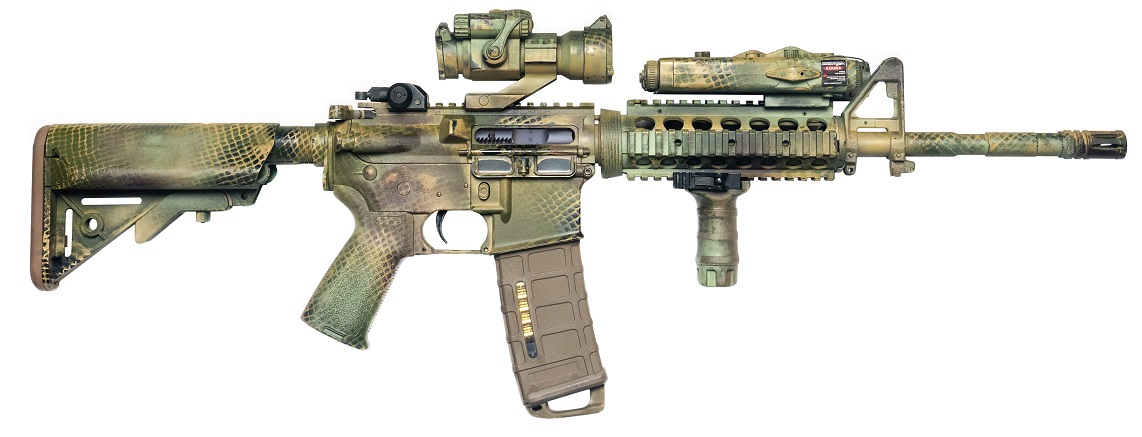
The unique benefit to using water transfer printing is the ability to apply complex camouflage patterns (like Multicam or Kryptek) or even full graphics (like an American flag) with perfect representation at a relatively affordable price. The pattern is applied instantaneously, with no need to pay an artist or experienced painter to apply patterns using layers, stencils, and multiple cure times.
Finish Specs/Features
- Degreasing prep is required
- Can be used to apply camo patterns
- Paint is applied first to hydrographic film
- Pattern or design lays atop distilled water
- Applied in one "dip" as a complete coating
Application
To apply water transfer prints to a firearm, it must first be prepped as any other to-be-painted surface must be: Degreased and not handled with bare hands afterward. To apply the paint, the design or pattern is first applied to a polyvinyl alcohol film, which is then laid atop distilled water. The film dissolves as an activator is sprayed onto it. This promotes adhesion to the firearm and leaves the pattern atop the water as a liquid layer, ready for application. The firearm or parts are then dipped through the pattern and into the water, to apply the coating. Once dry, the painted surface can then be sealed.
Durability
Once applied, hydro-dipped paint can withstand moderate temperatures (325 degrees F) so it must be properly coated with a high-temp clearcoat to function as a proper firearm treatment.
Parkerizing / Phosphating

Found on all truly "mil-spec" AR-15 barrels.
Phosphate coatings have been in use since WWII. If you're a fan of original 1911's or old bayonets, then you recognize this coating as "Parkerizing." Phosphate is a chemical conversion coating, meaning it transforms the raw surface of carbon steel like bluing or anodizing. The result is a tough, grippy, flat-textured gray or black finish that absorbs and retains oil while resisting water and high heat with great performance. Phosphate is only applied to the exterior surfaces of a firearm, so chrome lining is sometimes used to line barrels that are phosphated. Chrome lining provides direct insulation against heat and abrasion.
Qualities of Finish
- Heat-applied chemical conversion.
- Bonds directly with raw steel surface.
- Produces a flat gray or black finish.
- Retains oil and grease while repelling moisture.
- Provides very high heat and abrasion resistance.
- "Mil-spec" barrel coating found on many AR barrels.
Application
At-home phosphating/Parkerizing can be accomplished, and "DIY" Parkerizing Kits (like this one from Lauer Custom Weaponry, the maker of Duracoat) are available. If you want to phosphate a rifle barrel, you'll need a large stainless steel container. Smaller parts (like the slide or barrel on a 1911) can be coated using some uncoated stainless cooking ware.
The parks to be coated will first need to be completely free of any other coatings and degreased. Specific instructions will indicate how to mix the solution for coating, but generally, you'll need to submerge your parts in the solution while heating the chemical bath to around 170 to 190 degrees F. This will activate the zinc or manganese elements in the solution to convert into phosphate on the raw steel.
WARNING: The acid used for Parkerizing will dissolve the steel on your firearm if left unattended too long. Do not leave the parts submerged any longer than is necessary to achieve a uniformly gray or black finish. The chemical conversion process will end once the solution stops reacting and boiling/bubbling.
WARNING: It is incredibly important that you only use stainless steel containers to apply this coating. Using a carbon steel or iron container will result in the container dissolving while you're interacting with this heated solution. Very bad stuff will happen. 'Nuff said.
QPQ Nitride / Melonite
Found on new bolt carriers and barrels, this treatment has begun replacing phosphate.
Nitride, commonly branded as Melonite, is a newer chemical conversion coating similar to phosphate, but with even better wear and temperature resistance. Unlike hardcoat anodizing and phosphating, this treatment can be applied to the interior portion of barrels and moving assemblies (like bolts and bolt carriers). It also provides natural lubrication with a glossy, "slick" surface achieved after the coating is applied, unlike the porous, matte finishes of the former two coatings.
Finish Specs/Features
- Heated caustic chemical conversion coating.
- Replaces phosphate and chrome lining in barrels.
- Glossy finish provides natural lubrication for moving parts.
- Replaces phosphate on bolts and bolt carrier groups.
- Extremely high wear and temperature performance.
- Found on most modern rifles and many of our build kits.
Application
WARNING: Nitriding uses dangerous chemicals and cannot be done at home safely
Nitride treatments require incredibly high temperatures, between 650 and 1,050 degrees F, to activate the chemical conversion process. To coat a firearm or part, it must first be degreased and pre-heated. The part is then submerged in the super-heated salt bath, where the nitride chemical coating is precipitated into the surface of the raw steel. This process essentially produces an incredibly tough layer of oxidation, similar to bluing and phosphating, albeit with must more dangerous chemicals and higher heat. Speaking of bluing...
Bluing
For carbon steel parts.
Bluing isn't often found on modern AR-type rifles and pistols, but that doesn't mean you can't or shouldn't apply this coating to your custom gun. It's one of the oldest, most tried n' true firearm finishes and it provides an aesthetic, glossy or matte blue-black finish to boot. It's also incredibly easy to apply, with affordable DIY bluing kits available that can be applied at room temperature ("cold bluing") or with some heat ("hot bluing") with only basic degreasing and minimal prep. Bluing isn't as tough as an anodized, parkerized, nitrided, or painted finish, but that's not to say it's not durable. Bluing has a very high temperature resistance and good wear and abrasion resistance.
Bluing is also so easy to apply (and raw steel takes the chemical process so well) that its durability is essentially moot: Any scratch or marred finish can be corrected by simply dabbing a bit of cold bluing solution over the ruined finish, with no obvious repair noticeable once corrected.
Qualities of Finish
- Chemical conversion oxidation coating.
- Can provide a matte or gloss black finish.
- Provide an easy-to-achieve, uniform finish.
- Retain oil and grease and resist water.
- Protects carbon steel from rusting.
- Incredibly easy to touch up.
Application
Cold and hot bluing both use a chemical reaction with different agents. Cold bluing uses selenium dioxide to convert the steel's surface. Hot bluing uses heated liquid alkali salts (like nitriding) to oxidize the steel's raw surface. This caustic salt solution is dangerous if handled without protection. Gloves and glasses must be worn when handling it.
Cold bluing requires numerous coats with burnishing in between. Repeat the below process until the part has achieved a desirable finish with no blotchy or uneven patches. The finish should be protected with gun oil after application. No cure or "dry" time is required.
- Wash the part with Cold Blue applied to a cotton rag.
- Wipe away from the solution after leaving it for 60 seconds.
- The finish may be blotchy; this is okay.
- Burnish the surface with steel wool.
- Wipe it down to remove steel wool debris.
- Reapply Cold Blue for another 60 seconds.
- Wipe away again, and inspect the finish.
Hot bluing requires just a single application with typical degreasing. The surface should be burnished with steel wool to improve binding of the oxidized layer. Use either a retail Hot Blue solution, or mix two parts of sodium hydroxide to one part potassium nitrate and one part distilled water (2:1).
Follow the steps for hot bluing:
- Heat the Hot Blue solution to 275 to 295 (F). It should be boiling.
- Wrap steel wire around the part to be blued.
- Carefully submerge the part in the bath.
The heated caustic solution is volatile when boiling and likely to splash hot salts. Again, wear PPE (gloves, glasses, and protective clothing) and use caution when dipping the parts in the bath.
- Approximately 25 to 30 minutes of boiling is required.
- Once a dark, even finish has been achieved, remove the part.
- Quench the part in cold distilled water to stop the reaction.
- Wipe the part down with gun oil to protect the new finish.
FAQs
What's the easiest, most affordable "DIY" firearm finish out of all these?
A: We recommend Duracoat or hot bluing solution. Duracoat will be best for applying a custom finish to your long guns and AR-type firearms, and for raw (uncoated) 80% lowers you may have fabricated. Duracoat can easily resemble the color and consistency of an black anodized, parkerized, or nitride finish.
What's the overall "toughest" finish available?
A: For chemical-converted coatings that bond with the raw surface of an alloy, that would be nitride. For painted finishes, Cerakote edges out Duracoat with slightly better wear performance, thanks to its ceramic composition.
Can I really apply bluing solution to my AR-15?
A: Bluing will not work on aluminum or stainless surfaces, but you can absolutely cold- or hot-blue a carbon steel barrel and bolt carrier, achieving a unique, easy-to-maintain finish that is not often found on tactical rifles.
Do forged and billet AR receivers get the same coating?
A: Yes. Any aluminum AR upper and lower receiver, whether forged or billet, will typically receive a hardcoat anodized finish. That's what you'll find on all our coated 80% lowers (that are not polymer) and our barreled upper assembliesand aluminum handguards.
Can I paint a polymer AR part?
A: Yes. Polymer 80% lowers and any plastic accessories or attachments (like pistol grips) will take painted coatings like Duracoat, Cerakote, and hydro-dipped coatings just as well as a steel or aluminum component. You should take care when degreasing polymer components, though. Some degreasing solutions can react with the polymer and damage the component. Use pure alcohol and distilled water to rinse, in this case.
What's the best degreaser for prepping my firearm before coating or painting?
A: We recommend pure alcohol for all surfaces. Certain commercial degreasers can leave residues and films, which will inhibit the application process of just about every coating we've discussed in this guide. Parts with existing coatings should be physically sanded, sandblasted, or stripped with paint stripper, then degreased with alcohol to remove debris and any residue. You can also off-gas parts after degreasing by heating them at 150 to 200 degrees for 20 to 30 minutes, to ensure no residue is left behind.
What coatings can I apply to stainless steel?
A: Stainless is typically best left "raw". After all, this alloy is great at resisting corrosion and high heat as it is produced. If you want to apply a custom coating to, say, a stainless barrel, we recommend Cerakote. It provides higher temperature performance than Duracoat, and stainless cannot take a chemical conversion coating like phosphate or nitride.
DISCLAIMER: If you are new to the world of DIY gun building, you likely have a lot of questions and rightfully so. It’s an area that has a lot of questions that, without the correct answers, could have some serious implications. At GunBuilders.com, we are by no means providing this content on our website to serve as legal advice or legal counsel. We encourage each and every builder to perform their own research around their respective State laws as well as educating themselves on the Federal laws. When performing your own research, please be sure that you are getting your information from a reliable source.