
How to Disassemble and Clean The AR-15 BCG
Posted by Gun Builders Depot on May 19th 2020
The AR platform consists of various calibers and modified rifles and pistols. The 5.56 NATO, .223 Remington, DPMS .308 and AR-10 all share the same bolt carrier group (BCG) design. This guide covers how to disassemble, clean, and reassemble your AR's bolt. Grab some cleaning equipment and tools, first. Here's what you need:
Recommended Tools and Cleaning Supplies
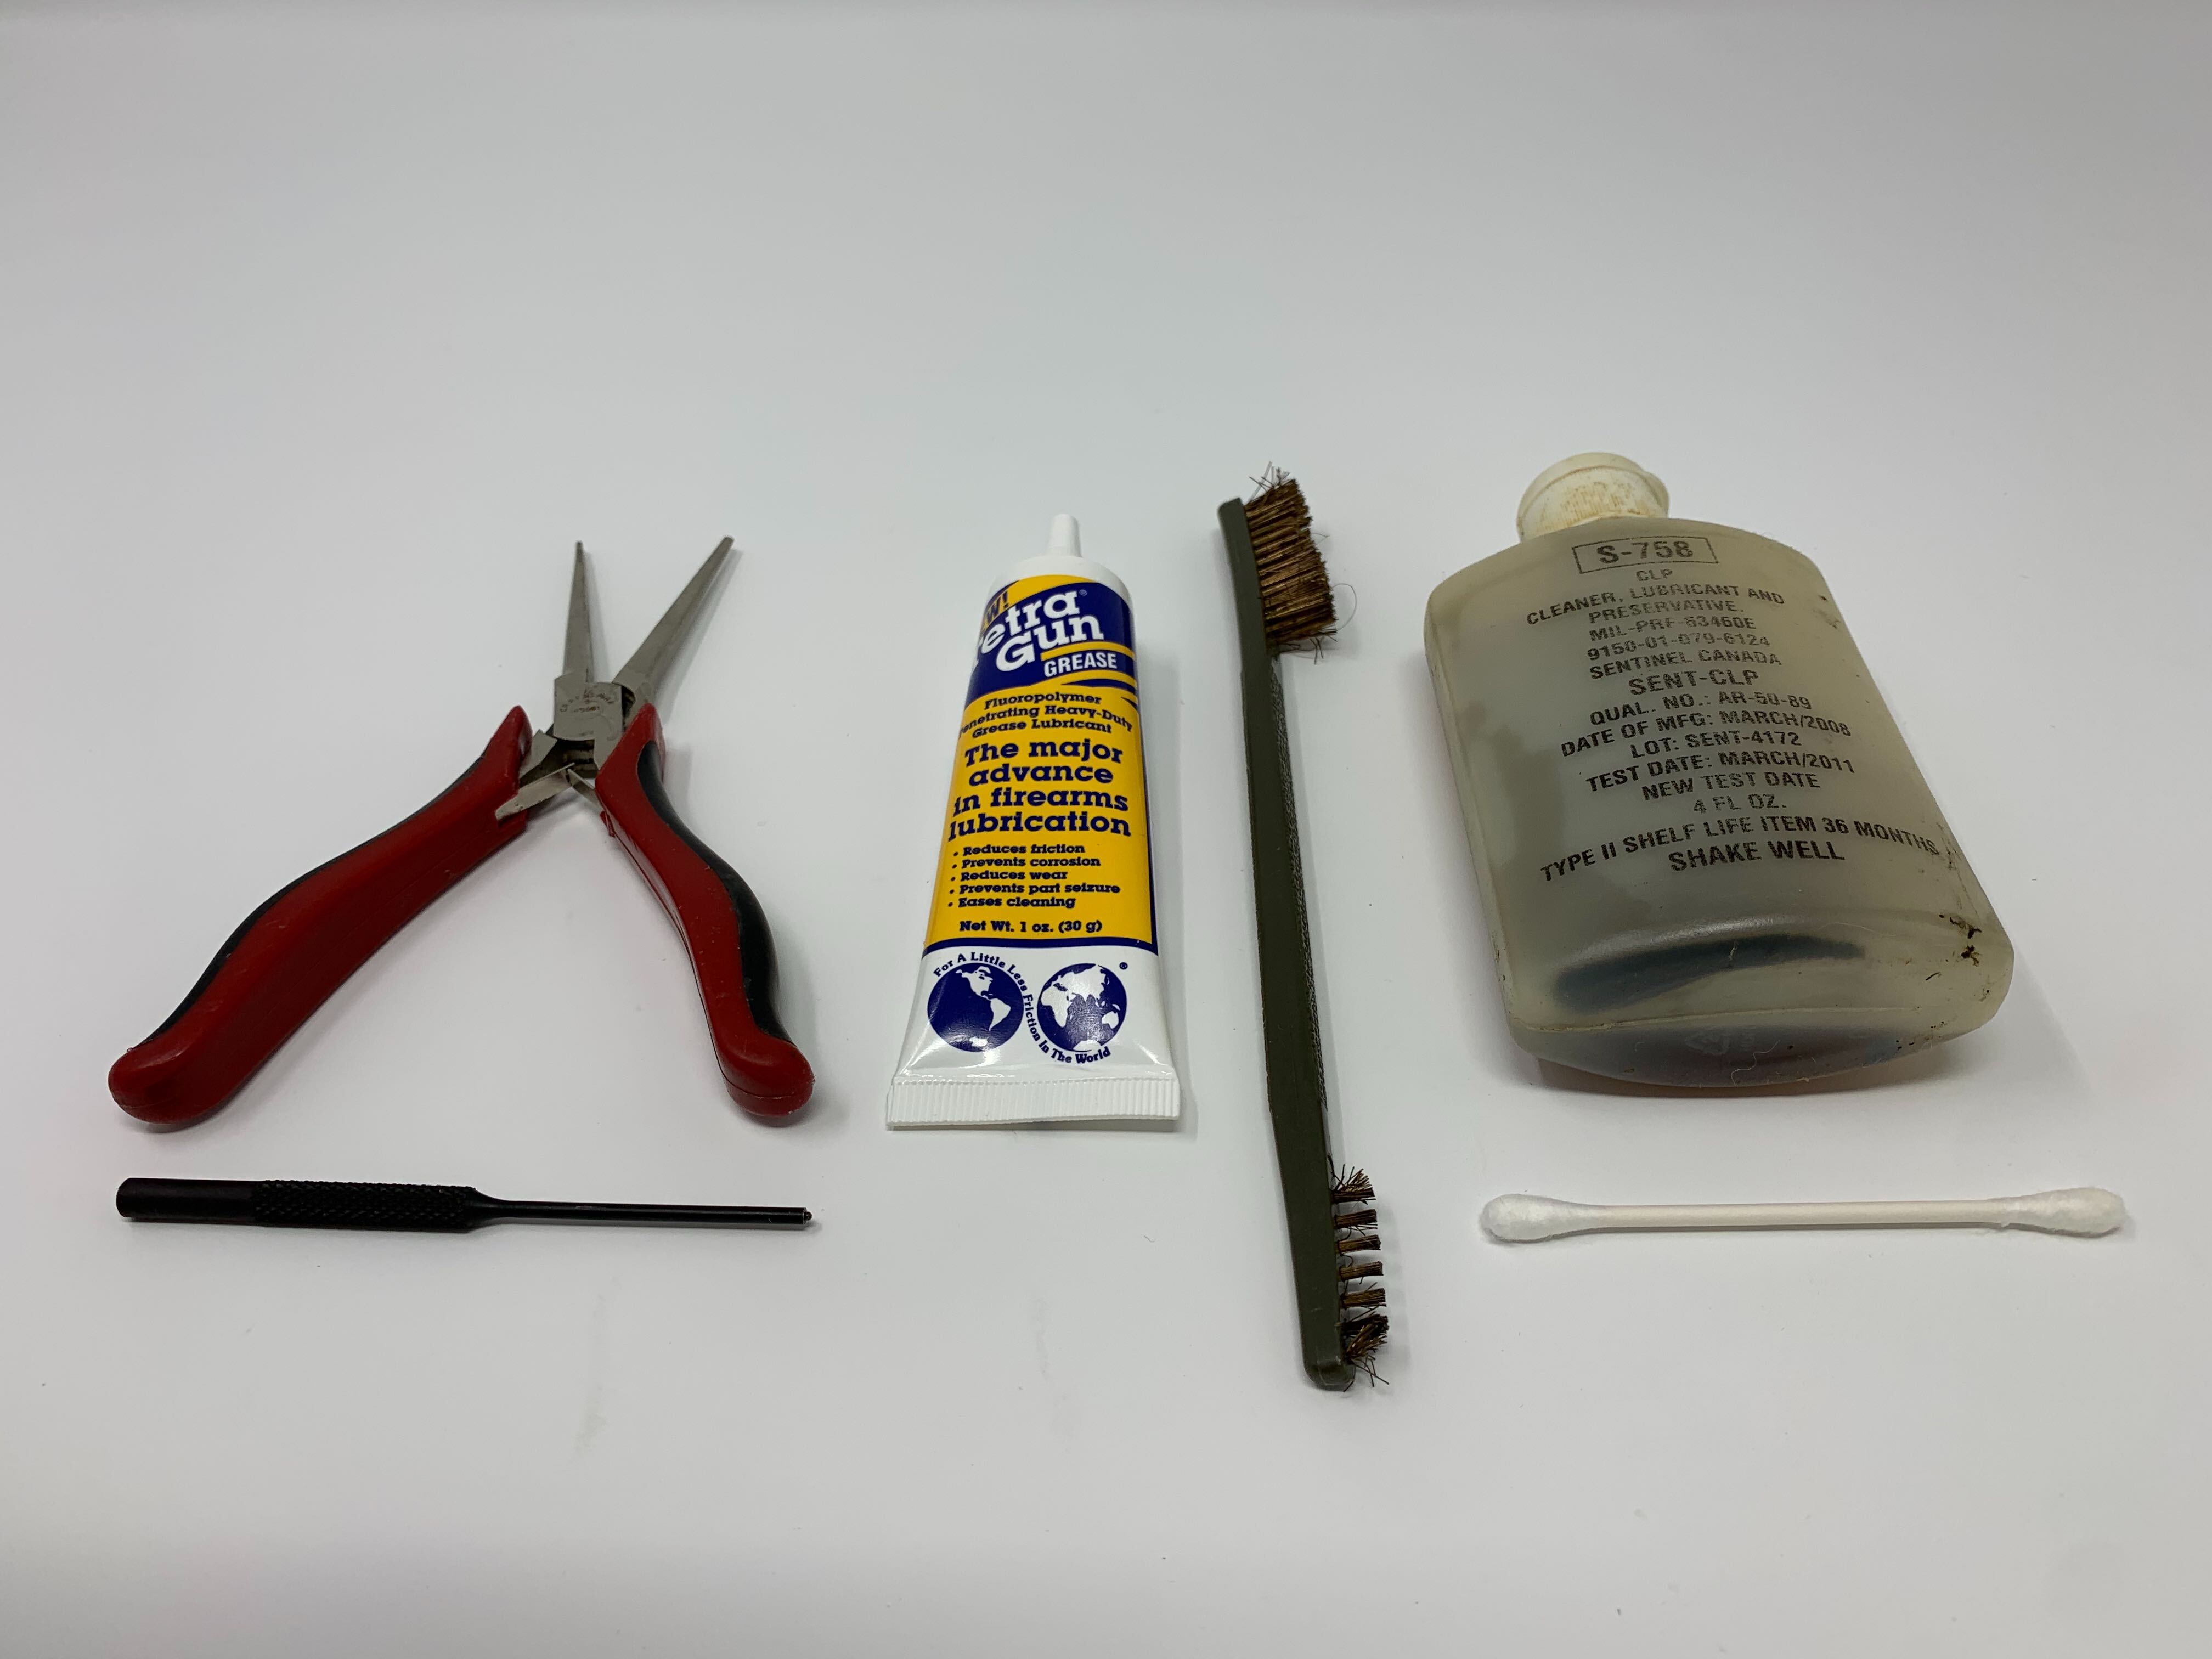
- Pliers and Punch. Both will help with removing and reinstalling the firing pin retaining pin, and the ejector pin.
- Solvent and Lube. Solvent is required for removing carbon fouling. the bolt and carrier require lubrication to run reliably, too.
- Wire brush and Q-Tips. Carbon build-up is stubborn and brittle, so a wire brush is often necessary to get it removed. Q-tips are great for removing debris and dirt in small areas of the bolt and carrier.
Bolt Disassembly
Step 1: Remove Firing Pin Retaining Pin
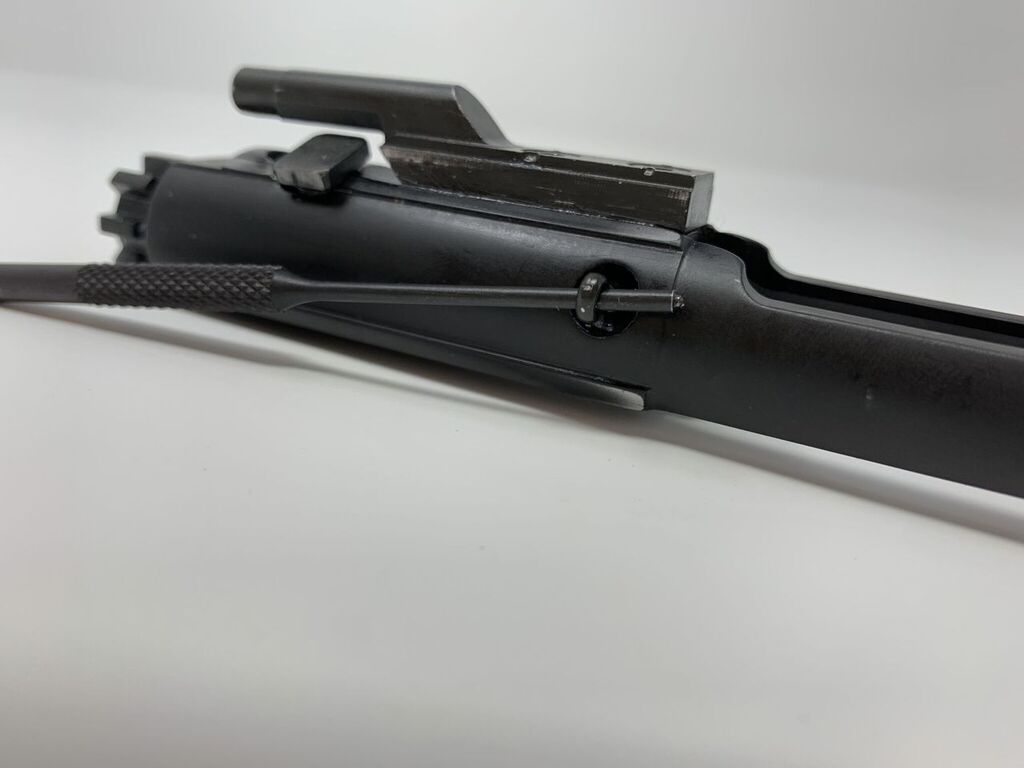
Use pliers or a punch to remove the firing pin retaining pin from the left side of the carrier.
Step 2: Remove Firing Pin from Bolt
Simply tap the bolt or raise the bolt carrier vertically to drop the firing pin from inside.
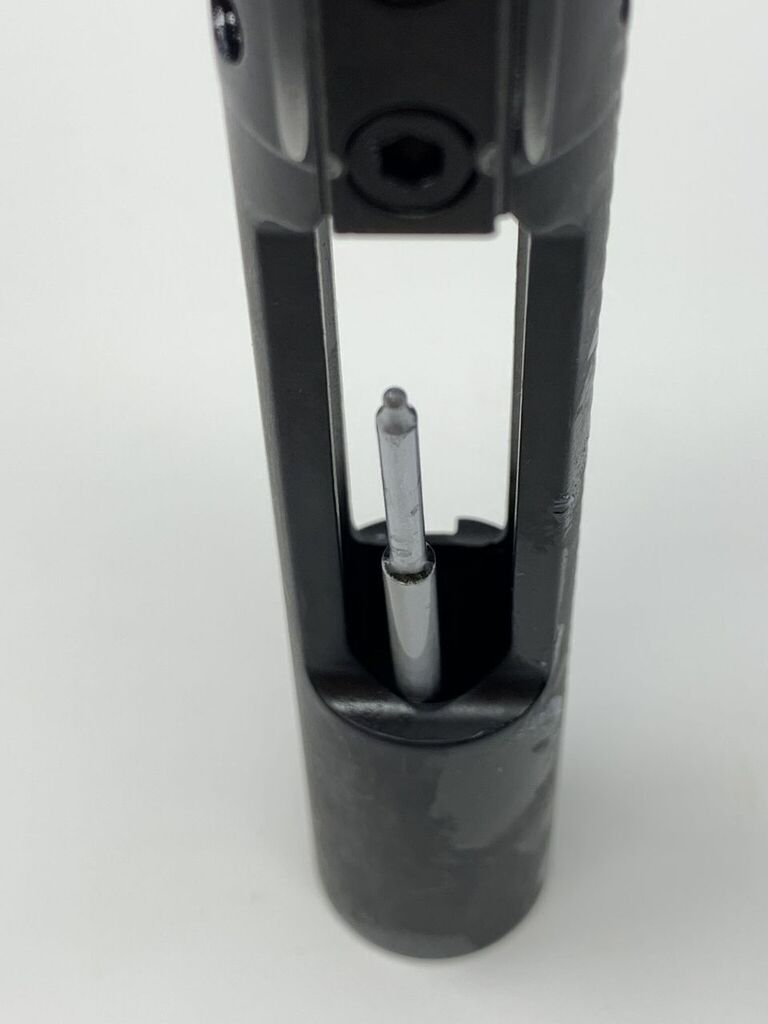
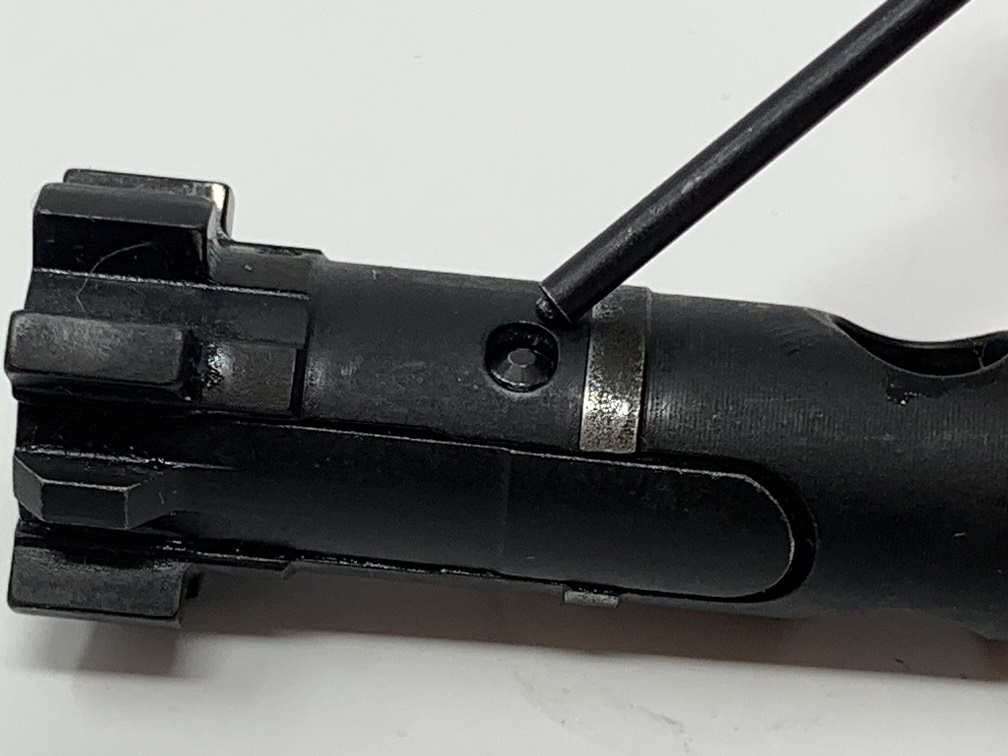
Step 3: Remove Bolt Cam Pin
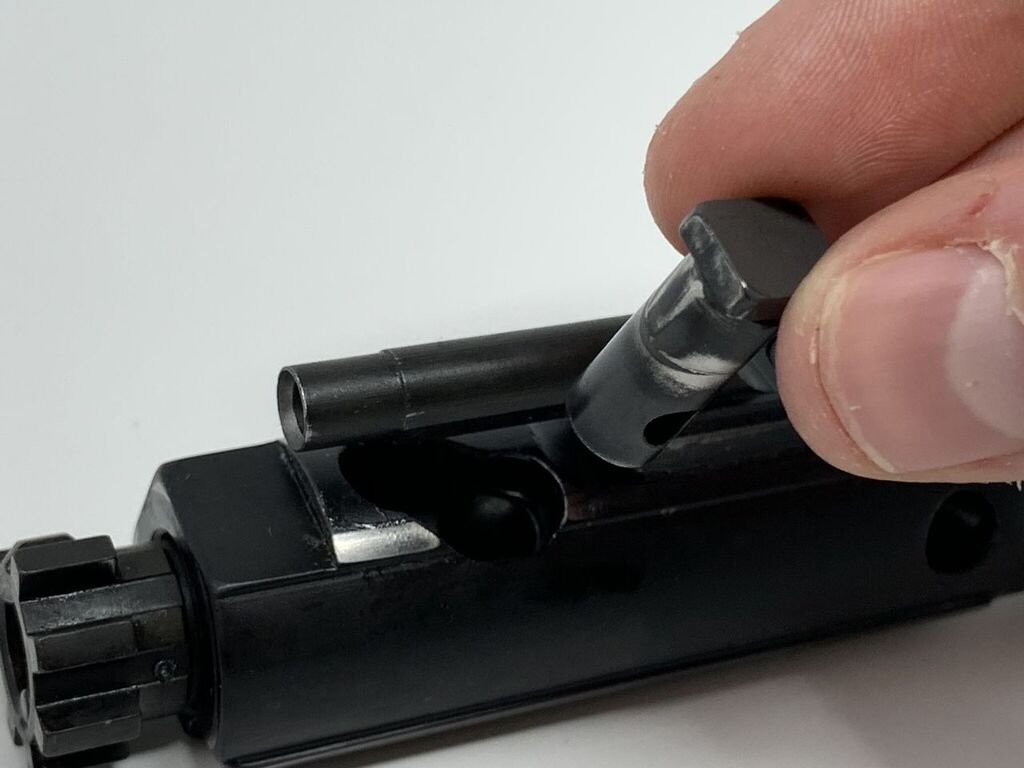
Rotate the cam pin so the head of the pin is parallel with the body of the carrier, then remove it from the carrier.
Step 4: Remove Bolt From Carrier

With the cam pin removed, the bolt can be pulled straight from the top of the carrier.
Step 5: Remove Ejector from Bolt
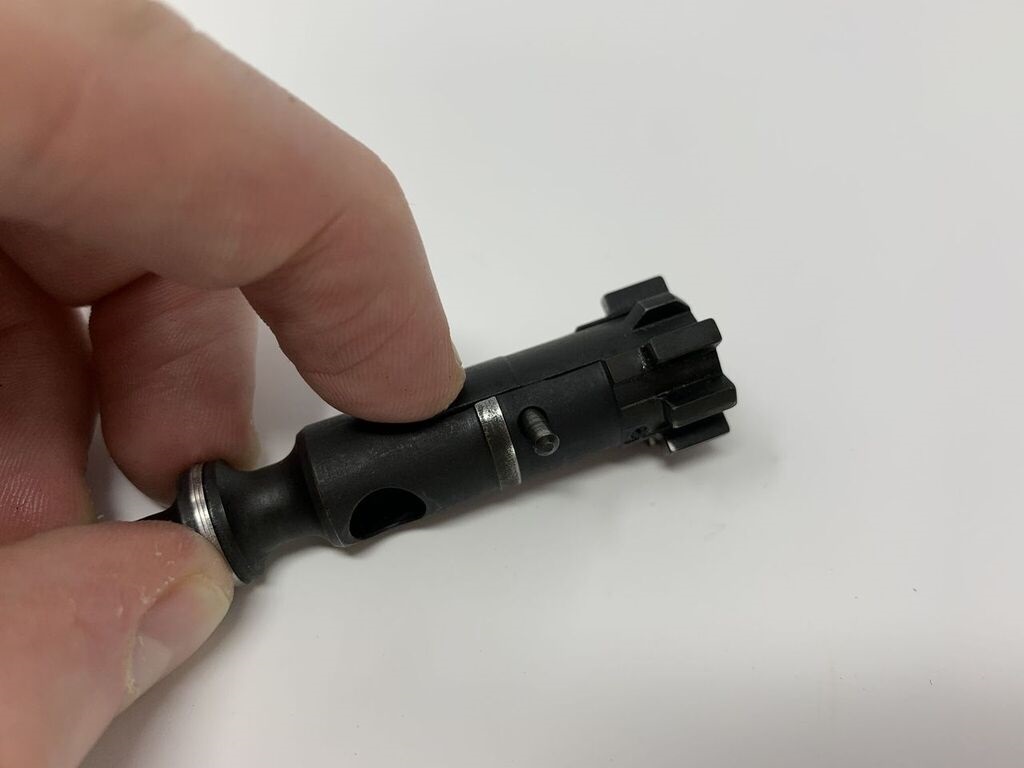
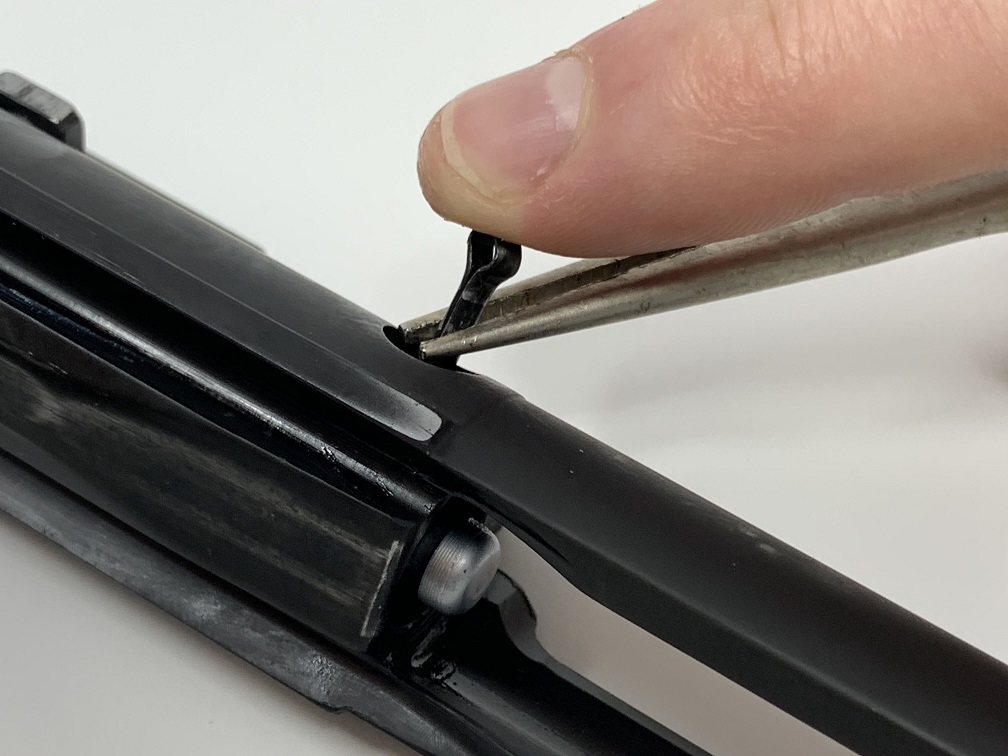
The ejector's retaining pin can be removed by applying pressure to either side of the pin with a punch, pick, or small screwdriver. If the pin is tight or seized, soak the bolt in solvent for five minutes before attempting to remove the pin.
Cleaning The Bolt Carrier Group
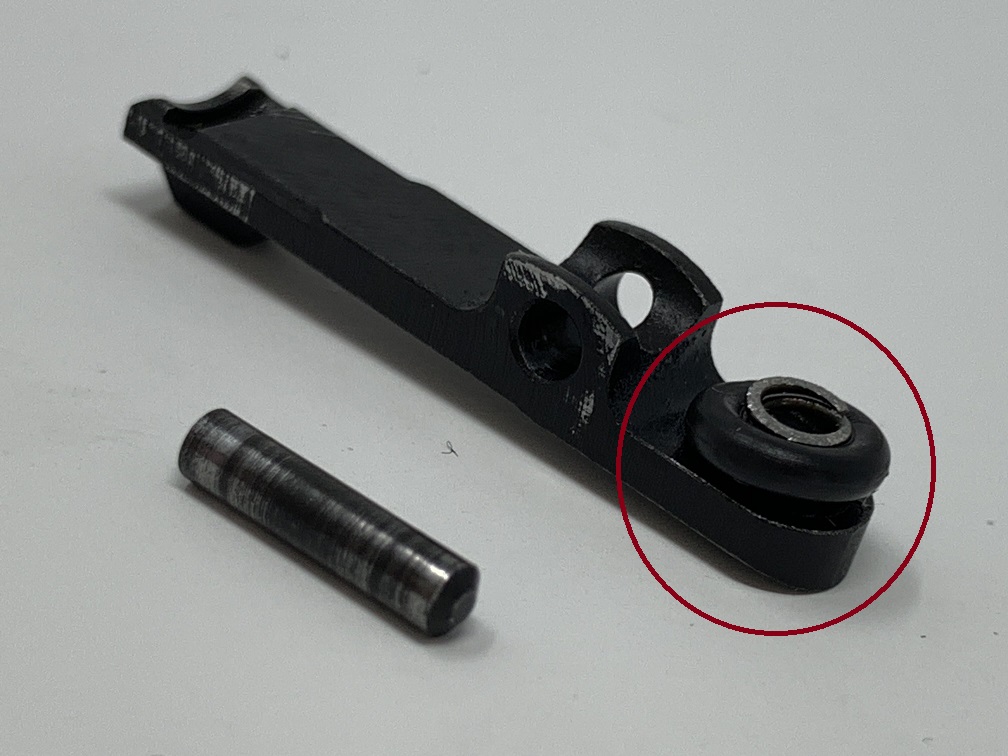
The ejector should be thoroughly cleaned with solvent and a wire brush to remove carbon build-up. The ejector spring may be covered with a rubber O-ring, which can be removed temporarily to assist with a thorough cleaning.
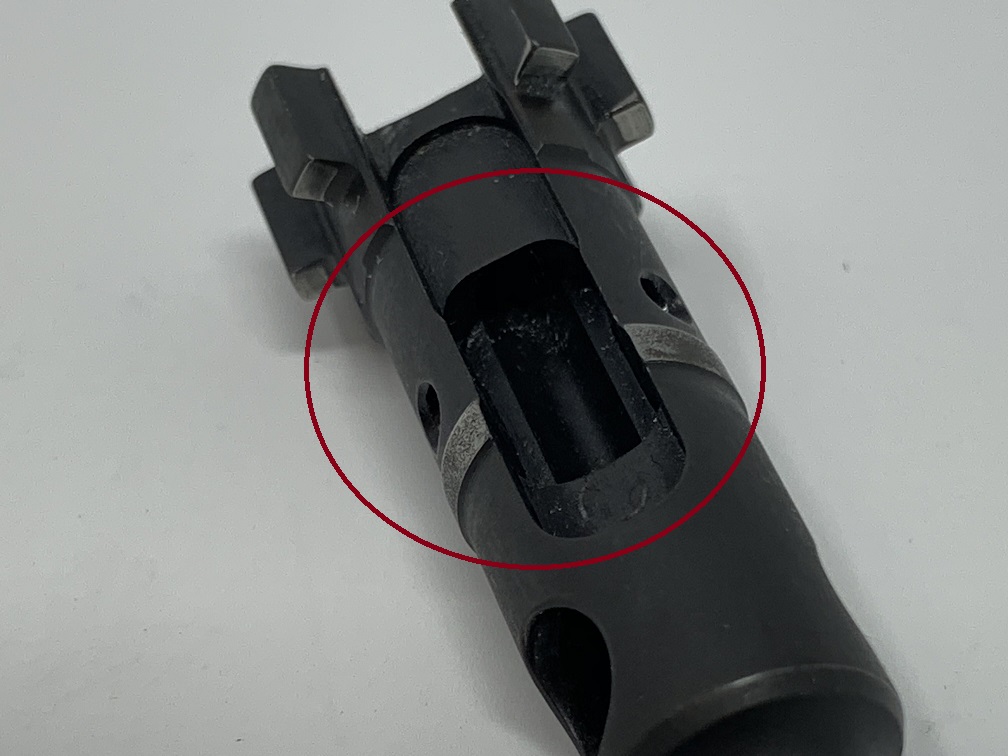
The inside the bolt will also have some carbon build-up. Soak the inside of the bolt with solvent, and use a Q-tip to remove debris. Be sure to also use solvent and a wire brush on the face of the bolt, where brass and carbon deposits build up from firing.
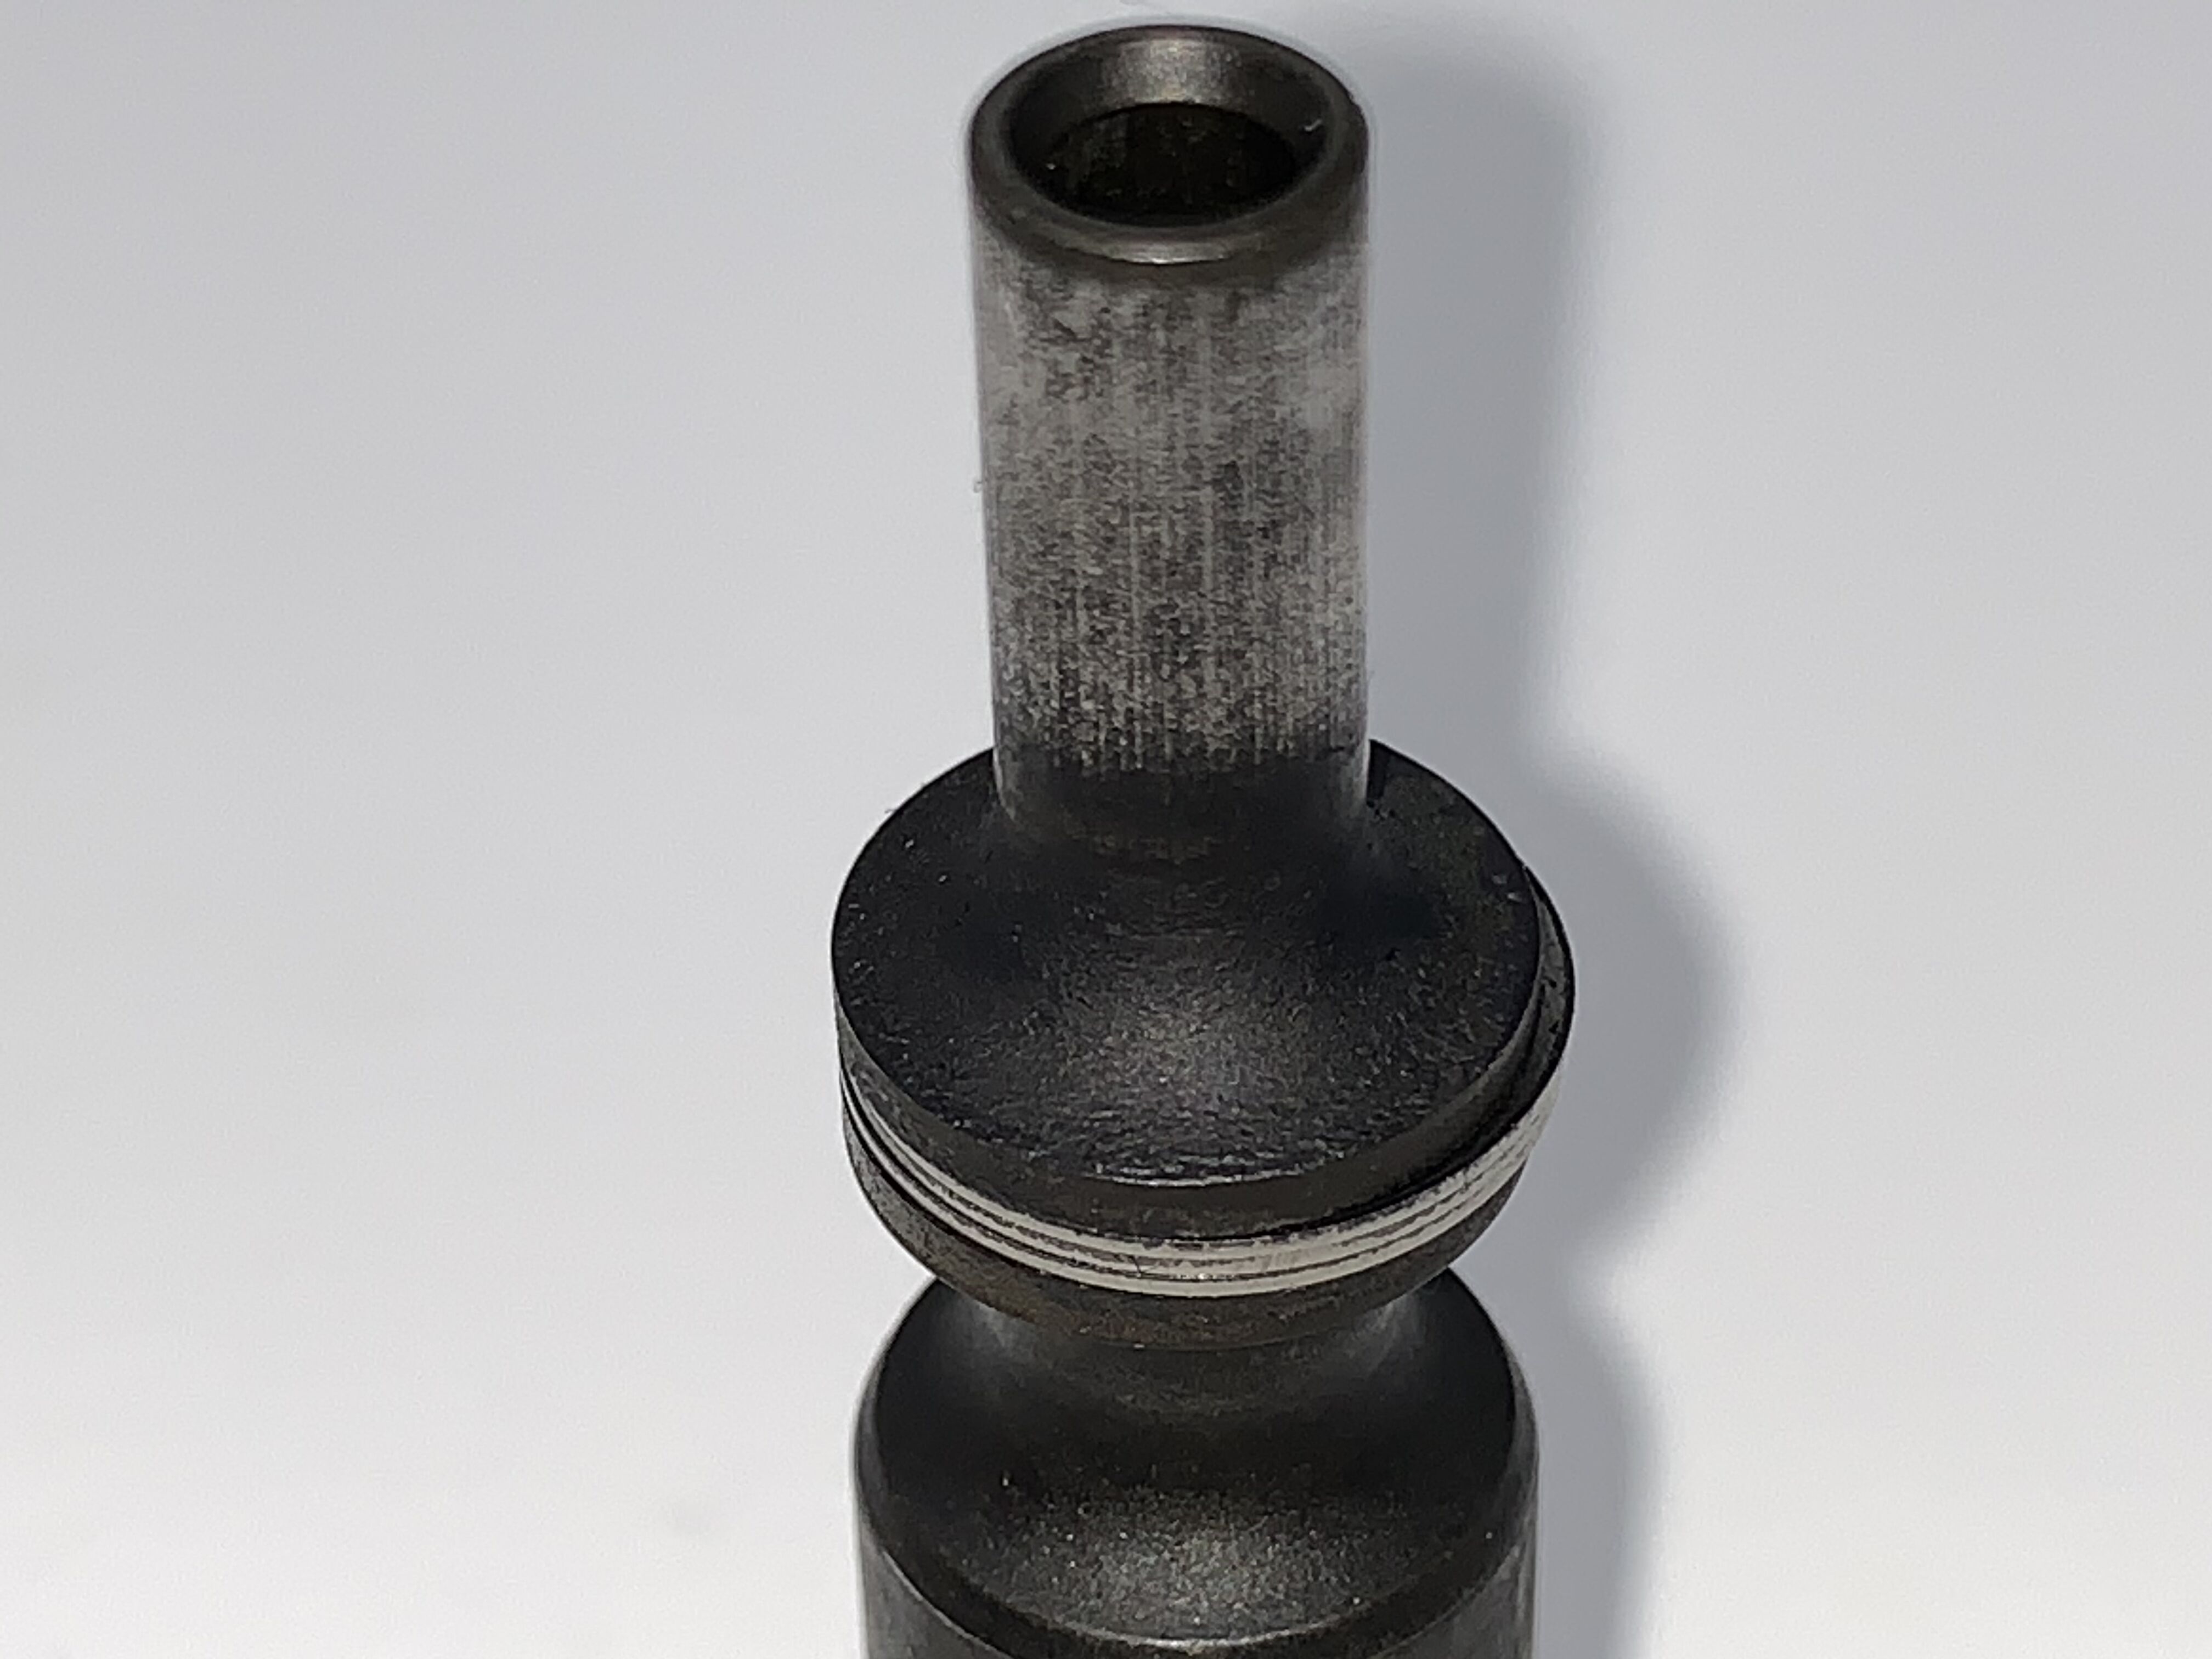
The rear of the bolt, past the three gas rings, is where carbon builds up most. This area acts as a sealed and pressurized space inside the carrier, where hot gas collects to move the bolt. You may need to let the bolt soak in solvent, and a wire brush will be required to remove this build-up. Be sure to inspect the gas rings for cracks or build-up. The rings should move freely and rotate.
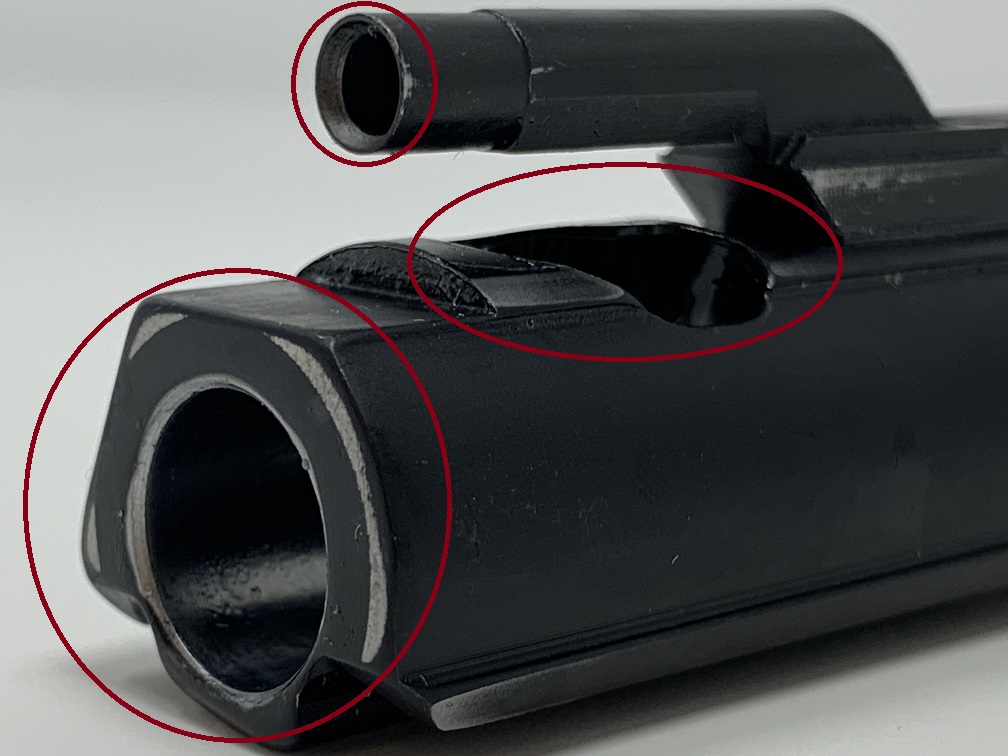
While your bolt is soaking, apply some solvent to the carrier. The entire carrier can always use a good cleaning, inside and out. Points to focus on include the face of the carrier, inside the cavity where the bolt rests, the channel for the cam pin, and most of all, the gas key. Soak the inside of the gas key with solvent and use a Q-tip to remove debris. There will be a lot of carbon in here.
Bolt Reassembly
Step 1: Reinstall Ejector
To reinstall the ejector, align it with the bolt and apply gentle pressure to align the pin holes. Reinsert the pin and make sure the pin is flush on both sides. A small punch may be useful if the pin is tight-fitting.
Step 2: Reinstall Bolt and Cam Pin
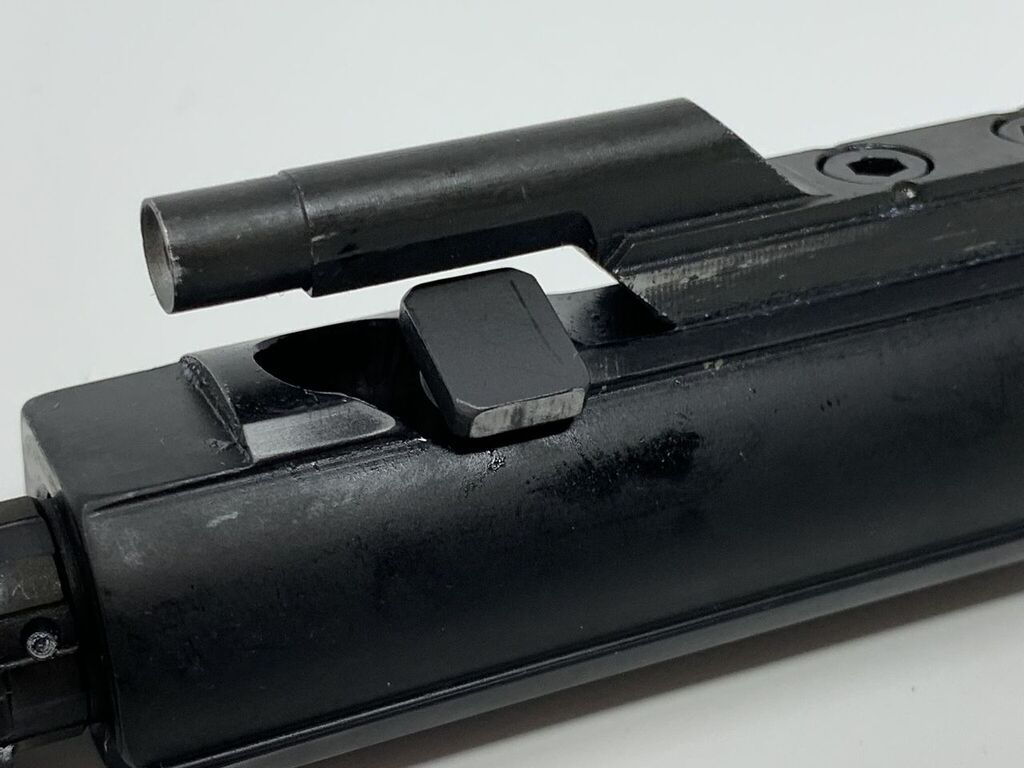
Drop the bolt into the carrier in the fashion as it was removed. The ejector needs to be located on the right side of the bolt carrier. Although two holes are drilled which appear to be made for the cam pin, only one of the holes is large enough to allow the pin to be inserted. Once inserted, rotate the cam pin so the "T" head is perpendicular to the body of the bolt.
Step 3: Reinstall Firing Pin and Retaining Pin
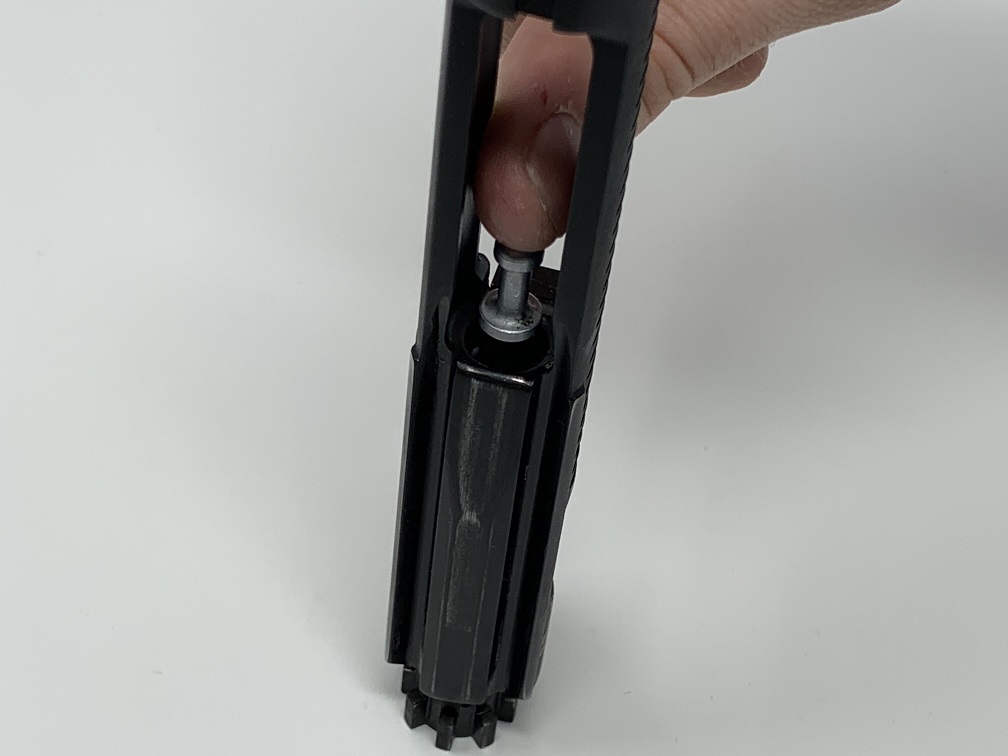
Orient the bolt carrier vertically and reinsert the firing pin through the channel inside the carrier.
Ensure the firing pin is fully seated inside the bolt and grab the retaining pin. The pin naturally separates with compression, which makes reinserting the pin difficult. To assist, grab a pair of pliers and firmly clasp the pin near the head to squeeze the two ends together. While compressing the pin, slide it into the hole. It helps to angle the pin slightly up so it clears the firing pin itself.
Insert BCG and Perform a Functions Check
Ensure the bolt and trigger assembly function by cocking the hammer and squeezing the trigger. While keeping the trigger held, re-cock the hammer by pulling the charging handle. Release the trigger after cocking. You should hear a "pop" as the hammer leaves the disconnector and is captured by the sear, resetting the trigger. Squeeze the trigger again after resetting to confirm the hammer drops.
DISCLAIMER: If you are new to the world of DIY gun building, you likely have a lot of questions and rightfully so. It’s an area that has a lot of questions that, without the correct answers, could have some serious implications. At GunBuilders.com, we are by no means providing this content on our website to serve as legal advice or legal counsel. We encourage each and every builder to perform their own research around their respective State laws as well as educating themselves on the Federal laws. When performing your own research, please be sure that you are getting your information from a reliable source.