
How to Install a Drop-in AR Trigger: Step-by-Step Guide
Posted by Gunbuilders.com on Apr 5th 2024
We've covered how to assemble your AR-15 lower receiver. But maybe you want to upgrade your parts. Lots of AR owners upgrade their rifle or pistol with a drop-in trigger: A self-contained trigger assembly that includes a new hammer, trigger bow, disconnector, and springs.
If you're here, you already know why you should buy a drop-in. So, let's get to it.
How to Install a Drop-in Trigger
Before we go over the install, make sure you have three tools:
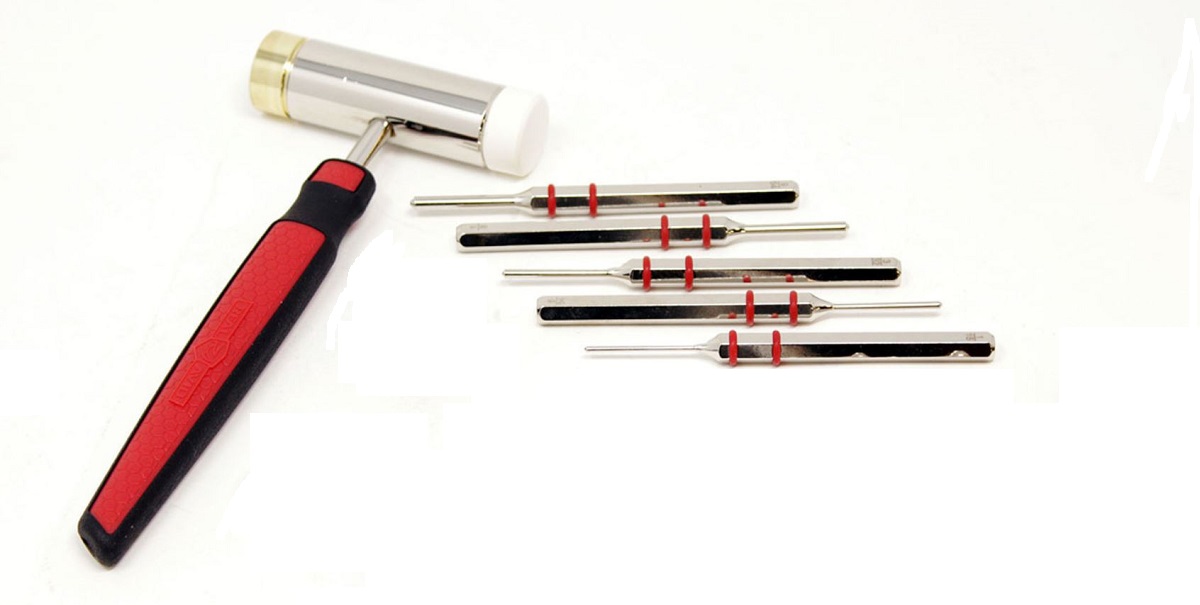
A gunsmithing hammer, a roll pin punch, and a hex driver or screwdriver for removing the pistol grip. Grab an AR-15 hammer and punch set for the first two tools.
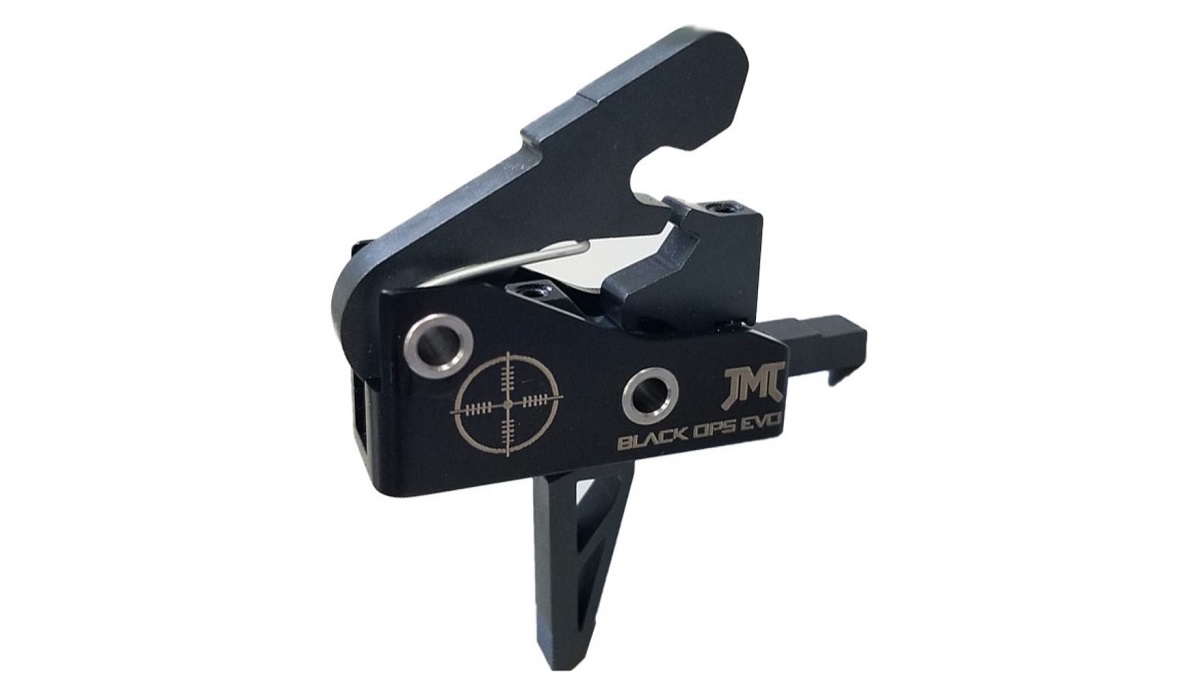
For our install, we're using JMT's Single-Stage Black Ops Trigger.
Got your tools and trigger? Let's do the install.
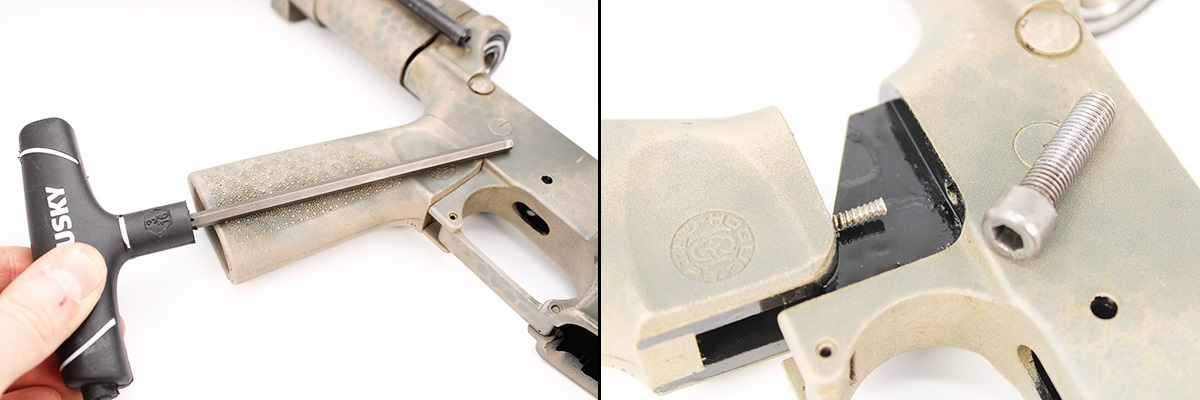
1. Remove Factory Trigger and Hammer
You need to remove the hammer before you can remove the trigger. Tap the hammer pin out from the receiver using your punch and gunsmith hammer.
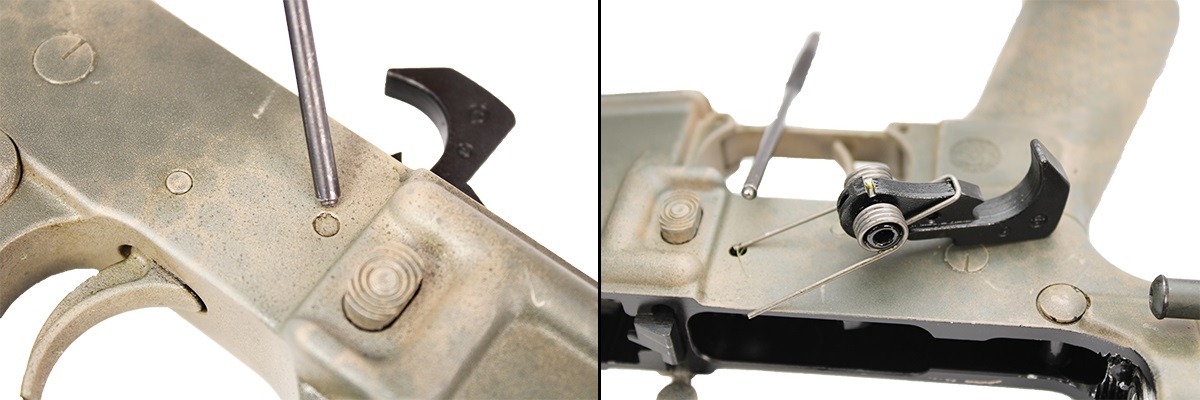
The hammer pin is the pin located just behind the magazine release button. The pin can be tapped out left to right, or right to left.
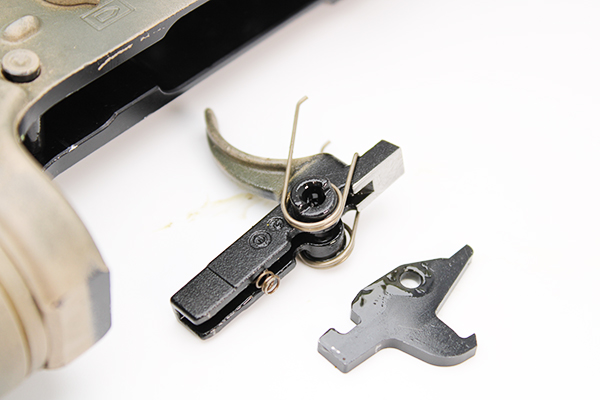
Using the same punch, tap the trigger pin out of the receiver to remove the trigger and disconnector.
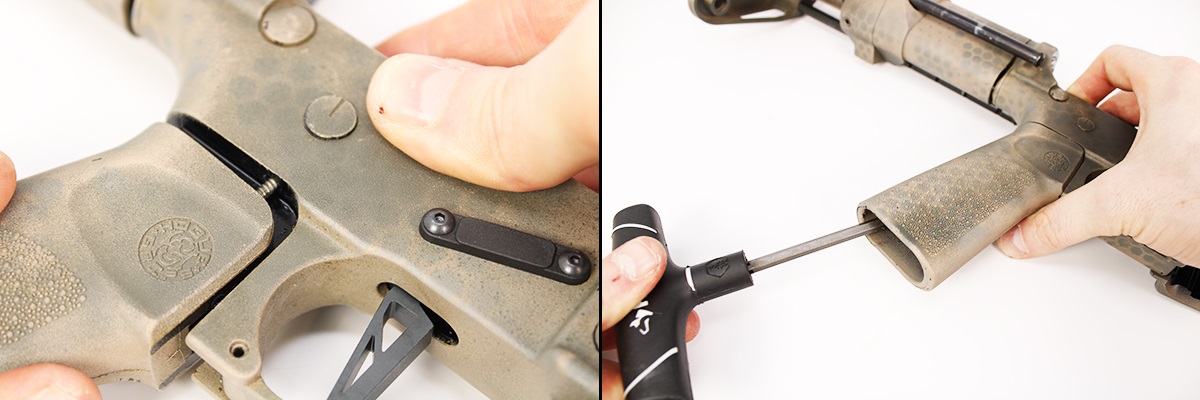
2. Remove the Grip and Safety
The safety selector lever's held in the receiver with a spring-loaded detent. To remove the detent, you need to remove the pistol grip.
Your pistol grip may be fastened to the receiver with a Hex-head bolt, or it may require a Phillips or flathead screwdriver to be removed.
After removing the grip bolt, slide the grip off the receiver to remove the safety lever's detent and spring.
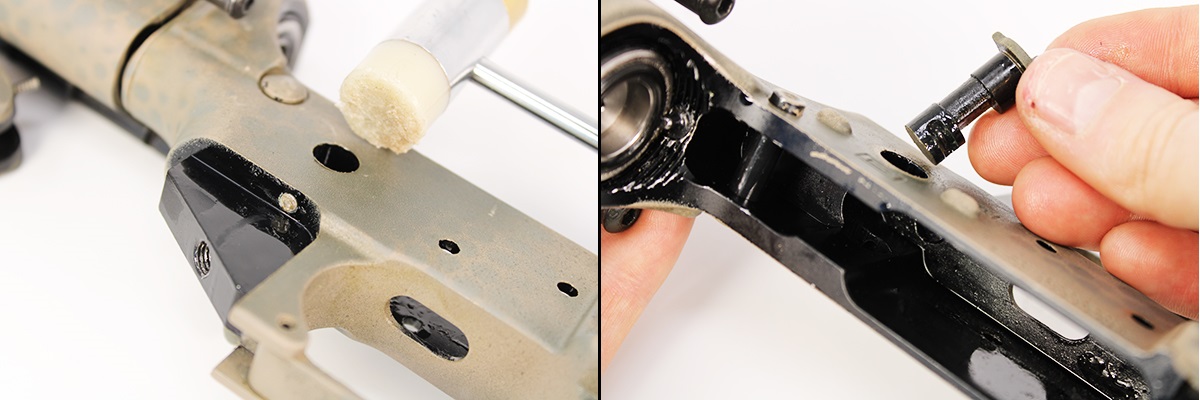
The safety detent may be stuck inside the receiver. If it is, gently tap on the receiver to dislodge it. After the detent's removed, flip the receiver over to remove the safety lever.
3. Insert Drop-In Trigger
The lower receiver is now ready for the drop-in trigger. You may want to clean the receiver before install.
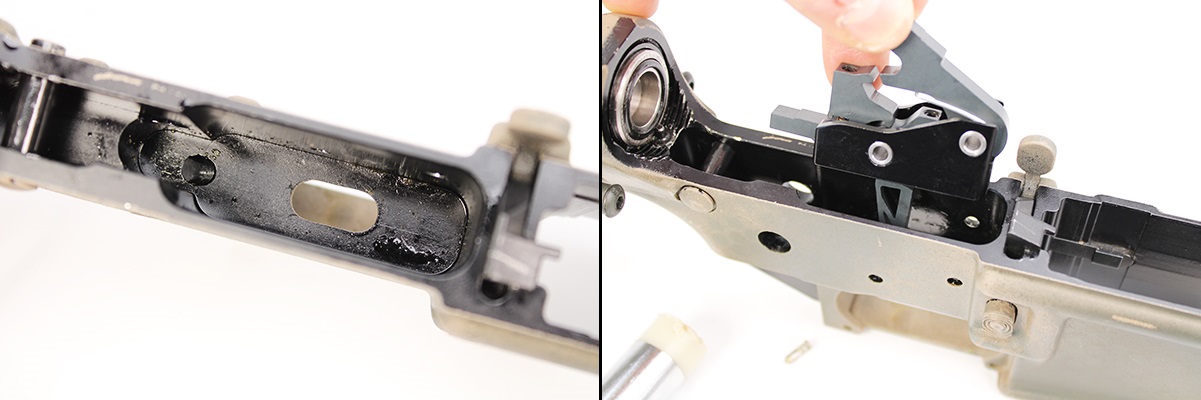
Drop the trigger through the hole in the receiver, and let the unit rest on the floor of the receiver.
IMPORTANT: Some drop-in triggers have set screws that need to be adjusted to align the trigger's pin holes with the pin holes in the receiver -- in the case of the JMT Black Ops, we have two set screws to adjust.
Once the drop-in trigger's pin holes are aligned, you can begin reinstalling the trigger and hammer pins.
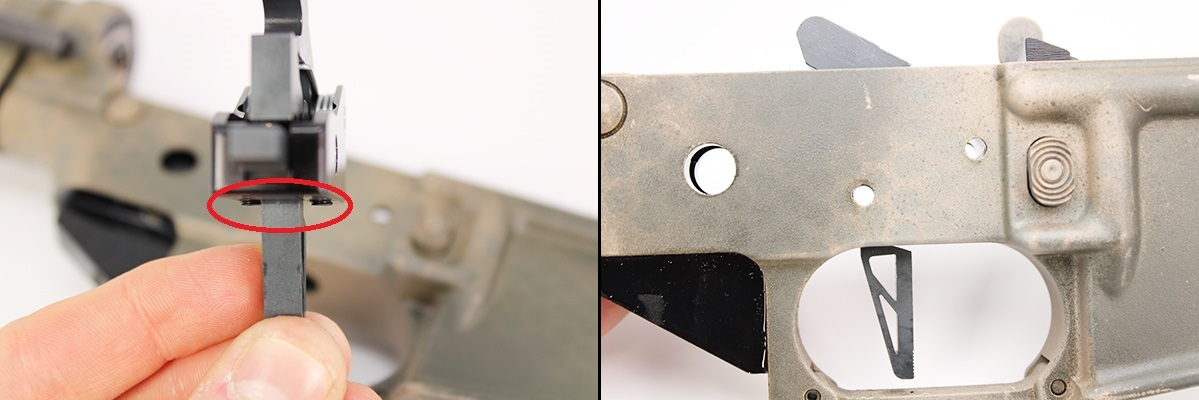
4. Install The Pins
If your new trigger doesn't come with new pins, simply reinstall your factory pins.
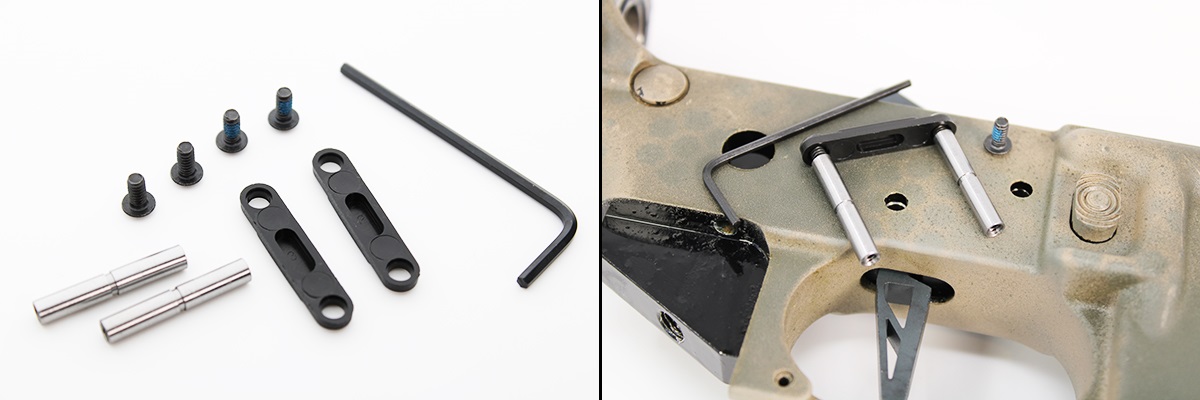
Some drop-in triggers come with captured pins, also called "anti-walk" pins. These eliminate the risk of pins drifting out of the receiver when the AR's fired.
Our anti-walk pins are connected to one another with a crossover and hex-head bolts. To install this assembly, attach one crossover to one side of both pins.
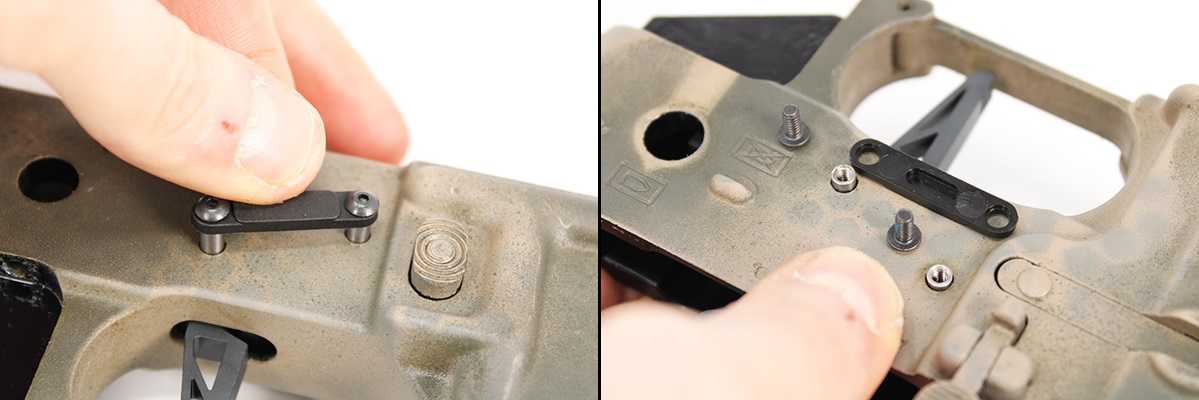
Now insert the pins through one side of the receiver -- it doesn't matter which side you choose. Then flip the receiver over, and attach the other crossover to the opposite side of the pins with the remaining bolts.
Take care not to overtighten the trigger pin bolts on your anti-walk pins. The heads on these bolts can strip easily. You may need two hex keys to tighten the pin bolts. Use one key to hold one bolt while you rotate and tighten the other.
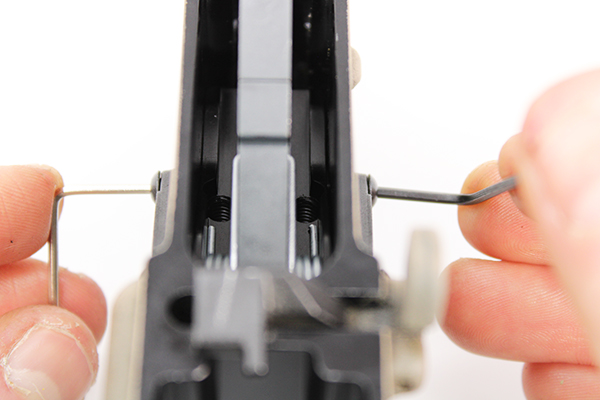
5. Reinstall Safety Lever
To reinsert the safety lever, you may need to gently pry up on the lever, and/or push down on the tail portion of the drop-in trigger, which interfaces with the safety. A flathead screwdriver works well for this.
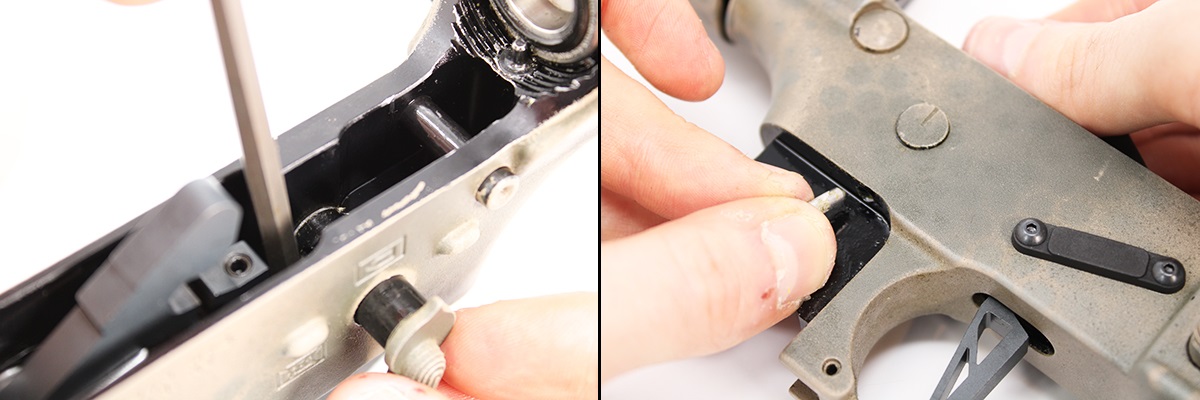
Once the safety lever's reinserted, orient it up and in the "FIRE" position, then insert the safety detent.
Lastly, reinstall the grip. Ensure the safety detent spring, located atop the grip, aligns with the detent while you push the grip in place. Tighten the bolt you removed earlier.
Confirm Trigger Function
Your trigger install is finished! It's important to make sure the trigger functions before attempting to fire your AR.
Push the hammer down to cock it. The hammer should remain down. Pull the trigger. The hammer should release.
Now with the hammer de-cocked, depress the trigger. While holding the trigger down, cock the hammer again.
This time, the hammer should cock and remain cocked. Release the trigger, but don't pull it yet. As you release the trigger, you should hear a light pop, but the hammer should remain held.
With the hammer cocked again, verify the safety lever functions by switching it from "FIRE" to "SAFE."
(If Your New Trigger Doesn't Work)
There should be no issues with the function of the trigger, hammer, or disconnector in your new trigger. Drop-in triggers are carefully assembled by the manufacturer, and shouldn't need be disassembled or adjusted by the end user.
In most cases, we find users have issues with the safety not working. This is usually because the set screws on the trigger aren't set correctly. If your safety lever's binding, adjust the set screws.
DISCLAIMER: If you are new to the world of DIY gun building, you likely have a lot of questions and rightfully so. It’s an area that has a lot of questions that, without the correct answers, could have some serious implications. At GunBuilders.com, we are by no means providing this content on our website to serve as legal advice or legal counsel. We encourage each and every builder to perform their own research around their respective State laws as well as educating themselves on the Federal laws. When performing your own research, please be sure that you are getting your information from a reliable source.